
Welcome to ExtremeHW
Welcome to ExtremeHW, register to take part in our community, don't worry this is a simple FREE process that requires minimal information for you to signup.
Registered users can:
- Start new topics and reply to others.
- Show off your PC using our Rig Creator feature.
- Subscribe to topics and forums to get updates.
- Get your own profile page to customize.
- Send personal messages to other members.
- Take advantage of site exclusive features.
- Upgrade to Premium to unlock additional sites features.

mllrkllr88
-
Posts
43 -
Joined
-
Last visited
-
Days Won
6 -
Feedback
0%
Content Type
Forums
Store
Events
Gallery
Profiles
Videos
Marketplace
Tutorials
Posts posted by mllrkllr88
-
-
Hey Guys! I've used consumer-grade routers for the last 20 years and I'm just now diving into this madness

I decided to go with OPNsense. It looks like they provide many more updates than pfSense. I built my first router but haven't given it internet yet. I'm going to put my Comcast modem/router combo in bridge mode and run this bad boy as the DHCP host.
Any tips or advice?

-
I'm drinking the Kool-Aid myself.
My 3090 died playing Cyberpunk so I decided to pick up the A770 and check it out. Obviously it's not a contender for the top Nvidia cards, but it doesn't pretend to be either. I appreciate the value of this card right now but I really love that fact that it's getting noticeably faster every few weeks.
I have big plans in store for overclocking and I just picked up a second A770 so I can brutalize one and let it ride the lightning

-
 1
1
-
 5
5
-
-
The ARC card looks amazing for the price and it's just the start. I am excited about this GPU and I am looking to grab one as soon as it's available again. Anyone out there have one?
-
1
-
2
-
-
Hey keyboard nuts!
My wife is about to take a hammer to my current mechanical keyboard because of the late night typing. I need a recommendation of a silent mechanical keyboard, something similar or quieter than a rubber dome one.
As for the budget I'd like to stay in the $75 range if possible...
-
Quote
T-FORCE Gaming 3D Mask is made with nanosilver and photocatalytic materials and has passed Taiwan’s CNS14774 certification test. It can block 99% of bacteria and viruses by guarding against harmful microorganisms, body fluids, and respiratory droplets. During its development, TEAMGROUP focused on durability and the need for communication while wearing masks for long periods of time. In doing so, it has gone beyond other face mask in the market. It has a 3D-shape that contours comfortably to the face and four layers of nonwoven fabric that prevent odor and residual smell. This design filters out airborne particles without affecting breathability. As always, TEAMGROUP maintains the brand spirit of T-FORCE by offering a product that not only exhibits a unique style but also offers the best user experience.
Source: https://www.teamgroupinc.com/en/news/ins.php?index_id=150
Team Group has a new mask out, what do you guys think, would you wear it?
-
Hey Guys!
I have been using my smartphone for review pictures, but I am continually fighting it and I want to try something new. I really don't know anything about cameras, but I want to try out a simple pint and shoot. I have been looking at cameras on eBay and I was just going to randomly grab something around the $100 price range, but thought it would be a good idea to reach out first. I was looking at the Sony DSC-W800, it seems like a good piece of hardware for the price.
I am looking for something that takes amazing pictures (mostly macro), is easy to use even for a complete noob, and is also cheap AF....that's all
 Any help for this noob? Want to trade me a camera for some computer hardware?
-
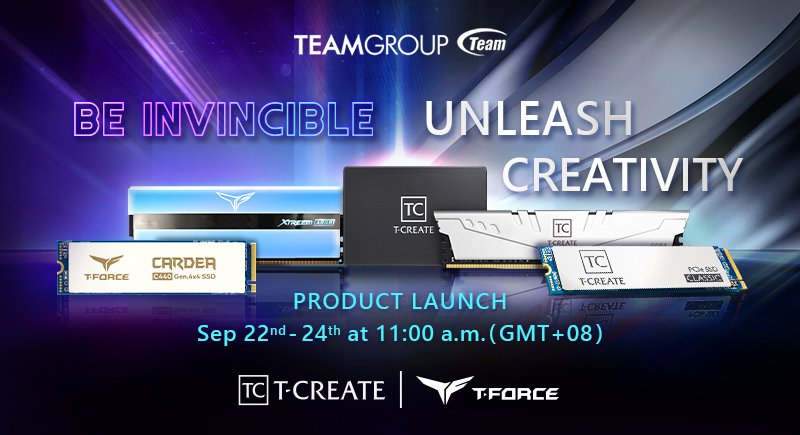
Team Group has as a huge selection of innovative RGB incorporated products, and on September 22 their product line is getting even bigger.
Full news article: https://www.teamgroupinc.com/en/news/ins.php?index_id=142&fbclid=IwAR0WBrHyi2-o2pVNnLFDegl3D6HMXa4JacndGoPUQYlLXCNX5TL1AHzxuK8
QuoteWhite PC builds are trending in the gaming industry. Colorful lighting effects and powerful performance
Inside this Lovers in Snow custom PC build, there are the XTREEM ARGB Gaming Memory, which won the Red Dot Design Award this spring, and the DELTA MAX Solid State Drive, which has the largest luminous proportion in the industry and has received high attention since its launch. Besides, with new Pure White color and made with ceramic material, the latest released CARDEA Ceramic C440 M.2 Solid State Drive, and T-FORCE’s exclusive mirror integrated AIO COOLER, all of the above together create the Lovers in Snow custom PC build, which will offer an all new gaming vision in the online launch event with its crystal clear pure white color.
QuoteLaunching all new T-CREATE brand for creators to unleash and inspire their creativity
In response to the explosive growth of digital content creations, TEAMGROUP will launch a new T-CREATE brand for creators in 2020. According to various upgrade needs of creators, products are divided into three product series, CLASSIC, EXPERT and MASTER, and will be revealed on September 23 for the first time. Depending on the usage, from content creation to post-production, all require powerful computing capability, storage speed and multitasking performance. Our upgraded products will offer you high stability, high performance, large capacity and smooth user experience. In addition to the high capacity single stick 32GB memory, professional grade anti-noise 10-layer board memory, we also offer solid state drive with the industry’s longest 12-year limited warranty. T-CREATE will accompany creators from all over the world to unleash and inspire their creativity. Riding wave of ideas and creativity can never be this easy.
-
Nice, I didn't think about it in the way that you could also use this to essentially replace a busted VRM, even if you are not interested in extreme overclocking.
That's exactly right! I have also seen cards with damaged PLL, 5V, and 3.3V rails...all of those broken voltage regulators could be replaced with this device. It has lots of applications outside of extreme overclocking!
Very nice presentation! If my work bench skills were bit less sloppy I'd be seriously thinking of how many dead cards on ebay might be saved with this. And the wife would be asking "Why are you getting another card for a computer U don't even use?" LOLSeriously,a very nice write up that made things easy to understand and explained what I was looking @ very well.:thumbs_thumbup:
Thank you! And yes...my wife would say the exact same thing...with a strong eye-roll tossed in for good measure
-
Elmor recently started taking orders for the AMPLE 20A power card. It’s a simple little single-phase VRM that can be used to replace a broken VRM or simply overcome that pesky OCP/OVP. The most common potential usage would be for a GPU memory rail. However, with an output voltage from 1.0-3.4 V it could be used for many different applications.
I obtained a test sample of this new device and I intend to put it to the ultimate test. I have an RX 580 GPU with a damaged memory voltage rail, but otherwise the GPU is in perfect condition. The plan is to solder on the AMPLE power card and observe the impact on the memory overclocking. I know what the card was capable of before the memory VRM died, so it’s the perfect test case for this little device. So follow along as I put this thing to the test and find out if it’s capable of delivering sufficient power to 8 GB of GDDR5.
The AMPLE Device
The device ships in an anti-static bag with the 6-pin connector added in as an accessory. This gives you the flexibility to power up the AMPLE from any qualifying voltage source you desire.
Product Specification
- Output voltage adjustable 1.0-3.4 V using the on-board potentiometer (range can be increased by adding your own potentiometer)
- Nominal input voltage 12 V (functional from 4.5 V up to 16 V)
- Max output current 20 A (thermally limited). Active cooling may be required to achieve high output current.
- Efficiency at max output 91.5% (3.4 V, 20 A, 750 KHz)
- Switching frequency selectable between 300 KHz and 750 KHz
- OVP (+20%), OCP (24A) and OTP (Tj = 150*C)
- Output voltage can be monitored and adjusted using the EVC2 VMOD1-header
- Ships with a PCIE 6-pin power connector which can be soldered on by the user
- Switch 1 OFF = 750 KHz switching frequency
- Switch 1 ON = 300 KHz switching frequency
- Switch 2 OFF = PSM = Power Saving Mode, higher ripple but lower loss at low loads
- Switch 2 ON = CCM = Constant Conduction Mode. The PMIC is always regulating to the best of its ability, for the tightest possible voltage regulation. In some cases, for example with this project at 3.0V+, that will create a high loss in no-load or low-load situations.
Source Credit: elmorlabs.com
There is one switch on the device which acts as a mode selector. There are a total of 4 different combinations you can set, which change the output delivery settings.
For controlling the voltage there are multiple different methods you can choose from. To make things simple, there is a potentiometer on the power card for direct control. For more advanced control, you have the ability to integrate the device with an EVC2 module using the vmod connection.
Mounting the Power Card
Before you just hastily solder on the AMPLE device, you should take the time to power it on and make sure it works. I would suggest powering it up and setting the desired voltage before you attempt to solder it on a GPU.
The underside of the AMPLE has power and ground planes. In my particular case I won't need these connections so I decided to insulate them with a few layers of Kapton tape. This is an unnecessary step, but in my case there were a few components on the card which were extremely close to shorting on the AMPLE device.
I chose to mount mine with 0.8 mm copper plate. I kept the plane-to-plane distance as short as possible. Furthermore, I always prefer to make my ground connections on the front of the card after where the main connection is.
In the picture below you can see both ground connections come after the memory plan connection. In my testing this provides the best realized MHz whether it be core or memory external VRM replacement.
Test Setup
The overall goal is to compare stock PCB memory overclocking with AMPLE power memory overclocking. To make the test consistent, I will use the same load voltage for both test conditions. The test methodology is to overclock memory and record the passable frequency in Fire Strike GT1. I will start at 2280 MHz, increase +10 MHz until it becomes unstable
- PowerColor RX580 8GB Golden Sample
- Z490 test platform
- AMPLE VRM on memory rail
- Memory IC: Micron D9VVR
- 1625 MHz strap timings copied to 2000 MHz strap (Most efficient timings possible without diminishing returns on frequency)
In order to get a realistic look at the voltage response of the device, I have placed voltage test points (TP1-3) at various distances away from the main inductor. During the load tests, I will also be conducting thermal tests of the mosfet heatsink. Ambient temperature for all tests around 24c
The voltage read points are as follows:
- TP1 = AMPLE power voltage at C10 cap
- TP2 = GPU plane voltage at solder connection
- TP3 = Memory IC voltage at MLCC cap on back of card, at least 100mm distance from AMPLE Vout solder connection
Test Results
Voltage droop is the enemy of external VRM mods. It’s important to know exactly where the voltage droop occurs because it can narrow down the cause. The voltage test point results indicate that the droop is not caused by the solder connection. The voltage droop is present at the C10 capacitor so therefore it’s coming directly from the AMPLE VRM. This makes me happy because the solder connection is relatively perfect, but it’s mildly concerning to see the AMPLE being stressed under load.
Regardless of any droop, the card was still able to pass FS GT1 test at the highest possible memory frequency. There is effectively no difference between the stock VRM and the AMPLE VRM for this test application.
The temperature reached a peak at the end of GT2 and was still climbing. With the Fire Strike test, GT3 is CPU based so it had a cooldown period. The max temp of around 50c seems reasonable but further testing may be needed. Sustained loads of 1hr might show a different result.
SW1 Test results proved inconclusive. Disregarding experimental error, there was effectively no difference in the realized MHz or voltage response.
Conclusion
Overall I am extremely pleased with this little device. It performed exceptionally well and the end result is that I was able to achieve the same overclocking performance as the stock PCB. The AMPLE single-phase power card has been validated for benchmarking purposes.
In terms of the switch options, my expectation was that CCM mode with 750 KHz would be the optimal configuration. The switch test results showed that the various combinations didn't have any noticeable effect on realized Mhz or voltage response. The 10 mV voltage droop is a mild concern because it’s coming directly from the AMPLE, however, it did not affect the overall overclocking result.
With a price tag of just $20,, it’s an absolute must-have tool for extreme overclockers. My RX580 is the perfect use case. The card was effectively dead and useless, but the mighty little AMPLE device brought it back to life and it still holds gold in TIme Spy. Even if the price was tripled, I would still recommend it because of its potential value.
This was just my first test, stay tuned for more tests to come.
-
1
- Output voltage adjustable 1.0-3.4 V using the on-board potentiometer (range can be increased by adding your own potentiometer)
-
Wow, really nice! This is a great tool and very useful, thank you! I am often testing different versions of W10 for benchmark efficiency, this makes it nice and easy to grab any one I want.
-
Ok guys, anyone out there able to help me setup and optimize Threadripper 3970X? It looks like some people are getting it up to 1 million PPD...which seems like alot for a CPU??
I did a bit of googling and it seems there are some tweaks that need to happen to get the max out of this thing. I read some stuff about 'slot' settings for core/thread count but I am totally clueless.
Also, can anyone give me a really quick summary of how this scales with overclocking? For instance, how much system memory does it use and what the score increase? Overclocking CPU? Mem? I've been in the professional XOC world for some years now but never touched folding until yesterday...I know nothing.
-
Good catch, I let it munch last night then saw this a few minutes ago. I swapped teams and now it's working again
-
I have never folded a day in my life, but I have a rig I can setup and try this out
I might need some help from the folding pro's... -
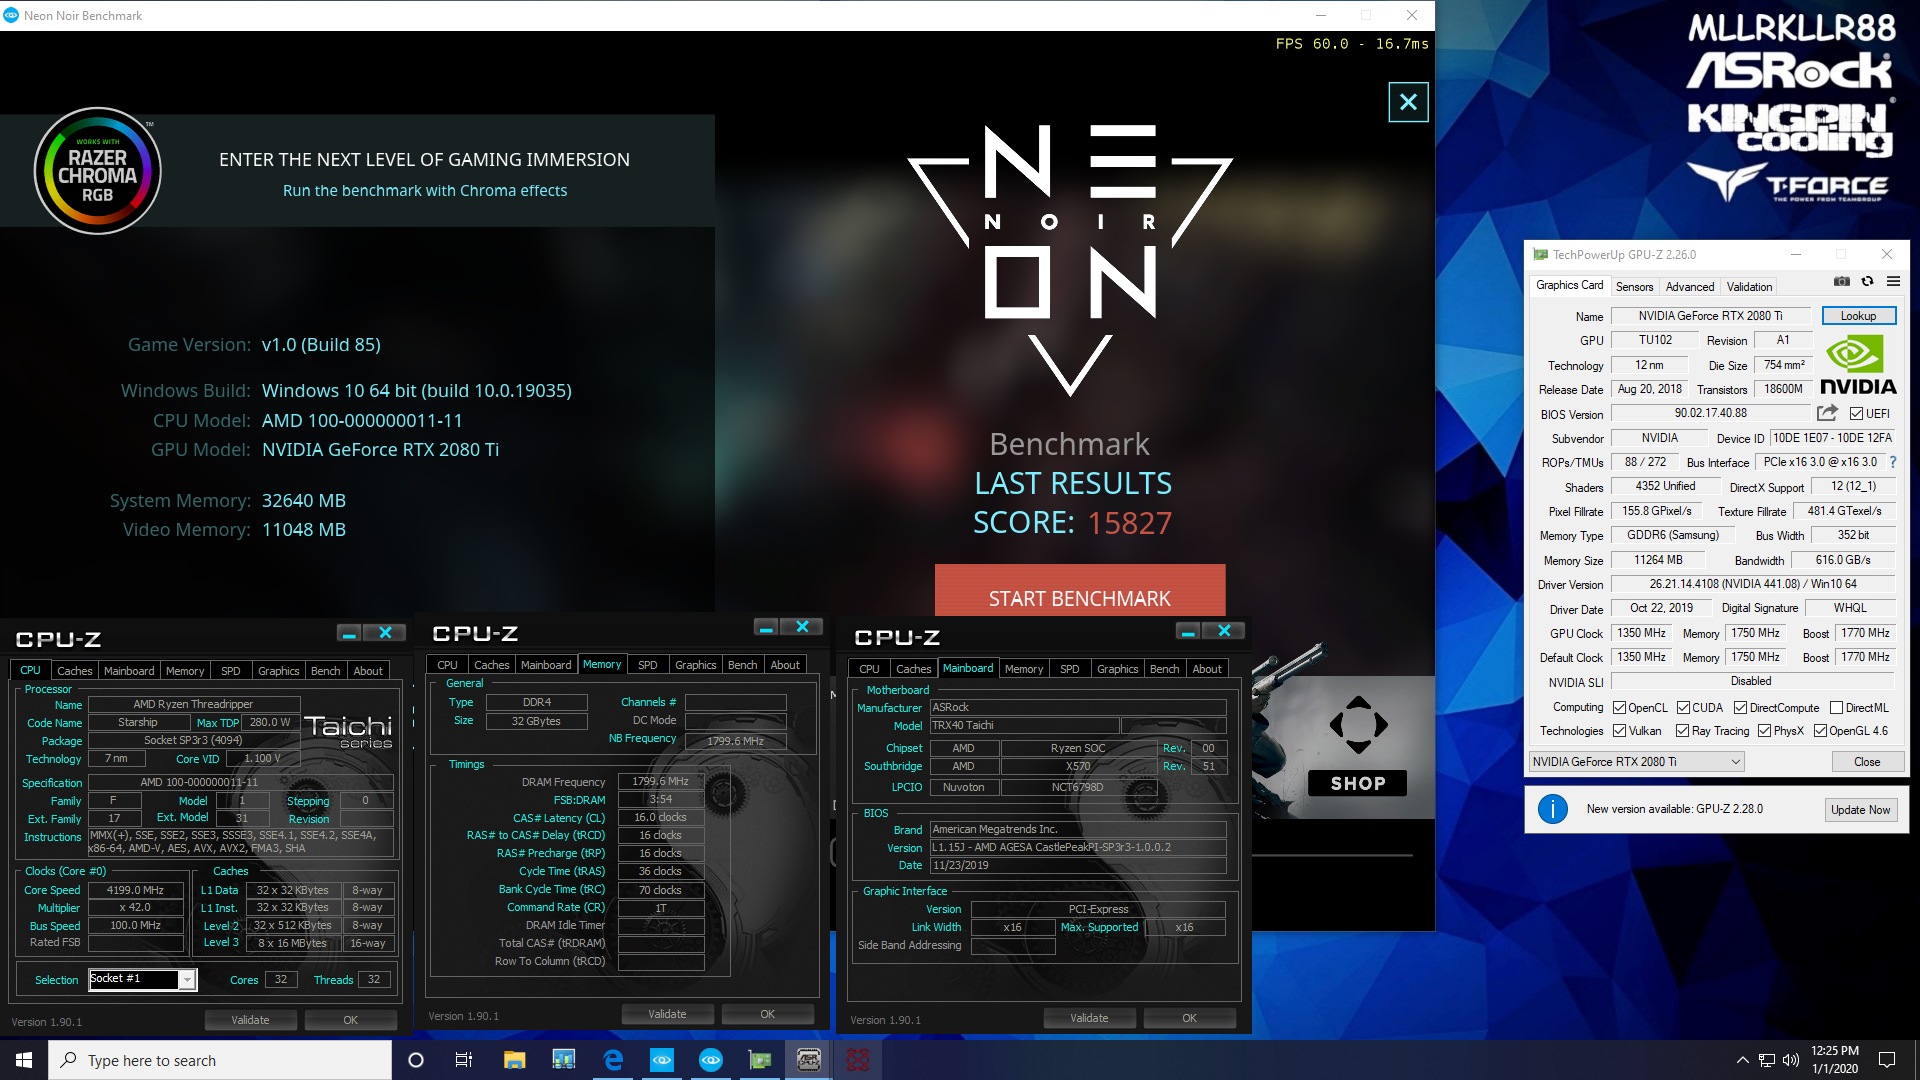
Nice, but what RES is that at ?
All basic mode... 1920x1080 with 60Hz
The bench automatically loaded in a window, which I have no clue what size that is. I did nothing but install and run on a dirty v1909 W10 install.
-
Bone stock run with absolutely ZERO tweaks or OS optimizations.... This is just a simple 9900k on Z170 with XMP memory and a stock 2080Ti KP. It looks like the score is higher than it should be, bummer this bench is so inconstant.
-
I am getting setup to play with this bench again. Looking forward to helping out with the testing and seeing if we can figure out the how it scales.
My biggest complaint is that this bench cannot be run in offline mode, and requires a huge download.
-
Oh that's really odd. I only did a quick run and I don't remember what my config was. I will have to play more and nail down how this bench works.
-
Hang on lol, how is your score like double mine ? Out of interest did you limit your cores in Ryzen Master when running ? @mllrkllr88
A few things here. Firstly this bench is very inconstant in terms of run-to-run score. Run the bench 5 times and you will see a big variange. I saw a big gain from disabling SMT, so that's something you can try.
-
1
-
-
I ran a quick one using RhreadRipper and stock card, so I am guessing the score sucks... We need more runs to compare to
-
The madness begins! I am excited for the new platform and cant wait to start playing with it.
-
It looks like the winner has been announced, congrats!
-
December is almost done, good luck everyone!!
-
[ATTACH=JSON]{"alt":"Click image for larger version Name:\timage_539.jpg Views:\t6 Size:\t1.05 MB ID:\t3068","data-align":"none","data-attachmentid":"3068","data-size":"medium"}[/ATTACH]
Similar to the launch of Ryzen 3000 series, the newly released Threadripper 3 series introduces greatly enhanced memory overclocking capabilities. To test out thees new overclocking capabilities, Corsair sent us a kit of their popular Vengeance LPX DDR4 memory modules. Using the new Threadripper 3970X CPU, we will evaluate the performance of this memory and investigate its strengths and weaknesses. Originally intended for Intel platforms, the Vengeance LPX will be put to the ultimate compatibility test on the TRX40 platform.
[ATTACH=JSON]{"alt":"Click image for larger version Name:\tHeading - Features and Specifications.jpg Views:\t0 Size:\t8.0 KB ID:\t2869","data-align":"center","data-attachmentid":"2869","data-size":"custom","height":"65","width":"860"}[/ATTACH]
Since they were founded in 1994,
CORSAIR has grown from pioneering the high-performance DRAM market into one of the world’s leading providers of high-performance PC peripherals and components. CORSAIR offers a complete range of products to equip gamers, enthusiasts and e-sports athletes, including mechanical keyboards, precision gaming mice, wireless headsets, high-performance components that gamers use to build gaming PCs, and the CORSAIR ONE fully-integrated gaming PC. With a company-wide commitment to quality, innovative design, advanced features and high performance, CORSAIR products have won thousands of media and industry awards, earning their place in gamers’ hands and PCs following years of development and engineering by a team dedicated to building great products they themselves would want to use. -CorsairDesigned for high-performance computing and computer enthusiasts, Corsair offers a truly dizzying array of options. The Vengeance LPX memory modules come in densities of 4GB, 8GB, and 16GB.
In terms of frequency and latency options it starts with the humble 2133 MHz CL13 and goes all the way up to the mind-boggling 5000 MHz CL18. All told, there are 25 different frequency and latency options to choose from. When it comes to kit combinations, Corsair doesn't disappoint there either. The Vengeance LPX comes in 18 different density configurations ranging from a 4GB single stick all the way up to a 128GB kit composed of 8 x 16GB sticks.
Take the already monstrous product line and multiple it by four, as Corsair also offers the Vengeance LPX in four different colors consisting of white, black, blue, and red.
[ATTACH=JSON]{"alt":"Click image for larger version Name:\tVengeance LPX Colors.JPG Views:\t1 Size:\t140.5 KB ID:\t2929","data-align":"center","data-attachmentid":"2929","data-size":"custom","height":"315","width":"634"}[/ATTACH]
Today we are evaluating the 4 x 8GB kit of 3000MHz CL15 memory, in black.
[ATTACH=JSON]{"alt":"Click image for larger versionName:\tTable - Specifications.PNGViews:\t0Size:\t64.4 KBID:\t2870","data-align":"center","data-attachmentid":"2870","data-size":"custom","height":"383","width":"644"}[/ATTACH]
Below is a screenshot of Thaiphoon Burner, which is a free tool that allows one to read the Serial Presence Detect (SPD) firmware of the DRAM. The SPD information is critical in determining how the stick will perform and how the computer will recognize it.
[ATTACH=JSON]{"alt":"Click image for larger versionName:\tVengeance LPX Thaiphoon Burner.pngViews:\t0Size:\t50.7 KBID:\t2871","data-align":"center","data-attachmentid":"2871","data-size":"custom","height":"759","width":"548"}[/ATTACH]
As the Thaiphoon Burner screenshot shows, this specific kit of memory is composed of Samsung B-Die ICs. Each memory module uses a total of 8 ICs, all of which are located on only one side. As you might know, Samsung B-Die has become synonymous with high frequency and tight timings. Overclockers, gamers, and system builders alike all flock to memory composed of Samsung B-Die ICs. They have become the gold standard to which all other memory ICs are compared.
That being said, this is the lowest XMP bin of B-Die we have ever seen. We theorize that this kit is running the OEM version of B-Die, which is seemingly different and doesn't have the aforementioned attributes for overclocking. Later on we will explore the overclocking capabilities so follow along if you would like to see more.
[ATTACH=JSON]{"alt":"Click image for larger version Name:\tHeading - Packaging and Product Tour.jpg Views:\t0 Size:\t8.0 KB ID:\t2872","data-align":"center","data-attachmentid":"2872","data-size":"custom","height":"64","width":"850"}[/ATTACH]
Packaging is often overlooked. It serves the function of safely shipping the product, but also as a first impression of the overall quality. Corsair ships the Vengeance LPX in a simplistic box and clam shell design.
Inside the box, the memory modules are safely tucked away in two plastic clam shells. It’s certainly not an elaborate packaging, but it is effective and ultimately saves you money in the end.
[ATTACH=JSON]{"alt":"Click image for larger version Name:\tCorsair Vengeance LPX - Product 1.jpg Views:\t0 Size:\t1.54 MB ID:\t2907","data-align":"none","data-attachmentid":"2907","data-size":"custom","height":"240","width":"319"}[/ATTACH] [ATTACH=JSON]{"alt":"Click image for larger version Name:\tCorsair Vengeance LPX - Product 2.jpg Views:\t0 Size:\t1.87 MB ID:\t2908","data-align":"none","data-attachmentid":"2908","data-size":"custom","height":"241","width":"320"}[/ATTACH]
The outside of the box tells us that this memory was designed for Intel platforms with the Intel XMP branding and logo's. This might pose an issue because we are testing this memory on AMD Threadripper 3.
Our first look at the memory we see the all-black aluminum heat sink. The overall size is quite low profile and doesn’t protrude much beyond the actual PCB itself. The memory module has a lightweight feel in hand but the aluminum feels sturdy.
[ATTACH=JSON]{"alt":"Click image for larger version Name:\tCorsair Vengeance LPX - Product 3.jpg Views:\t0 Size:\t2.05 MB ID:\t2909","data-align":"center","data-attachmentid":"2909","data-size":"custom","height":"460","width":"613"}[/ATTACH]
Samsung memory has been known to produce moderate heat for memory. Within the XMP 2.0 voltage limit of 1.50v, the typical heat output is just a few degrees Celsius above ambient. Although the heat sink is on the small side, we believe it will be very effective at dealing with the nominal heat output.
[ATTACH=JSON]{"alt":"Click image for larger version Name:\tCorsair Vengeance LPX - Product 4.jpg Views:\t0 Size:\t1.03 MB ID:\t2910","data-align":"center","data-attachmentid":"2910","data-size":"custom","height":"348","width":"621"}[/ATTACH]
The styling is subtle but makes a definite statement. Our review modules have a classic glossy black appearance which should make them match other system components.
The potential upside to low-profile memory heat sinks is that they will not interfere with the CPU cooler. This is something that first time builders and beginners often overlook, but tall memory heat sinks can conflict with some large aftermarket CPU air coolers.
[ATTACH=JSON]{"alt":"Click image for larger version Name:\tCorsair Vengeance LPX - Product 8.jpg Views:\t0 Size:\t1.52 MB ID:\t2912","data-align":"none","data-attachmentid":"2912","data-size":"custom","height":"292","width":"274"}[/ATTACH] [ATTACH=JSON]{"alt":"Click image for larger version Name:\tCorsair Vengeance LPX - Product 7.jpg Views:\t0 Size:\t842.7 KB ID:\t2911","data-align":"none","data-attachmentid":"2911","data-size":"custom","height":"292","width":"312"}[/ATTACH]
[ATTACH=JSON]{"alt":"Click image for larger version Name:\tCorsair Vengeance LPX - Product 6.jpg Views:\t0 Size:\t1.60 MB ID:\t2914","data-align":"none","data-attachmentid":"2914","data-size":"custom","height":"254","width":"338"}[/ATTACH] [ATTACH=JSON]{"alt":"Click image for larger version Name:\tCorsair Vengeance LPX - Product 5.jpg Views:\t0 Size:\t1.37 MB ID:\t2913","data-align":"none","data-attachmentid":"2913","data-size":"custom","height":"253","width":"337"}[/ATTACH]
Installed in our test rig, the Vengeance LPX makes quite an attractive paring with the ASRock TRX40 Taichi. In this case the heat sink size and profile was not an issue because we are using water cooling.
[ATTACH=JSON]{"alt":"Click image for larger version Name:\tCorsair Vengeance LPX - Product 9.jpg Views:\t0 Size:\t2.91 MB ID:\t2917","data-align":"center","data-attachmentid":"2917","data-size":"custom","height":"470","width":"626"}[/ATTACH]
[ATTACH=JSON]{"alt":"Click image for larger version Name:\tHeading - Testing and Overclocking.jpg Views:\t0 Size:\t7.7 KB ID:\t2873","data-align":"none","data-attachmentid":"2873","data-size":"custom","height":"67","width":"894"}[/ATTACH]
The overall objective is to evaluate the memory from the perspective of daily usage. We will try to answer the question of what memory speeds produce the best results for overall performance and productivity. The approach is to first test the XMP 2.0 profile. Once we have established that the XMP profile is working on the test system, then the real fun begins as we evaluate the memory from an overclocking perspective.
Additionally, we will briefly examine how Ryzen Threadripper responds to memory overclocking and examine what types of overclocks can be carried out with reasonable voltage levels. To accomplish this task, we will turn to benchmark programs to examine the performance of the memory and overall system under various conditions.
[ATTACH=JSON]{"alt":"Click image for larger versionName:\tTable - Test Setup.PNGViews:\t0Size:\t48.3 KBID:\t2874","data-align":"center","data-attachmentid":"2874","data-size":"custom","height":"216","width":"588"}[/ATTACH]
XMP Profile
The XMP profile for this memory was intended for Intel platforms, as is stated on the outside of the box. We know that AMD platforms require slightly different DDR4 timing profiles than the Intel counterparts. So the first test is just to apply the built in XMP profile, and see if it the system even boots at all. If the XMP profile is able to be set in the bios then we will enter the OS and stat testing.
Given the the profile speed is running a modest 3000 MHz, we didn't have any issues with the XMP profile. It quickly and effortlessly trained all the profile timings in the bios and once in the OS, everything was rock solid stable. However, as soon as we got to the OS we soon realized that all of the monitoring software showed CL16. We double checked that the motherboard was still set to CL15, so there is an issue with the AMD platform at the moment.
We tried a different kit of memory and confirmed that it's a platform problem and not a problem with this memory.
FCLK = 1800 MHz; UCLK = 1800 MHz
[ATTACH=JSON]{"alt":"Click image for larger version Name:\tAIDA64 XMP.png Views:\t0 Size:\t129.5 KB ID:\t2992","data-align":"none","data-attachmentid":"2992","data-size":"custom","height":"512","width":"533"}[/ATTACH] [ATTACH=JSON]{"alt":"Click image for larger version Name:\tVengeance LPX XMP Timing.PNG Views:\t0 Size:\t68.5 KB ID:\t2993","data-align":"none","data-attachmentid":"2993","data-size":"custom","height":"511","width":"1156"}[/ATTACH]
Overclock 1 ~ 3533 MHz CL15-17-17 + XMP Sub Timings @ 1.45 V
Once the XMP profile has been successfully tested, we can dive into overclocking. The methodology is to set our maximum working voltage of 1.50 V, to see what could be accomplished, and then lower the voltage to find the stability point.
For the first overclocking attempt, we raised frequency and voltage only and left everything else set by the XMP profile. Due to the fact that our test kit is composed of Samsung B-Die IC's, we had exceptionally high hopes for this memory. We soon found out that seems to be it's B-Die in name only and does follow the same overclocking characteristics of other B-Die modules we have tested.
We finally arrived at a frequency of 3533 MHz. That is a substantial 533 MHz over the stock frequency, but it is substantially less than we have seen with other Samsung B-Die based memory models. Below is the resulting timing profile and AIDA64 test.
FCLK = 1800 MHz; UCLK = 1800 MHz
[ATTACH=JSON]{"alt":"Click image for larger version Name:\tAIDA64 3533 XMP Sub Timings.png Views:\t0 Size:\t129.7 KB ID:\t2997","data-align":"none","data-attachmentid":"2997","data-size":"custom","height":"488","width":"509"}[/ATTACH] [ATTACH=JSON]{"alt":"Click image for larger version Name:\tVengeance LPX XMP Timing.PNG Views:\t0 Size:\t68.5 KB ID:\t2998","data-align":"none","data-attachmentid":"2998","data-size":"custom","height":"488","width":"1104"}[/ATTACH]
Overclock 2 ~ 3000 MHz CL14-16-16 + Tight Sub Timings @ 1.45 V
The second overclocking test is similar to the first one, but in reverse. In this case we leave the frequency determined by the XMP profile and only adjust the timings. The goal here is to build a timing profile that is tighter and more efficient than the XMP profile, but also one that is fully stable. This can be a lengthy and time consuming process, but there are useful tools to help beginners such as the DRAM Calculator for Ryzen.
In this case we will build our timing profile the hard way, and forgo any timing profile builder tools. Each timing was tested one-by-one to find the optimal balance between stability and performance. As is the case with overclock attempt 1, we found this memory difficult to deal with and not very flexible in terms of overclocking. Below is the resulting timing profile and AIDA64 test.
FCLK = 1800 MHz; UCLK = 1800 MHz
[ATTACH=JSON]{"alt":"Click image for larger version Name:\tAIDA64 3000 c14 Tight Timings.png Views:\t0 Size:\t129.4 KB ID:\t2994","data-align":"none","data-attachmentid":"2994","data-size":"custom","height":"503","width":"524"}[/ATTACH] [ATTACH=JSON]{"alt":"Click image for larger version Name:\tVengeance LPX C14 Tight Timing.PNG Views:\t0 Size:\t68.2 KB ID:\t2995","data-align":"none","data-attachmentid":"2995","data-size":"custom","height":"501","width":"1119"}[/ATTACH]
Overclock 3 ~ 3200 MHz CL14-16-16 + Tight Sub Timings @ 1.50 V
The third and final overclocking test is an attempt to combine the first and second ones. In this case we will attempt to build an optimally efficient overclocking profile by adjusting both the frequency and the timings.
We ended up at the same timing profile as overclock test 2, however, we were able to increase the frequency by an additional 200 MHz. Below is the resulting timing profile and AIDA64 test.
FCLK = 1800 MHz; UCLK = 1800 MHz
[ATTACH=JSON]{"alt":"Click image for larger version Name:\tAIDA64 3200 c14 Tight Timings.png Views:\t0 Size:\t129.5 KB ID:\t2996","data-align":"none","data-attachmentid":"2996","data-size":"custom","height":"532","width":"555"}[/ATTACH] [ATTACH=JSON]{"alt":"Click image for larger version Name:\tVengeance LPX C14 Tight Timing.PNG Views:\t0 Size:\t68.2 KB ID:\t2999","data-align":"none","data-attachmentid":"2999","data-size":"custom","height":"533","width":"1192"}[/ATTACH]
The heat output of this memory proved to be nominal. With the highest overclocked memory profile, and 1.50 V set in the bios, we observed a scant increase in temperature of 4 degrees Celsius. The temperature was measured by placing a thermal probe directly on the heat sink and recording the temperature with a Fluke 52-2 digital thermometer.
[ATTACH=JSON]{"alt":"Click image for larger version Name:\tHeading - Benchmark Results.jpg Views:\t0 Size:\t6.5 KB ID:\t2876","data-align":"center","data-attachmentid":"2876","data-size":"custom","height":"67","width":"895"}[/ATTACH]
Benchmark programs allow us to examine the performance gain or loss from making changes to the various computer components such as the CPU, GPU, or memory. In this case, the goal is to remove all variables and examine only the performance change from memory overclocks. To accomplish this, all benchmarks were run with the CPU held at a constant 4.2 GHz for every benchmark. We will investigate the effects of memory overclocking not just because it’s fun, but because it has real-world implications and can help with the productivity of daily tasks.
When we go to test the memory and overclocking capabilities we need to take into consideration two new variables: FCLK and UCLK. Even though these variables are somewhat out of our control, they play a huge role in the overall performance and benchmark scoring. That being said, it’s not always fair to compare one frequency against another, because the FCLK and UCLK might be running at different speeds and will, thus, skew the test results. While it’s not within the scope of this memory review to dive deeper into the memory structure, just keep in mind that those variables are there.
[ATTACH=JSON]{"alt":"Click image for larger versionName:\tTable - Memory Speeds Compared.PNGViews:\t0Size:\t43.5 KBID:\t2875","data-align":"none","data-attachmentid":"2875","data-size":"custom","height":"158","width":"578"}[/ATTACH]
First lets examine the memory by using AIDA64 Cache and Memory Benchmark. Specifically speaking,
Memory bandwidth benchmarks (Memory Read, Memory Write, Memory Copy) measure the maximum achievable memory data transfer bandwidth. The code behind these benchmark methods are written in Assembly and they are extremely optimized for every popular AMD, Intel, and VIA processor core variants by utilizing the appropriate x86/x64, x87, MMX, MMX+, 3DNow!, SSE, SSE2, SSE4.1, AVX, AVX2, and AVX-512 instruction set extension. –AIDA64In the chart below, we compare the four different memory speeds and how they affect the overall system performance. As you can see, the first overclocking test case was the clear winner here. Keeping the memory timings fixed by the XMP profile and adjusting the frequency to the max proved to the be best case for all three AIDA64 tests. The results show that AIDA64 clearly favors frequency on this platform.
[ATTACH=JSON]{"alt":"Click image for larger version Name:\tGraph - AIDA64.jpg Views:\t0 Size:\t109.3 KB ID:\t2890","data-align":"center","data-attachmentid":"2890","data-size":"custom","height":"431","width":"952"}[/ATTACH]
Next up is Geekbench 4. This benchmark utilizes multiple different tests warped into one benchmark, so it’s a great analytical tool to evaluate memory performance. Specifically speaking, it:
Includes updated CPU workloads and new Compute workloads that model real-world tasks and applications. Geekbench is a benchmark that reflects what actual users face on their mobile devices and personal computers. –GeekbenchThe Geekbench 4 test results parallel the AIDA64 ones nicely with a small difference. In this case, raw frequency overclocking was not the clear winner. Looking at the overall score, the overclock test 1 and overclock test 3 were nearly tied.
[ATTACH=JSON]{"alt":"Click image for larger version Name:\tGraph - Geekbench 4.jpg Views:\t0 Size:\t115.5 KB ID:\t2892","data-align":"center","data-attachmentid":"2892","data-size":"custom","height":"465","width":"971"}[/ATTACH]
Next, we will examine the performance using a few of the memory benchmark tests offered in the SiSoftware Sandra suite of benchmarks.
SiSoftware, founded in 1995, is one of the leading providers of computer analysis, diagnostic and benchmarking software….Since launch, SiSoftware has always been at the forefront of the technology arena, being among the first providers of benchmarks that show the power of emerging new technologies such as multi-core, GPGPU, OpenCL, OpenGL, DirectCompute, x64, ARM, NUMA, SMT (Hyper-Threading), SMP (multi-threading), AVX512, AVX2, AVX, FMA3, NEON, SSE4.2, SSE4, SSSE3, SSE2, SSE, Java and .NET. –SiSoftwareFor both of the tests we ran in the Si Sandra bench marking suite, we found that the combined higher frequency and tighter timings was best.
[ATTACH=JSON]{"alt":"Click image for larger version Name:\tGraph - SiSandra.jpg Views:\t0 Size:\t104.0 KB ID:\t2893","data-align":"none","data-attachmentid":"2893","data-size":"custom","height":"453","width":"1001"}[/ATTACH]
Next we will take a look at two very popular 3D-rendering benchmarks. Specifically, we will look at how the different memory profiles effect the scoring in the Time Spy Extreme CPU score, and Fire Strike Physics Score. Both of those benchmarks are designed to give a real example of 3D performance, but we are focusing on the CPU system performance parts of the test only.
Across the board we saw an improvement in the scores from memory overclocking. This was somewhat an unexpected result because on Intel platforms the gain from memory overclocking in both of those benchmarks is quite small or nonexistent.
[ATTACH=JSON]{"alt":"Click image for larger version Name:\tGraph - UL Benchmarks.jpg Views:\t0 Size:\t102.3 KB ID:\t2891","data-align":"center","data-attachmentid":"2891","data-size":"custom","height":"460","width":"1016"}[/ATTACH]
For those interested, here is a table showing all of the hard benchmark numbers from our testing. All of thees figures are represented in the graphs above, but we will give you the hard numbers as well.
[ATTACH=JSON]{"alt":"Click image for larger versionName:\tTable - Benchmark Raw Data.PNGViews:\t0Size:\t130.7 KBID:\t2878","data-align":"center","data-attachmentid":"2878","data-size":"custom","height":"371","width":"665"}[/ATTACH]
[ATTACH=JSON]{"alt":"Click image for larger version Name:\tHeading - Conclusion.jpg Views:\t0 Size:\t4.9 KB ID:\t2877","data-align":"center","data-attachmentid":"2877","data-size":"custom","height":"65","width":"872"}[/ATTACH]
Overall there's a lot to love about the Corsair Vengeance LPX. From the simplistic buy tasteful heat sink design, to the staggering array of product options, this memory has something for everyone. While many modern computer builders might flock to RGB memory, the always-popular glossy black design is timeless.
We were pleasantly supervised to find Samsung B-Die lurking under the heat sink. However, once we got into overclocking, we soon realized that there was not as much overclocking headroom as we would have expected. From an overclocking perspective we did manage an increase of 533 MHz beyond the XMP frequency, which is a good touchstone for Samsung memory modules.
With an Newegg price tag of $149.99 they are certainly not the cheapest option available in their class, but they might be the coolest. In terms of competition the G.Skill Sniper X retails for around $115 for the 32GB kit and is running 3000 MHz CL16-18-18. Further competition in the 32GB, 3000 MHz memory field is the Ballistix Sport LT for around $150.
With Corsair's legendary company history backing them, and given that thees our test sample was equipped with samsung B-Die IC's, we feel that this kit is an easy win. The modules would make a great addition to any gaming or performance orientated system out there.
Lastly we wish to thank Corsair for providing this memory kit for review !
-
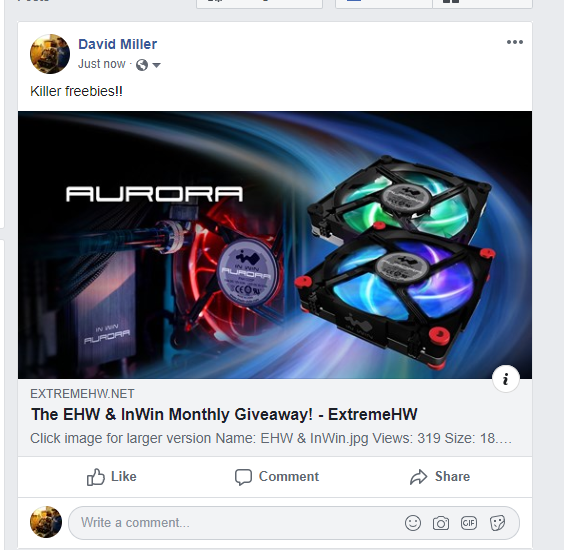
My 2080Ti desperately needs that PSU for so it can be a dedicated GPU PSU for LN2 GPU sessions. If I win, I will certainly post pictures of it in use
My contest submission
1. Yes please, Im In
2. Share this giveaway thread on your Facebook or Twitter
3. Follow EHW Facebook.
4. Follow EHW Twitter.
5. Follow InWin Facebook.
6. Follow InWin Instagram.
7.Create a thread with useful information such as a guide/how to in an appropriate section of The Forums
I present my GPU volt-mod guide: https://extremehw.net/forum/modifica...-voltmod-guide


 And the wife would be asking "Why are you getting another card for a computer U don't even use?" LOL


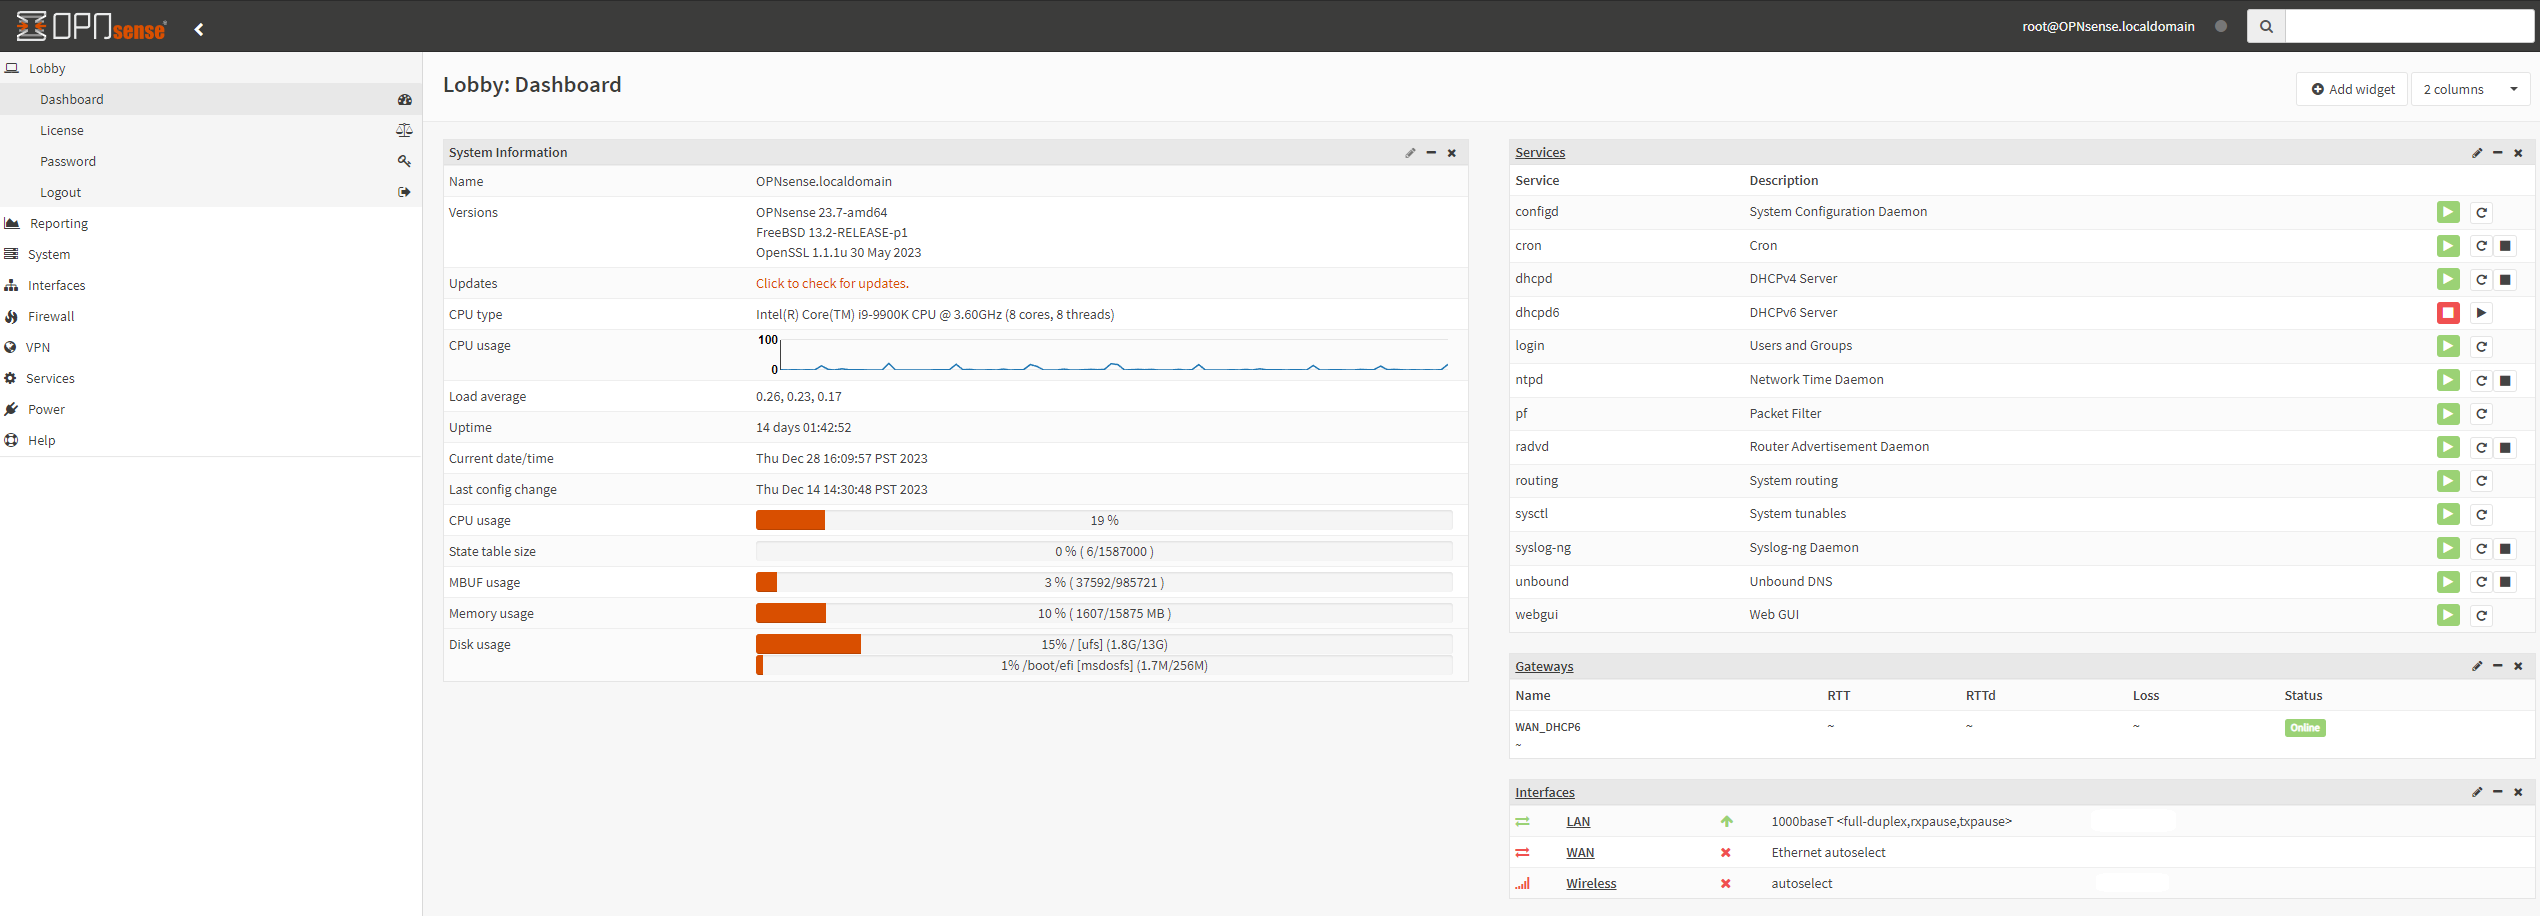
the pfense club
in Networking General
Posted
Thanks for getting back to me!
The system is built and OPNsense is installed on a little ITX 9900K. I have an Intel 10g NIC for the device too. I think it's total overkill but hopefully, it should run for ages and not give me any problems.
I am set up with Comcast DSL at my house. It's rated for about 600Mbps down and 120Mbps up. It's not great but it's what I can get in my area and the price is nice at $55 per month.
I don't like the Comcast router/modem even though it's high-performance and free. It's WiFi6 and has never failed once, but it broadcasts the xfinitiywifi signal for all users to piggyback on my network, which is the real reason I want to turn it into a bridge.
As for my network requirements, it's pretty simple. I don't need a VPN or anything like that. However, my work laptop is quite aggressive and talks to everything on my network. I was thinking about setting up a VLAN so my work laptop is completely isolated from my home network. I guess I would need to buy a managed switch for that?? Right now I setup a guest account on my WiFi and I connect my laptop to that. I think it's fairly well isolated but that laptop has fangs