Welcome to ExtremeHW
Welcome to ExtremeHW, register to take part in our community, don't worry this is a simple FREE process that requires minimal information for you to signup.
Registered users can:
- Start new topics and reply to others.
- Show off your PC using our Rig Creator feature.
- Subscribe to topics and forums to get updates.
- Get your own profile page to customize.
- Send personal messages to other members.
- Take advantage of site exclusive features.
- Upgrade to Premium to unlock additional sites features.

Salty_Pepperpot
-
Posts
31 -
Joined
-
Last visited
-
Feedback
0%
Content Type
Forums
Store
Events
Gallery
Profiles
Videos
Marketplace
Tutorials
Everything posted by Salty_Pepperpot
-
Thanks man
-
That's a very nice hardware list you have there Love the look of the heatkiller gear. You going with heatkiller blocks on the 3090's too?
-
I've seen too many horror stories of pastel coolant, and I'm trying to avoid as much potential staining as possible, so a couple of drops of dye in distilled is the way for me. I'm leaning toward the full nickel, the GPU will be standard inverted TJ07 style. If I do go nickel tho it will be nickel fittings too. Silver fittings and black blocks, I haven't really thought about I'll go find someones build log who's done it and see the pics
-
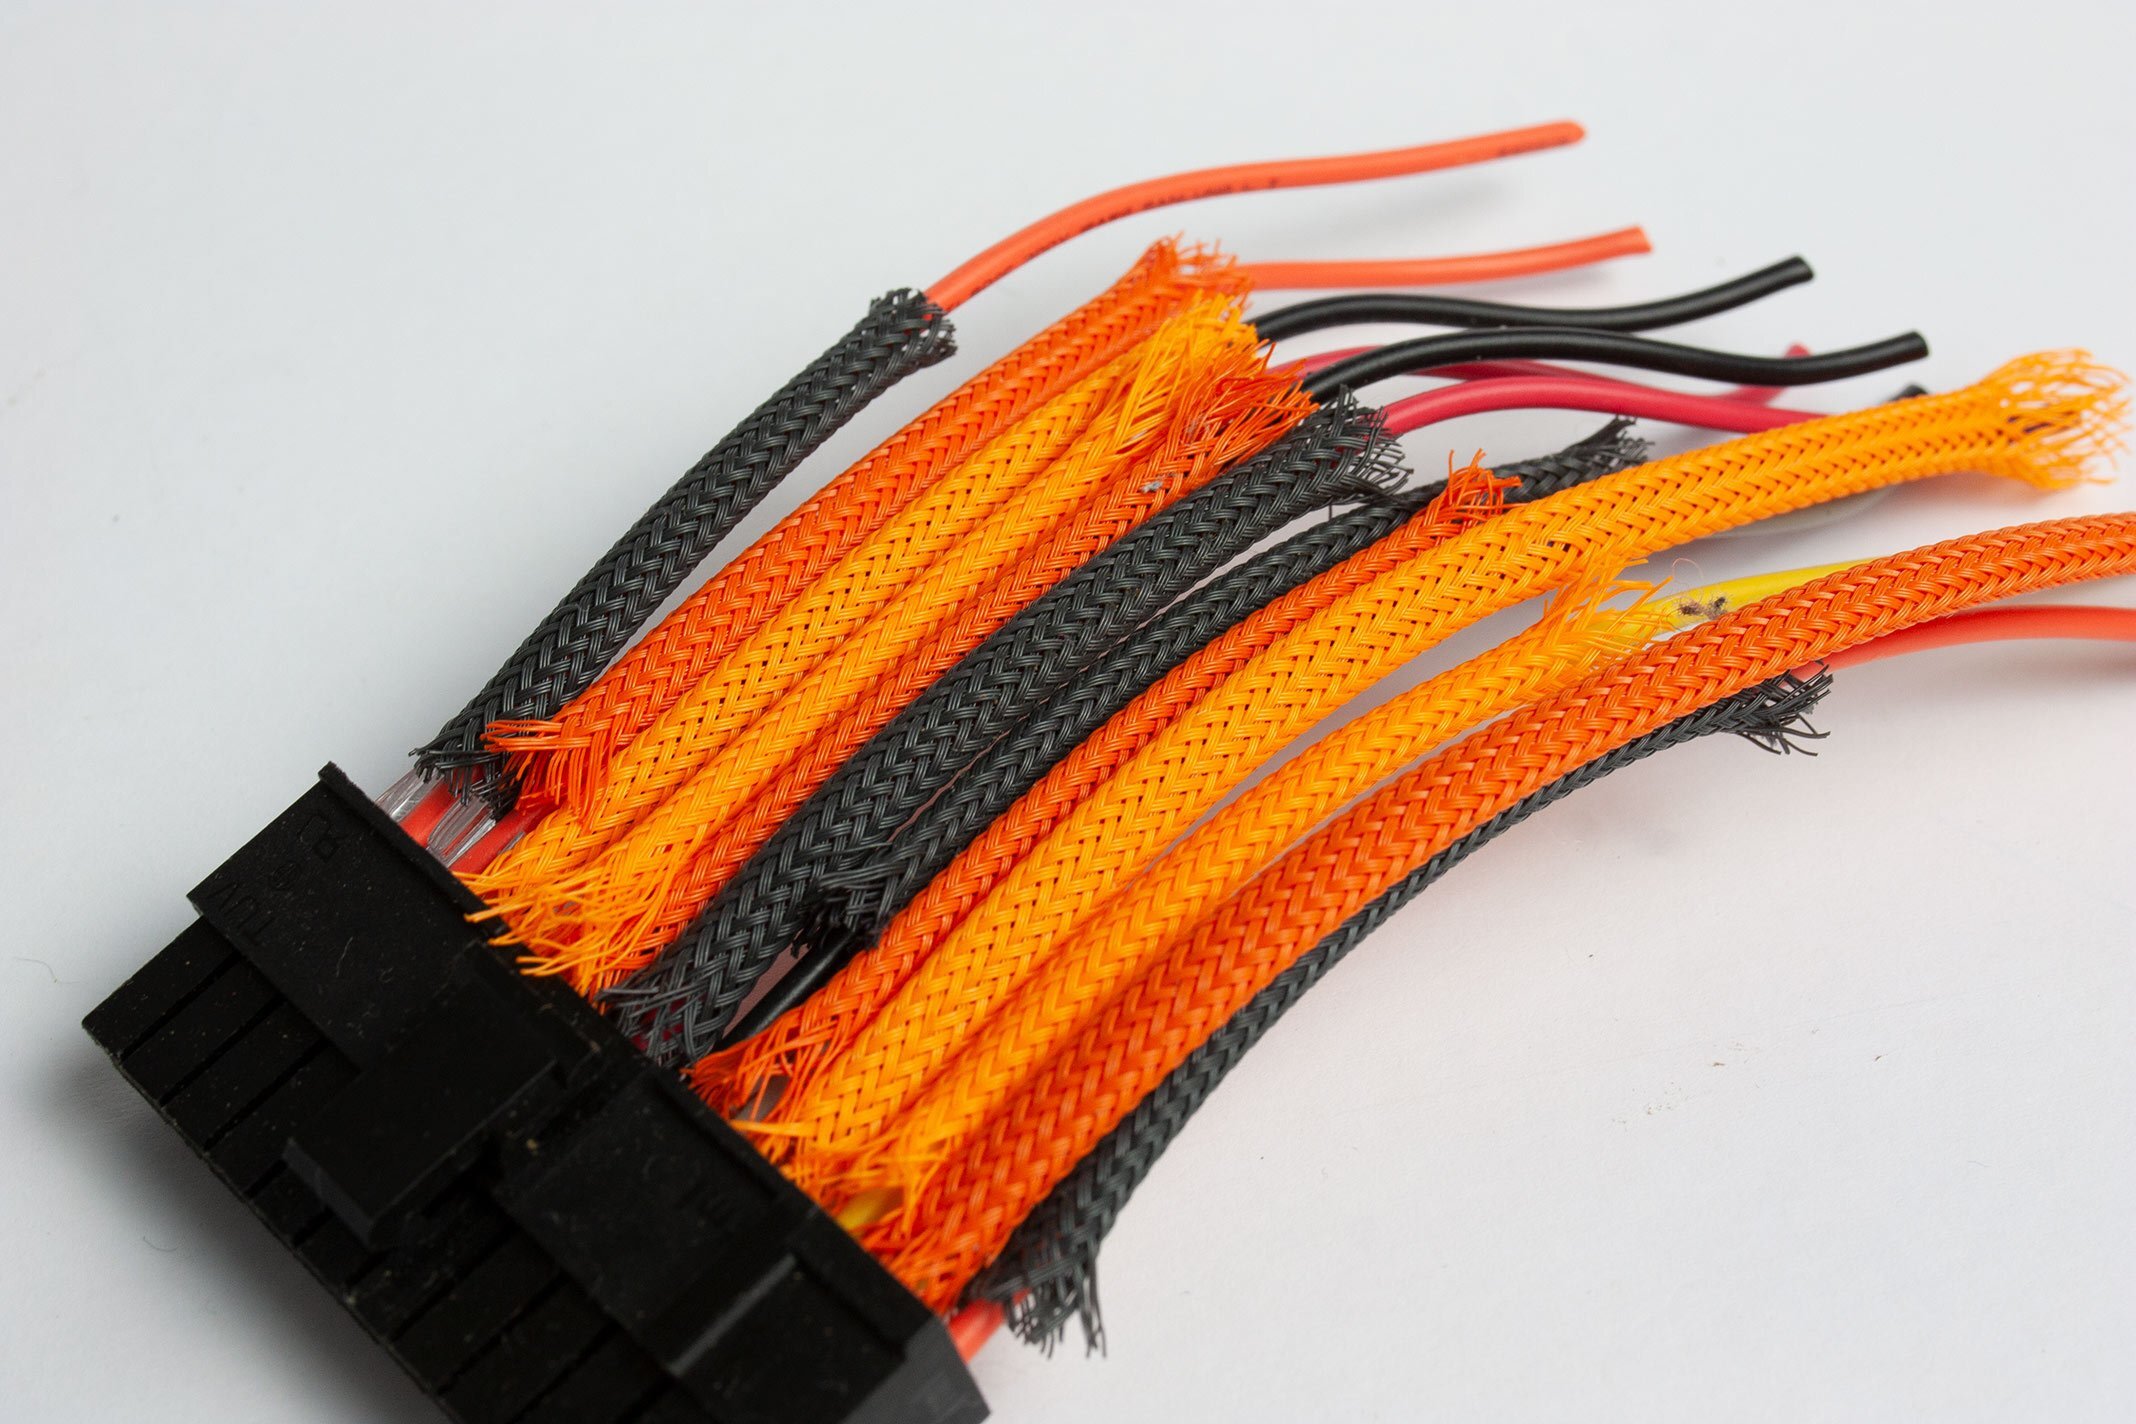
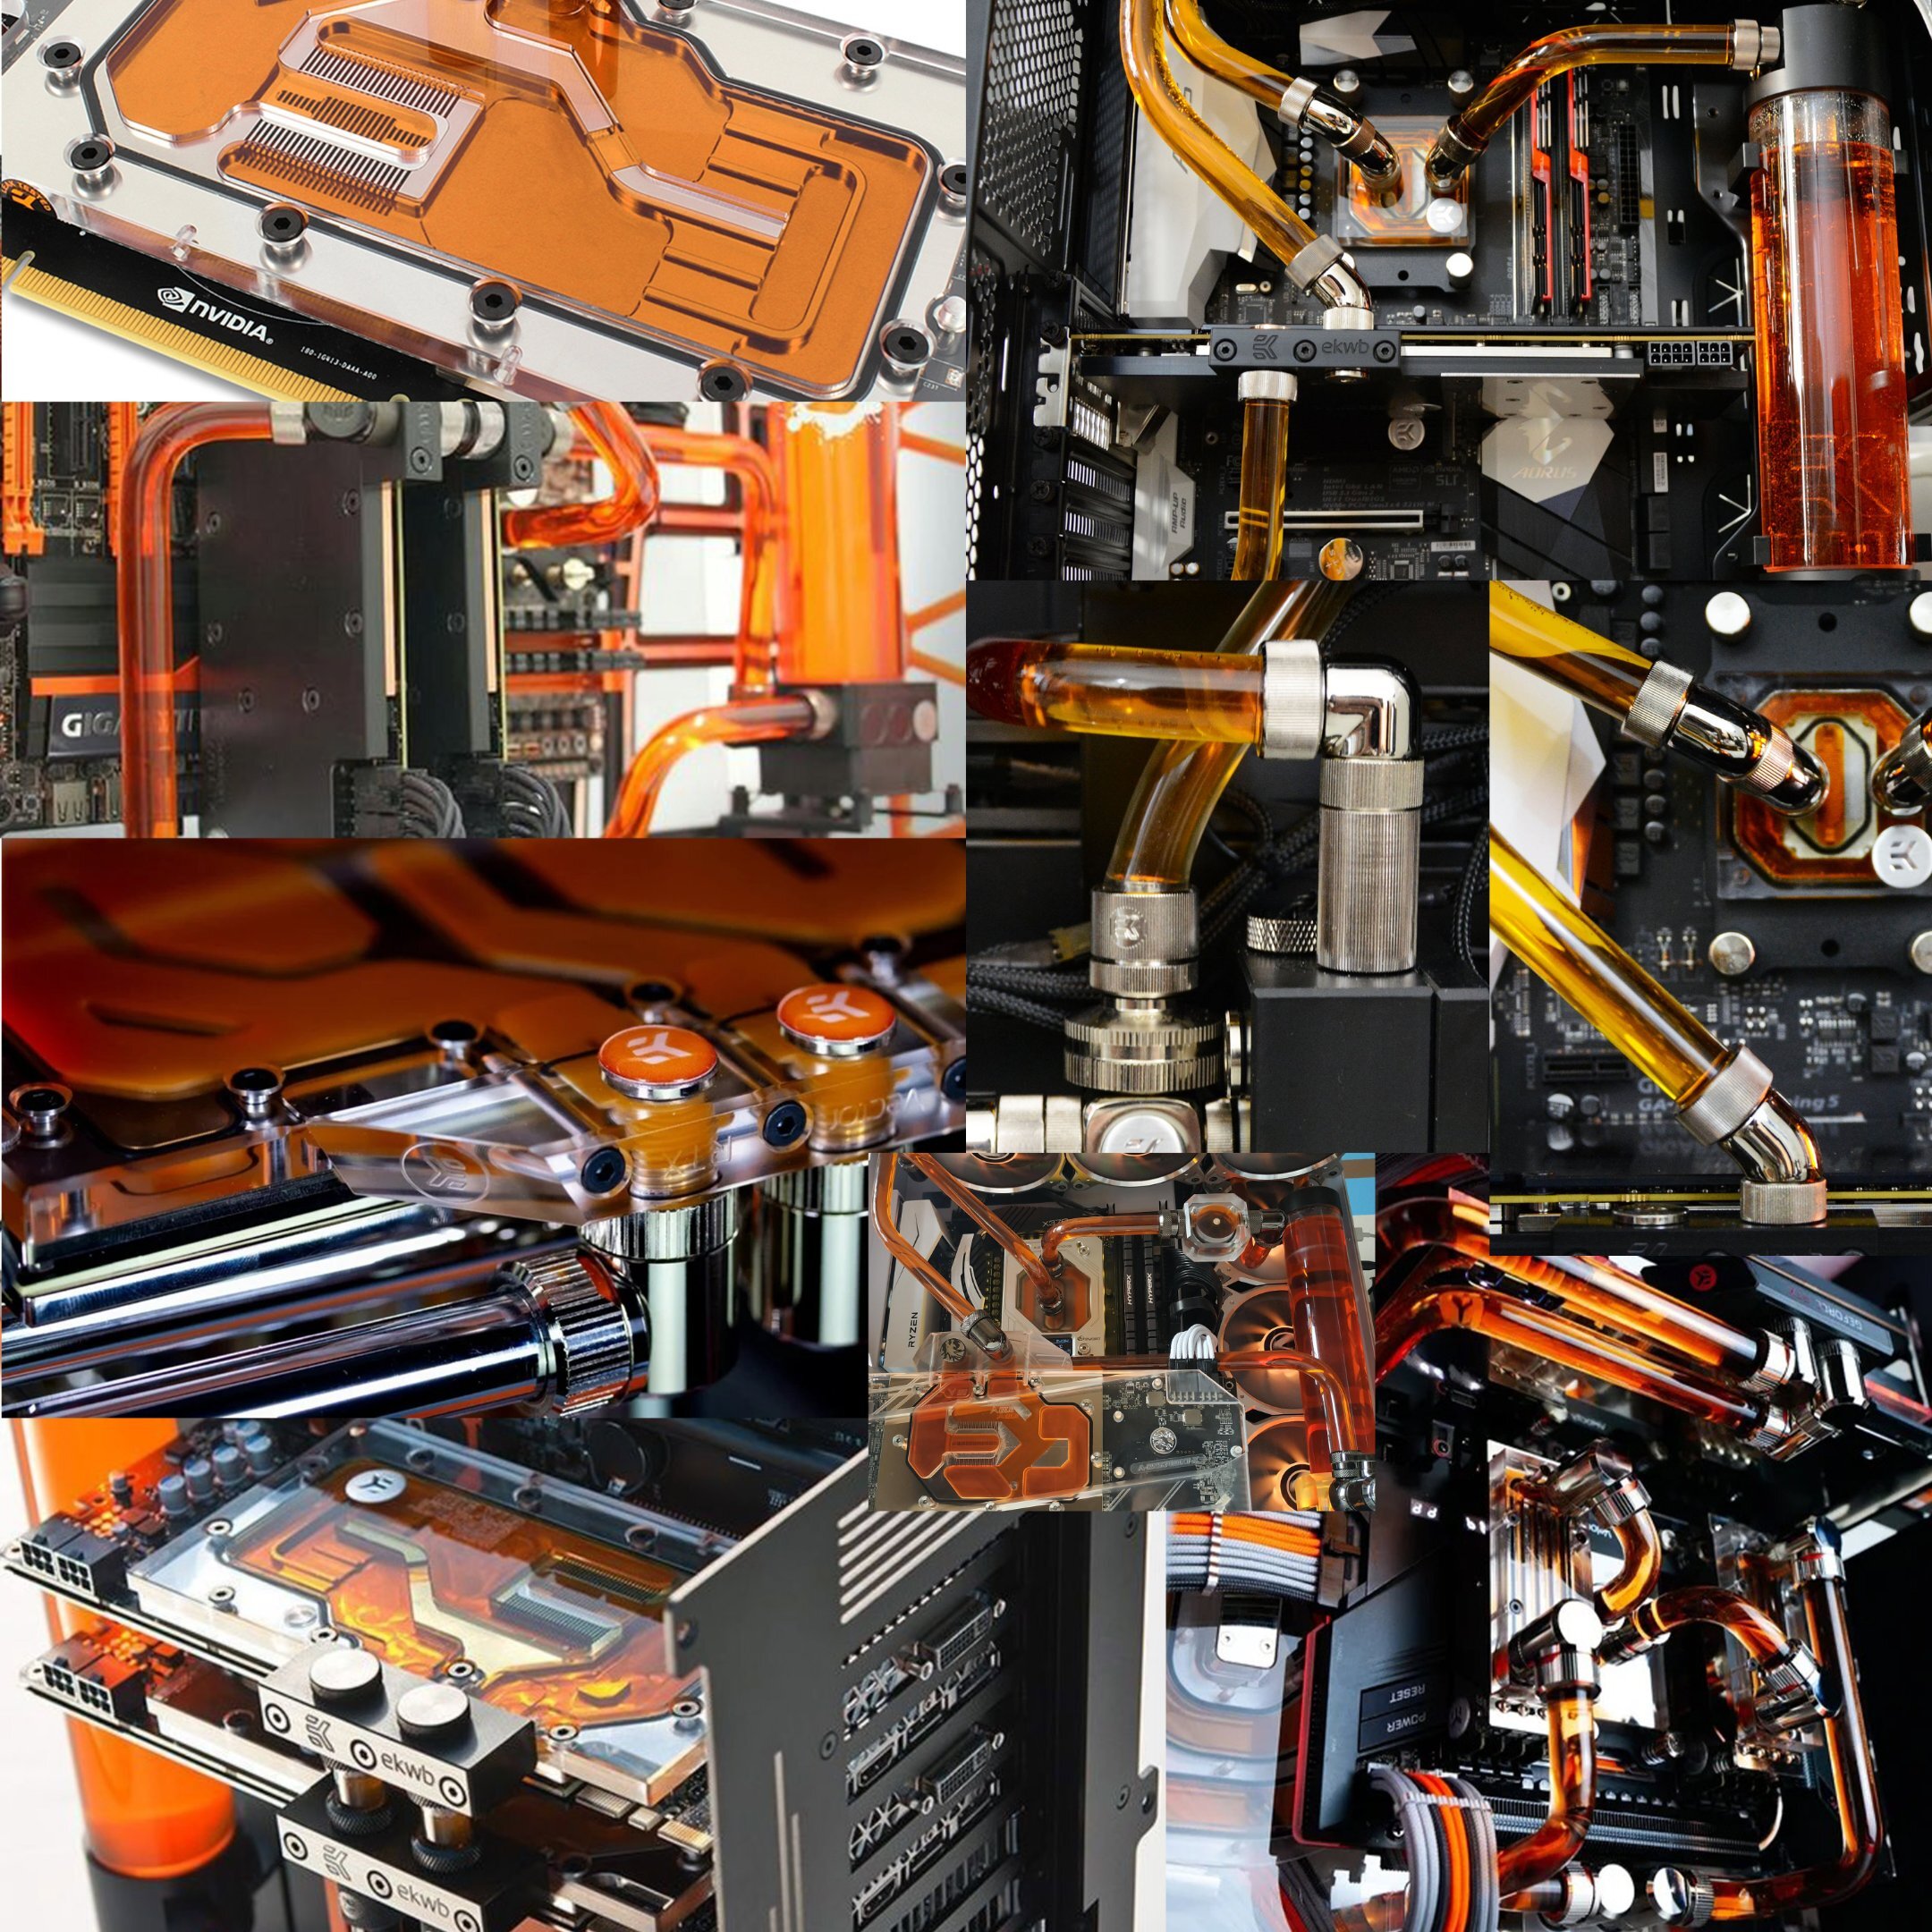
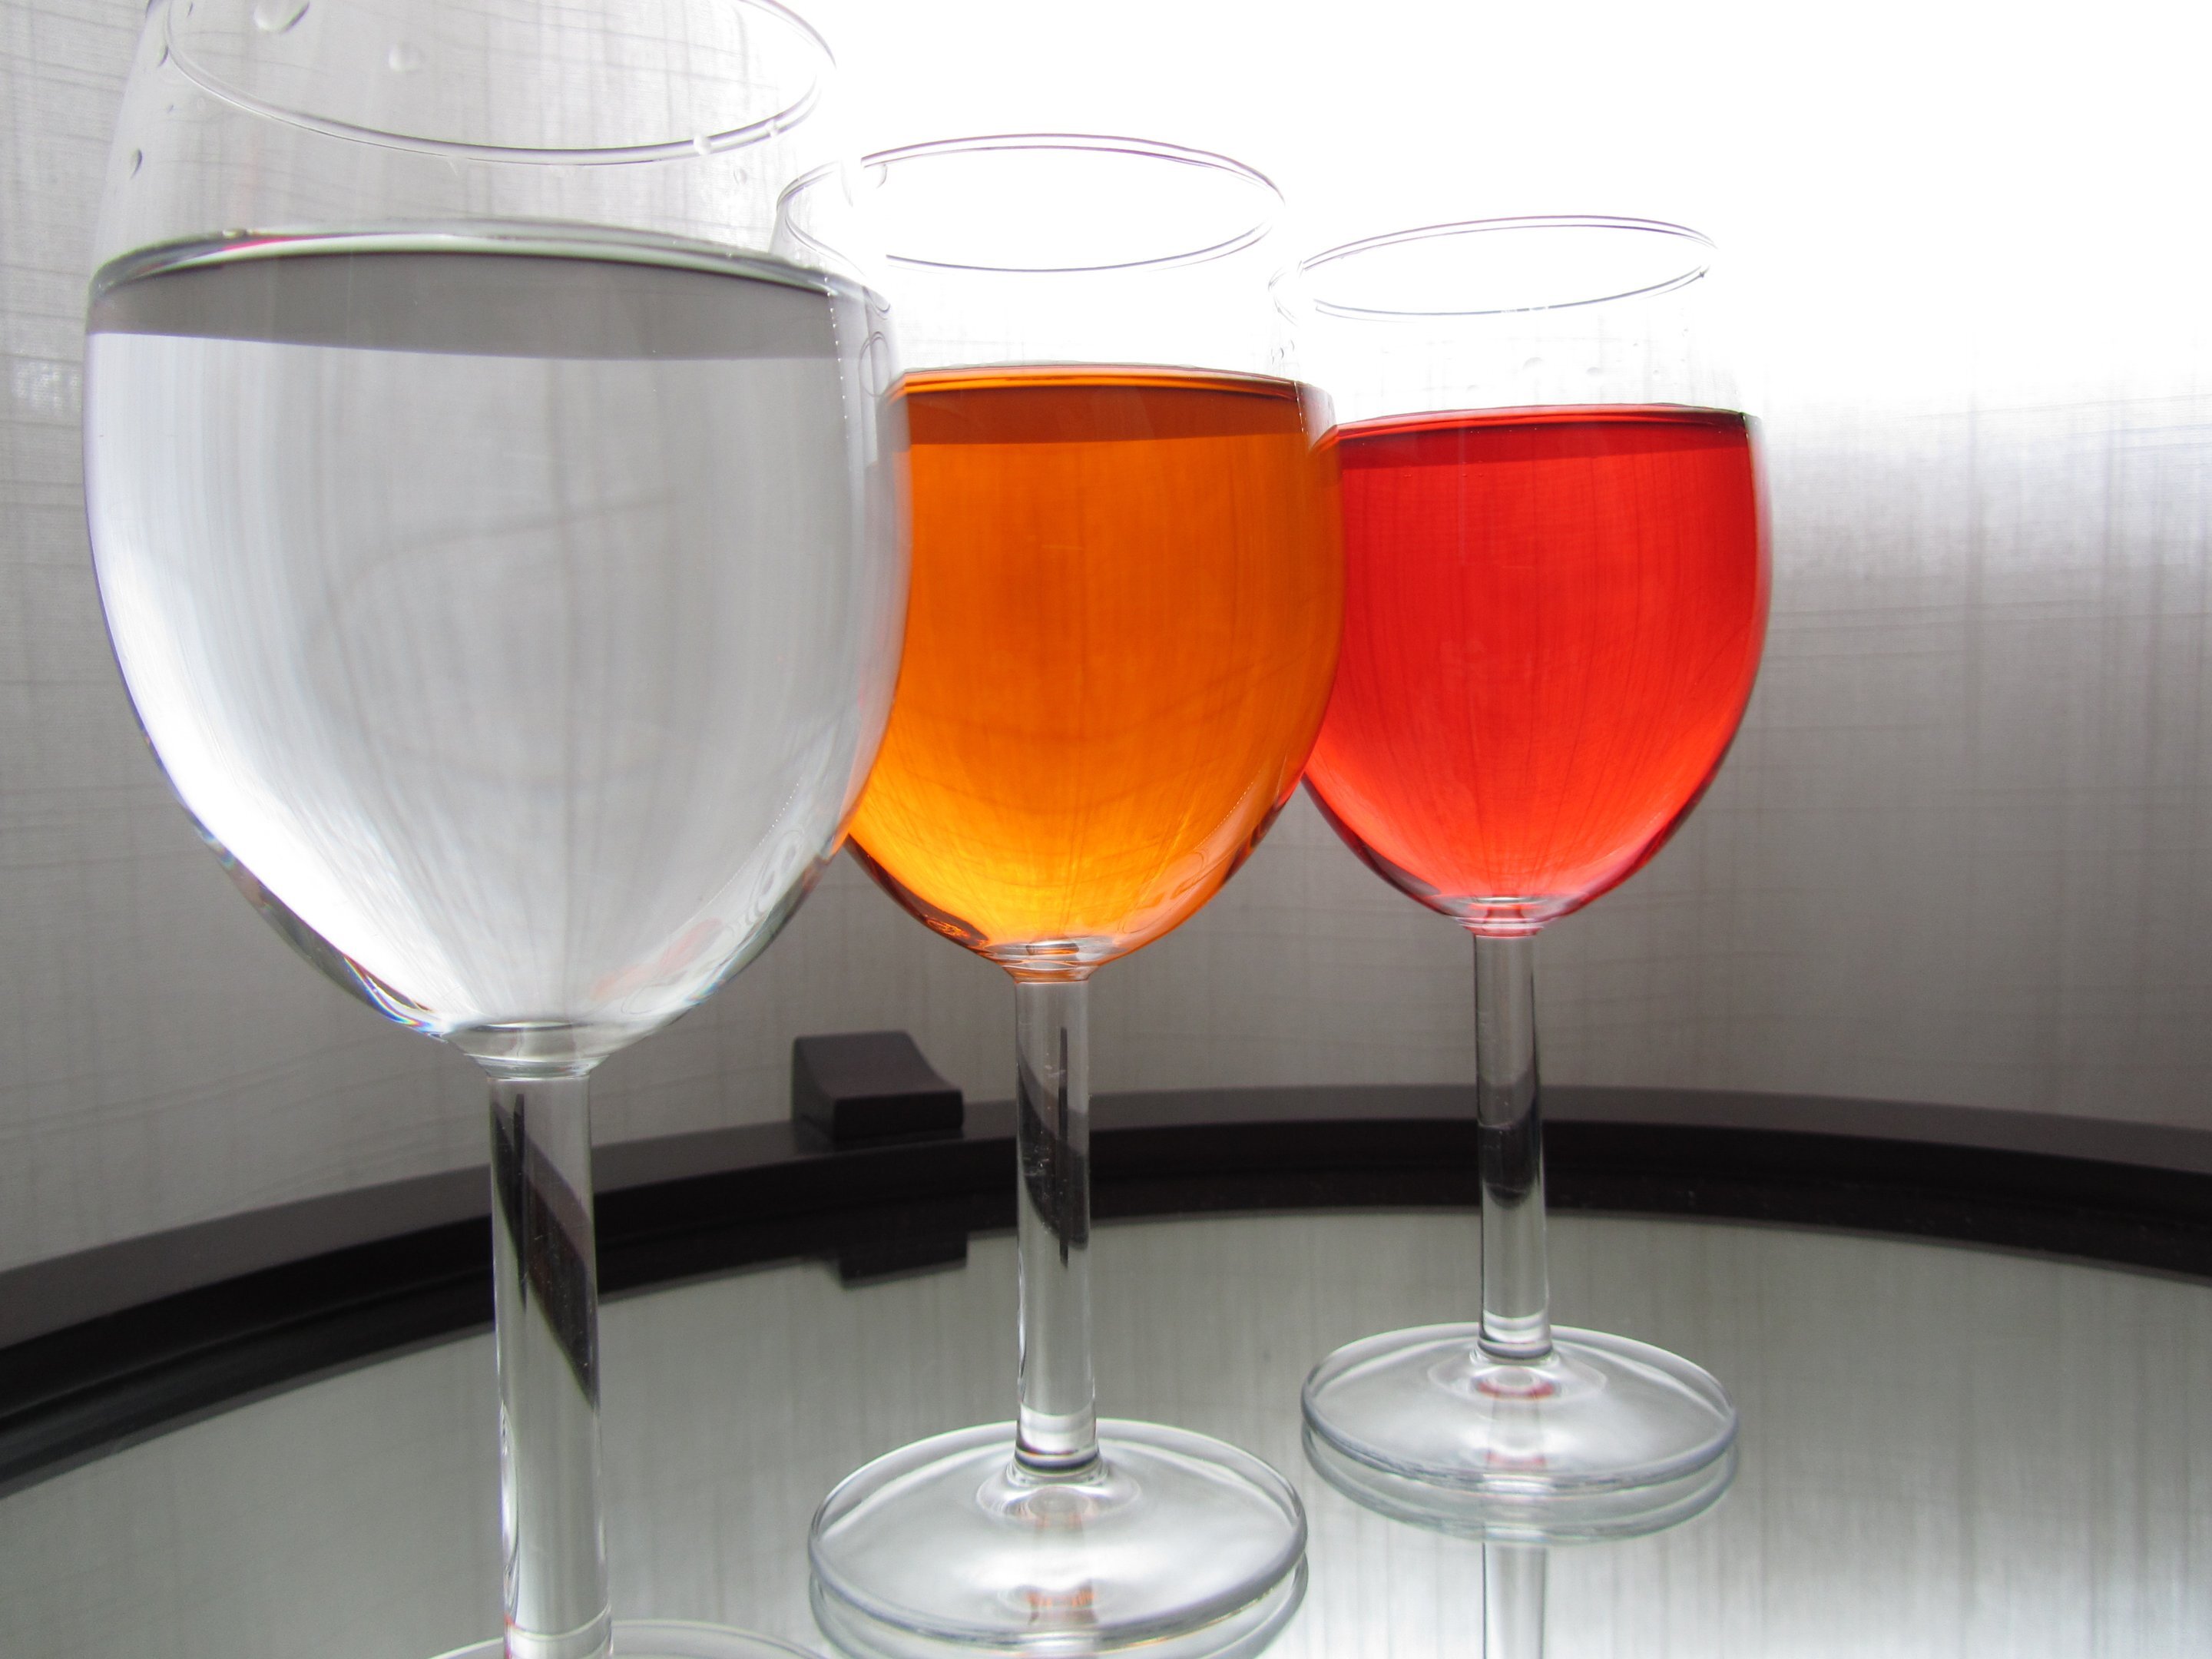
Build log tangent- Was looking at cable combs today the question is, silver or black?... which prompted a journey down a rabbit hole of aesthetic choices that need to be actually decided. At the moment, the colour scheme is: Black case. Orange lights. Orange/Dark Grey Cables like so: And I'm going with some Mayhems orange dye. Not the Pastel stuff either, as I've seen some horror stories. The ideal result with look like centre glass here: But there isn't much in the way of "accent colours". And the Cable combs should match the fittings right? So here we have the face-off. Fittings and general water-cooling stuff, Black vs. Aluminium/Silver. I made some giant image boards to help me decide, but it's not helped, its just made me more indecisive. I guess click them to get the full impression. Silver looks great. Black looks great too! I think with the right lighting the silver will "pop" more, and all those nice specular highlights off the metal and transparent tube/liquid. In particular the bottom right/left of the silver group. But black is pretty badass. Look at that Heatkiller GPU block. The contrast works better with a pastel fluid though. Hummmm. Thoughts? Ugh, I'm probably going to have to buy a few of each and have a look IRL. Those that don't make the cut can be hidden in the bottom of the case if needs be Tangent over (for now) Sleeving update tomorrow!

-
Ah cheers It's reassuring to get some good feedback that's for sure!
-
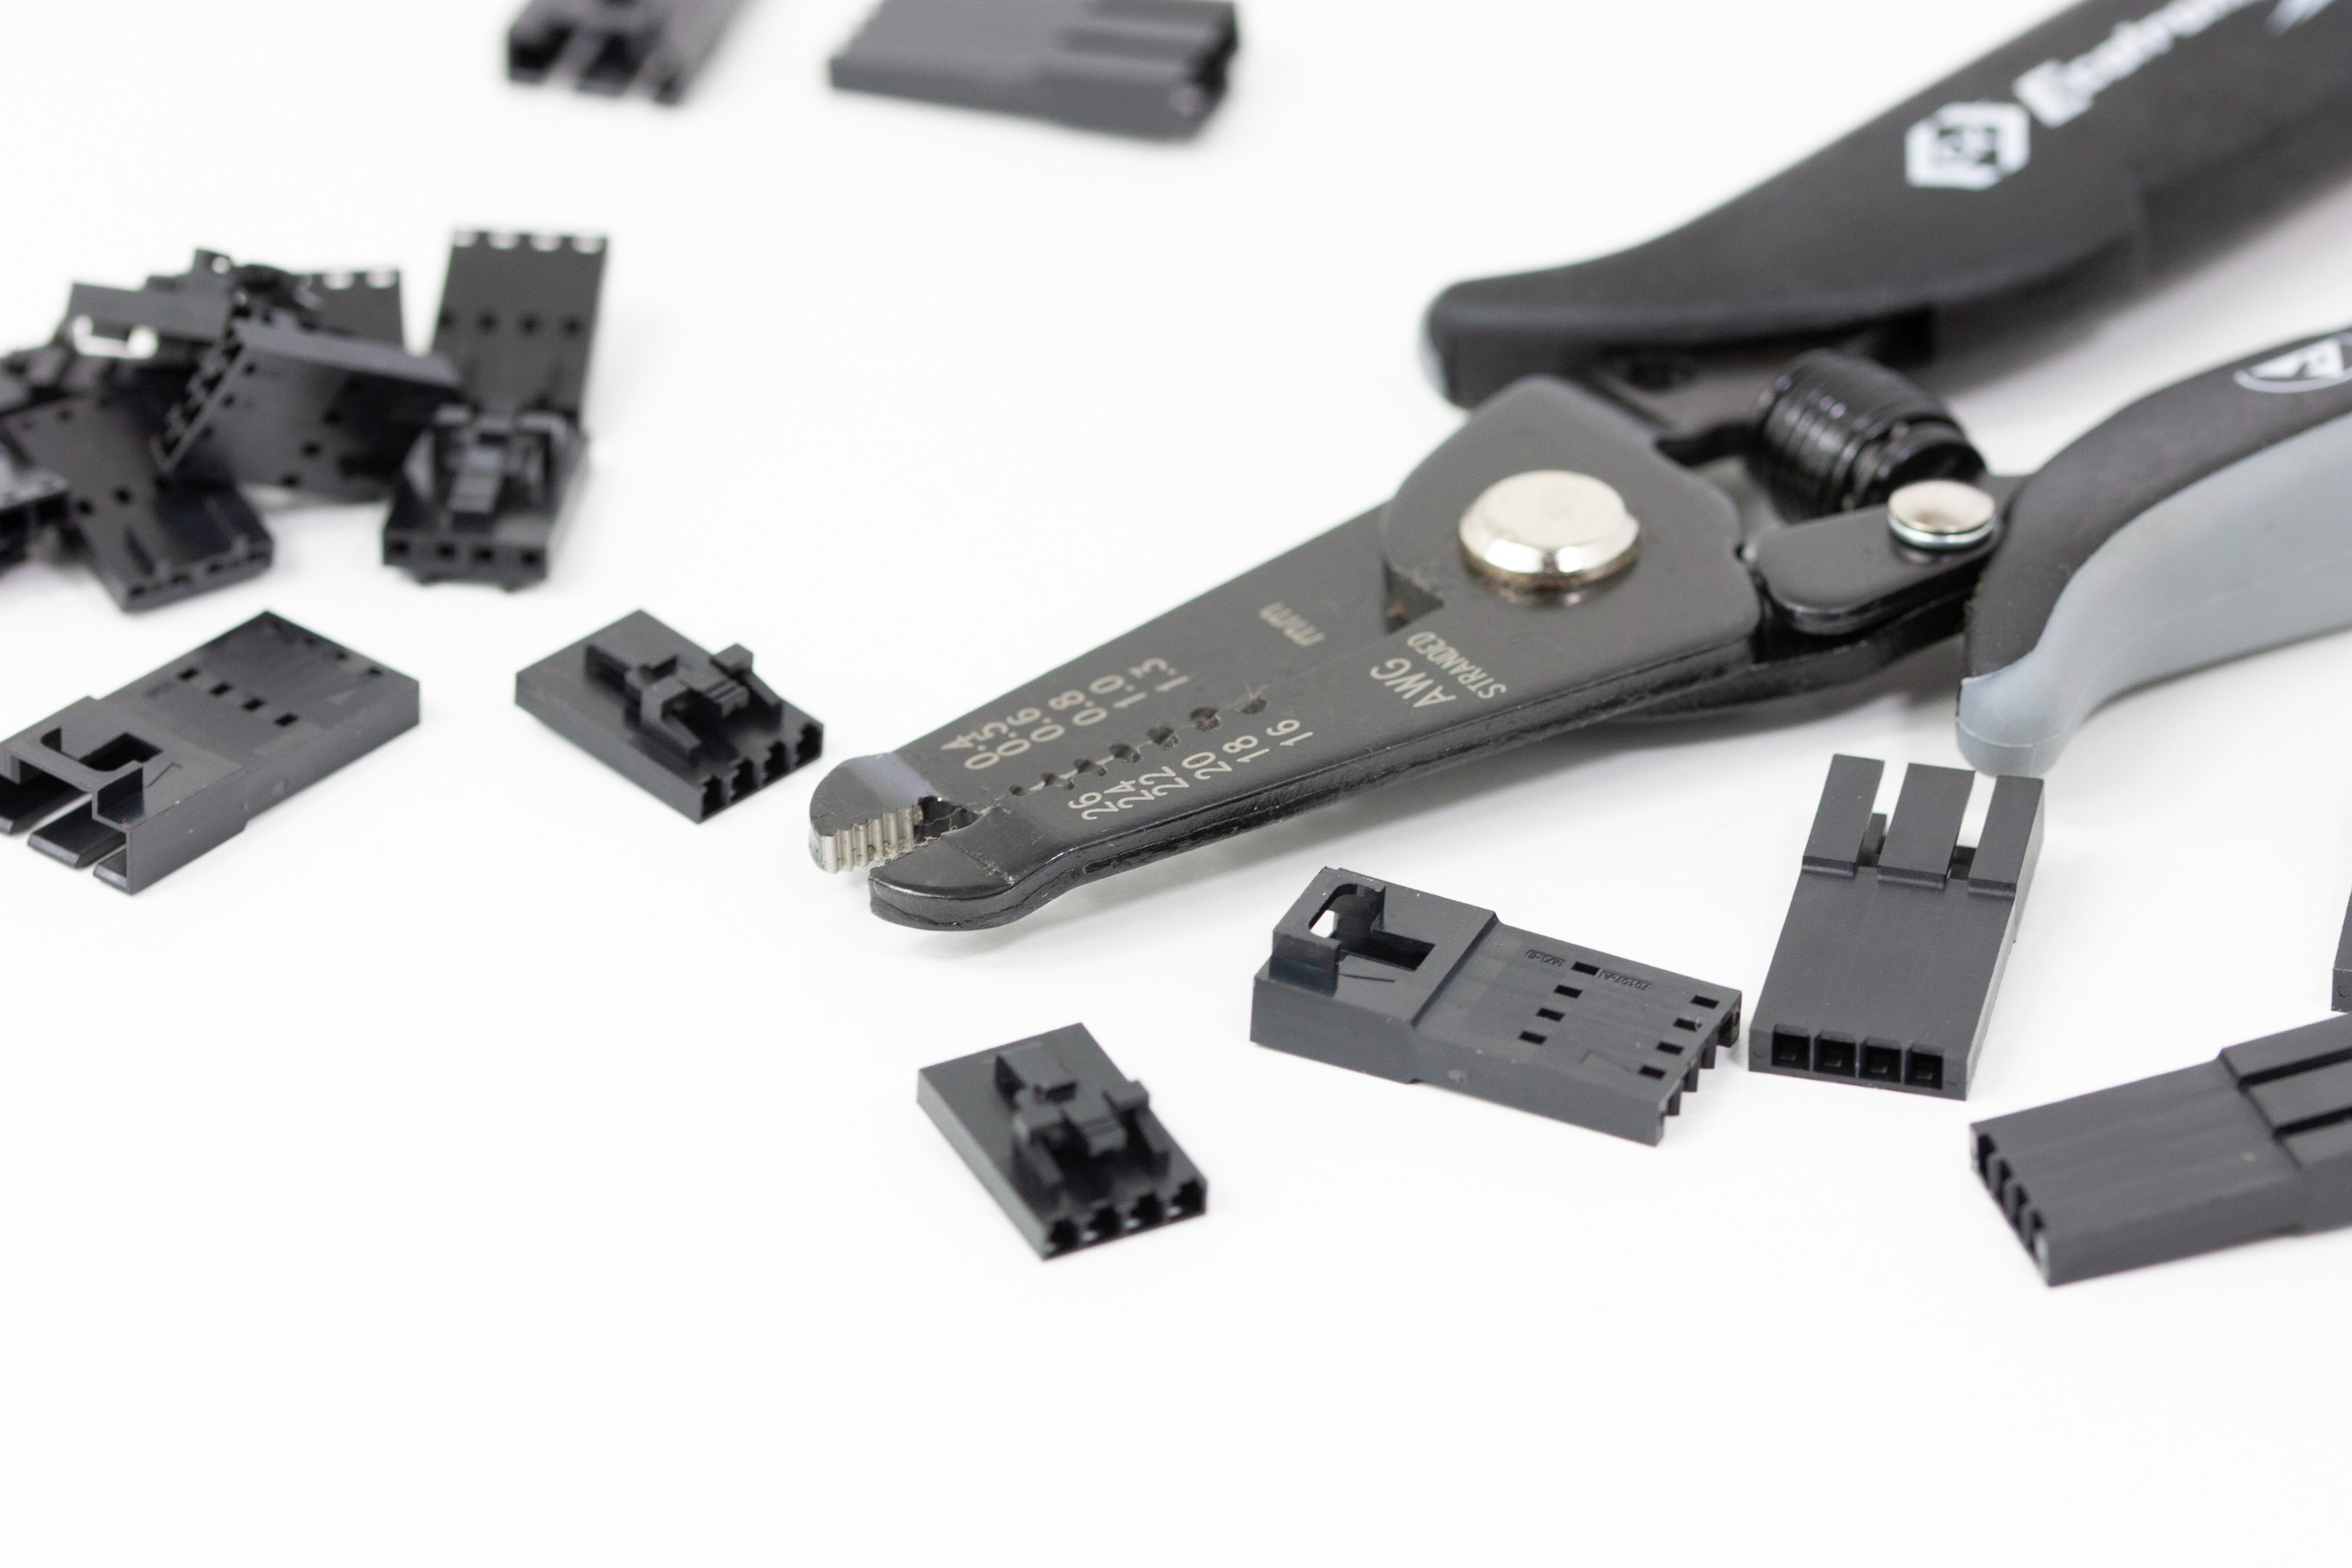
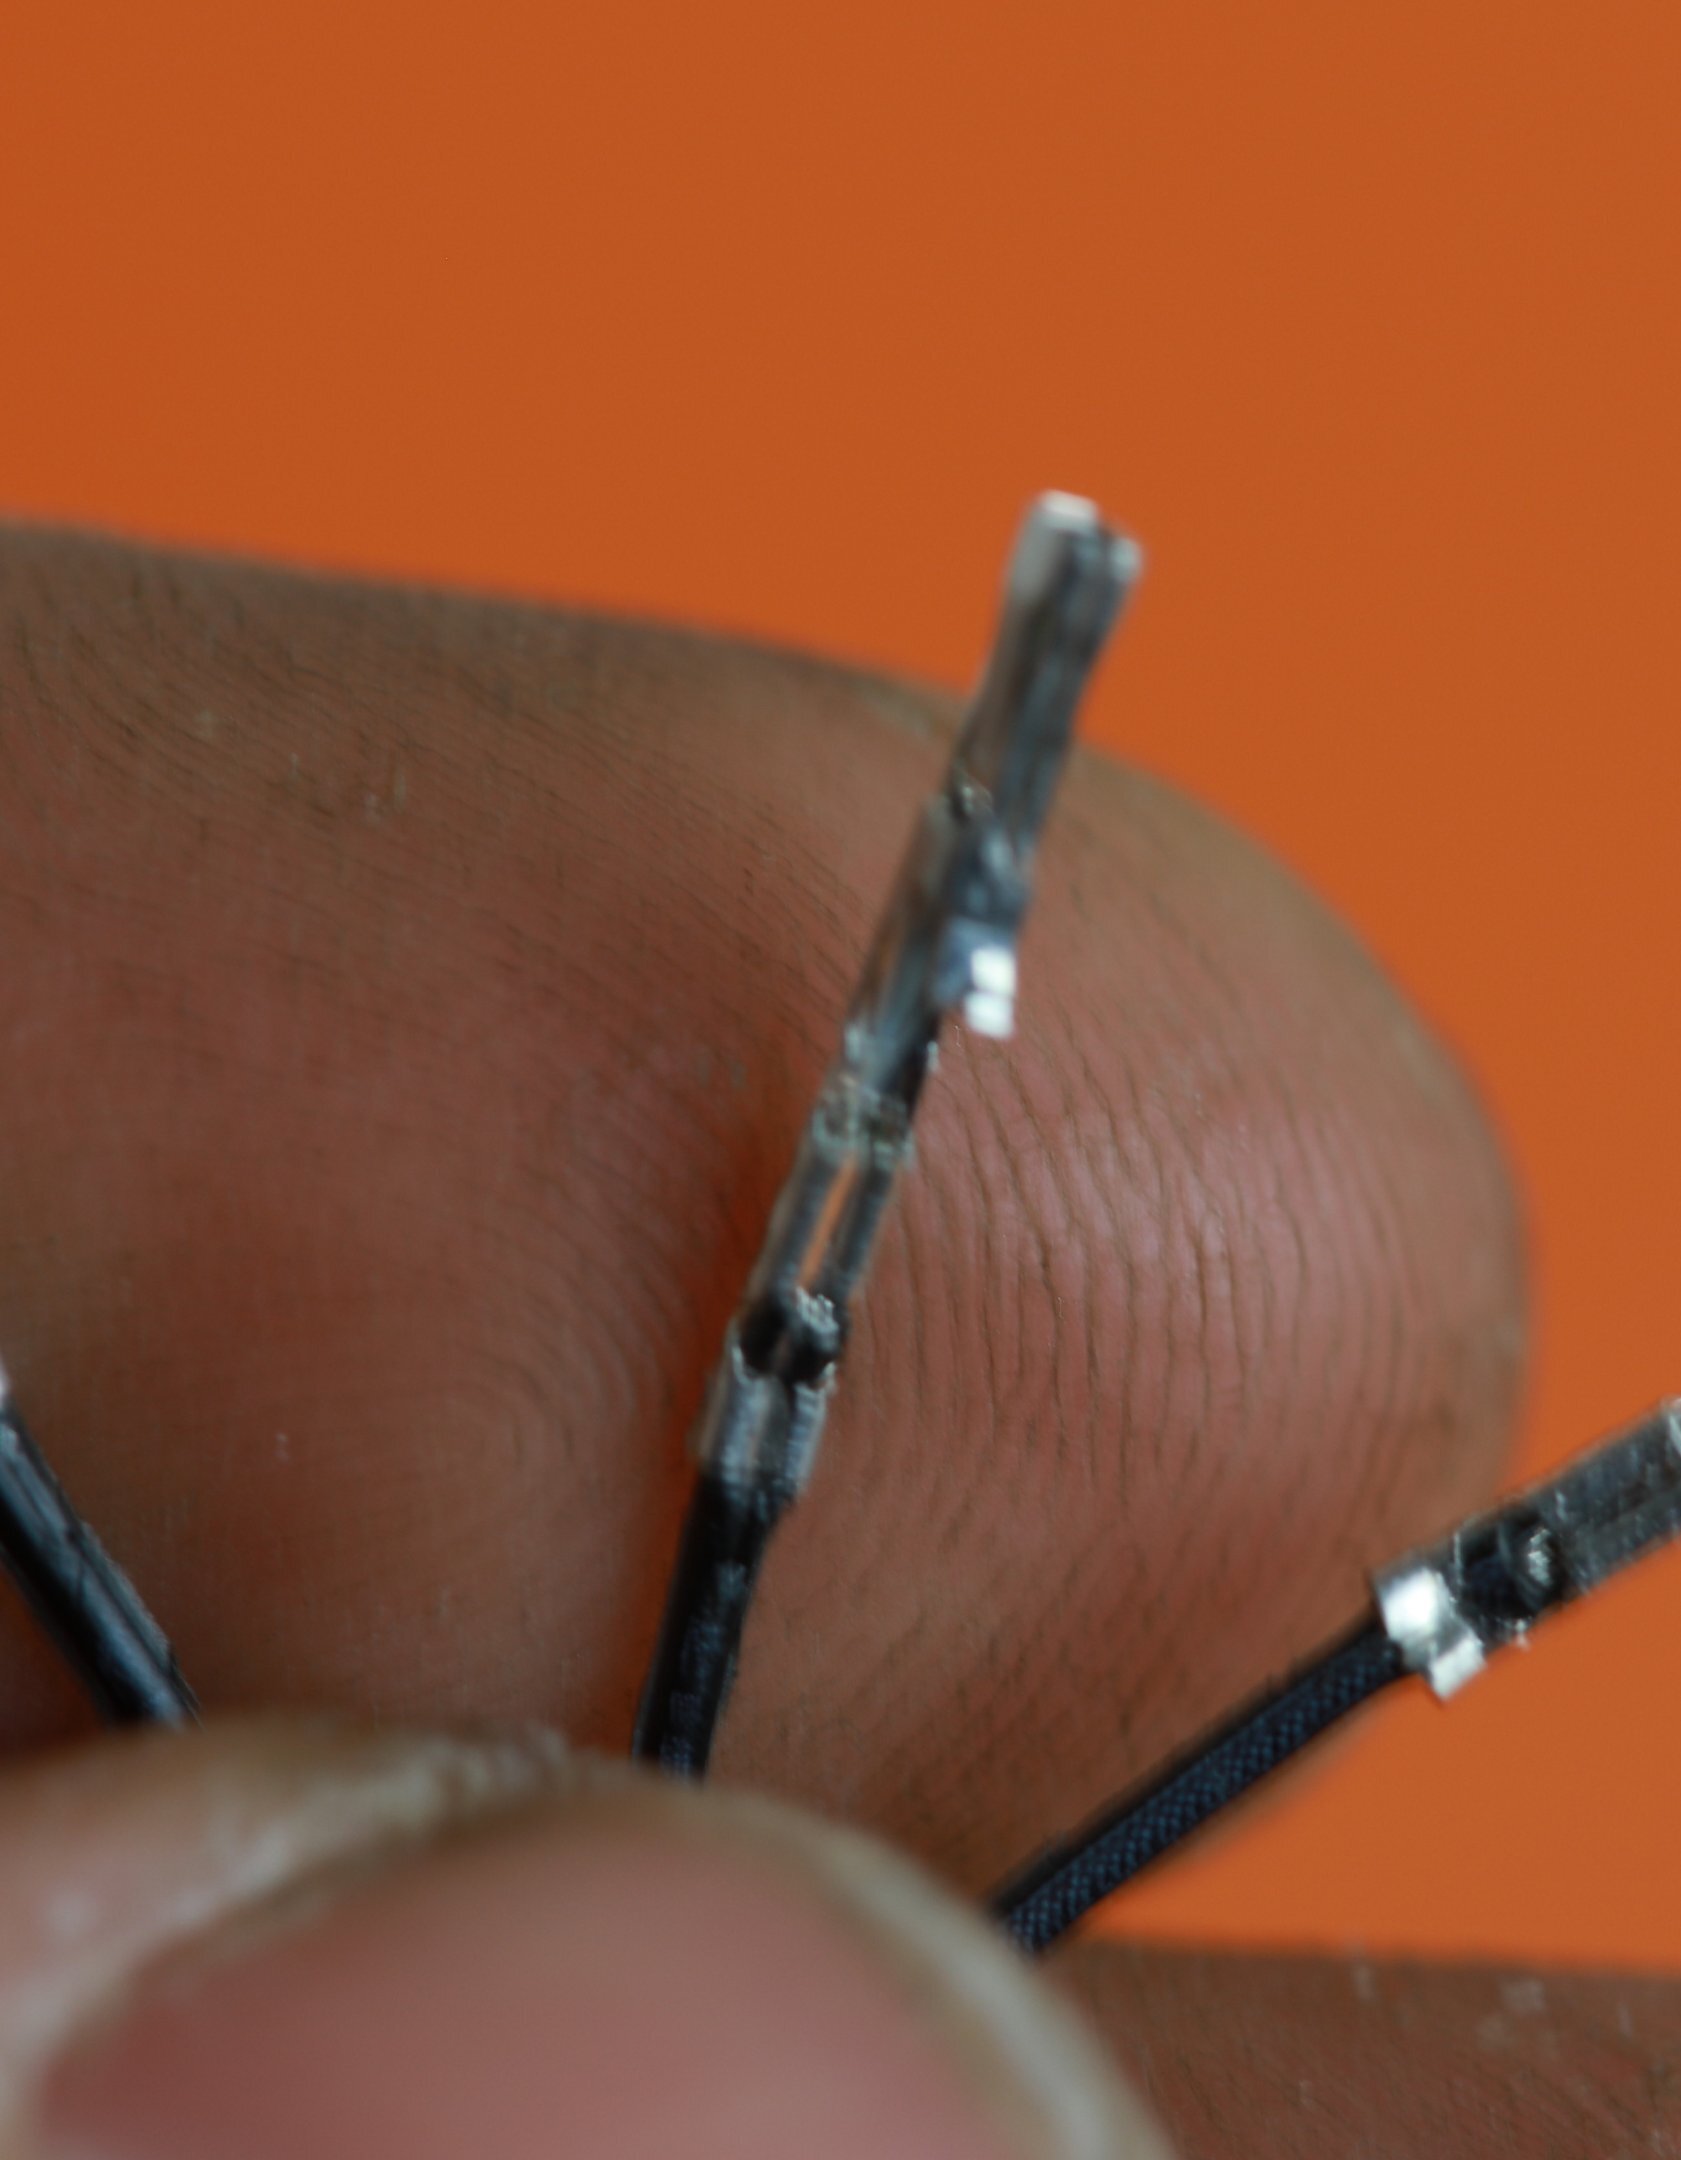
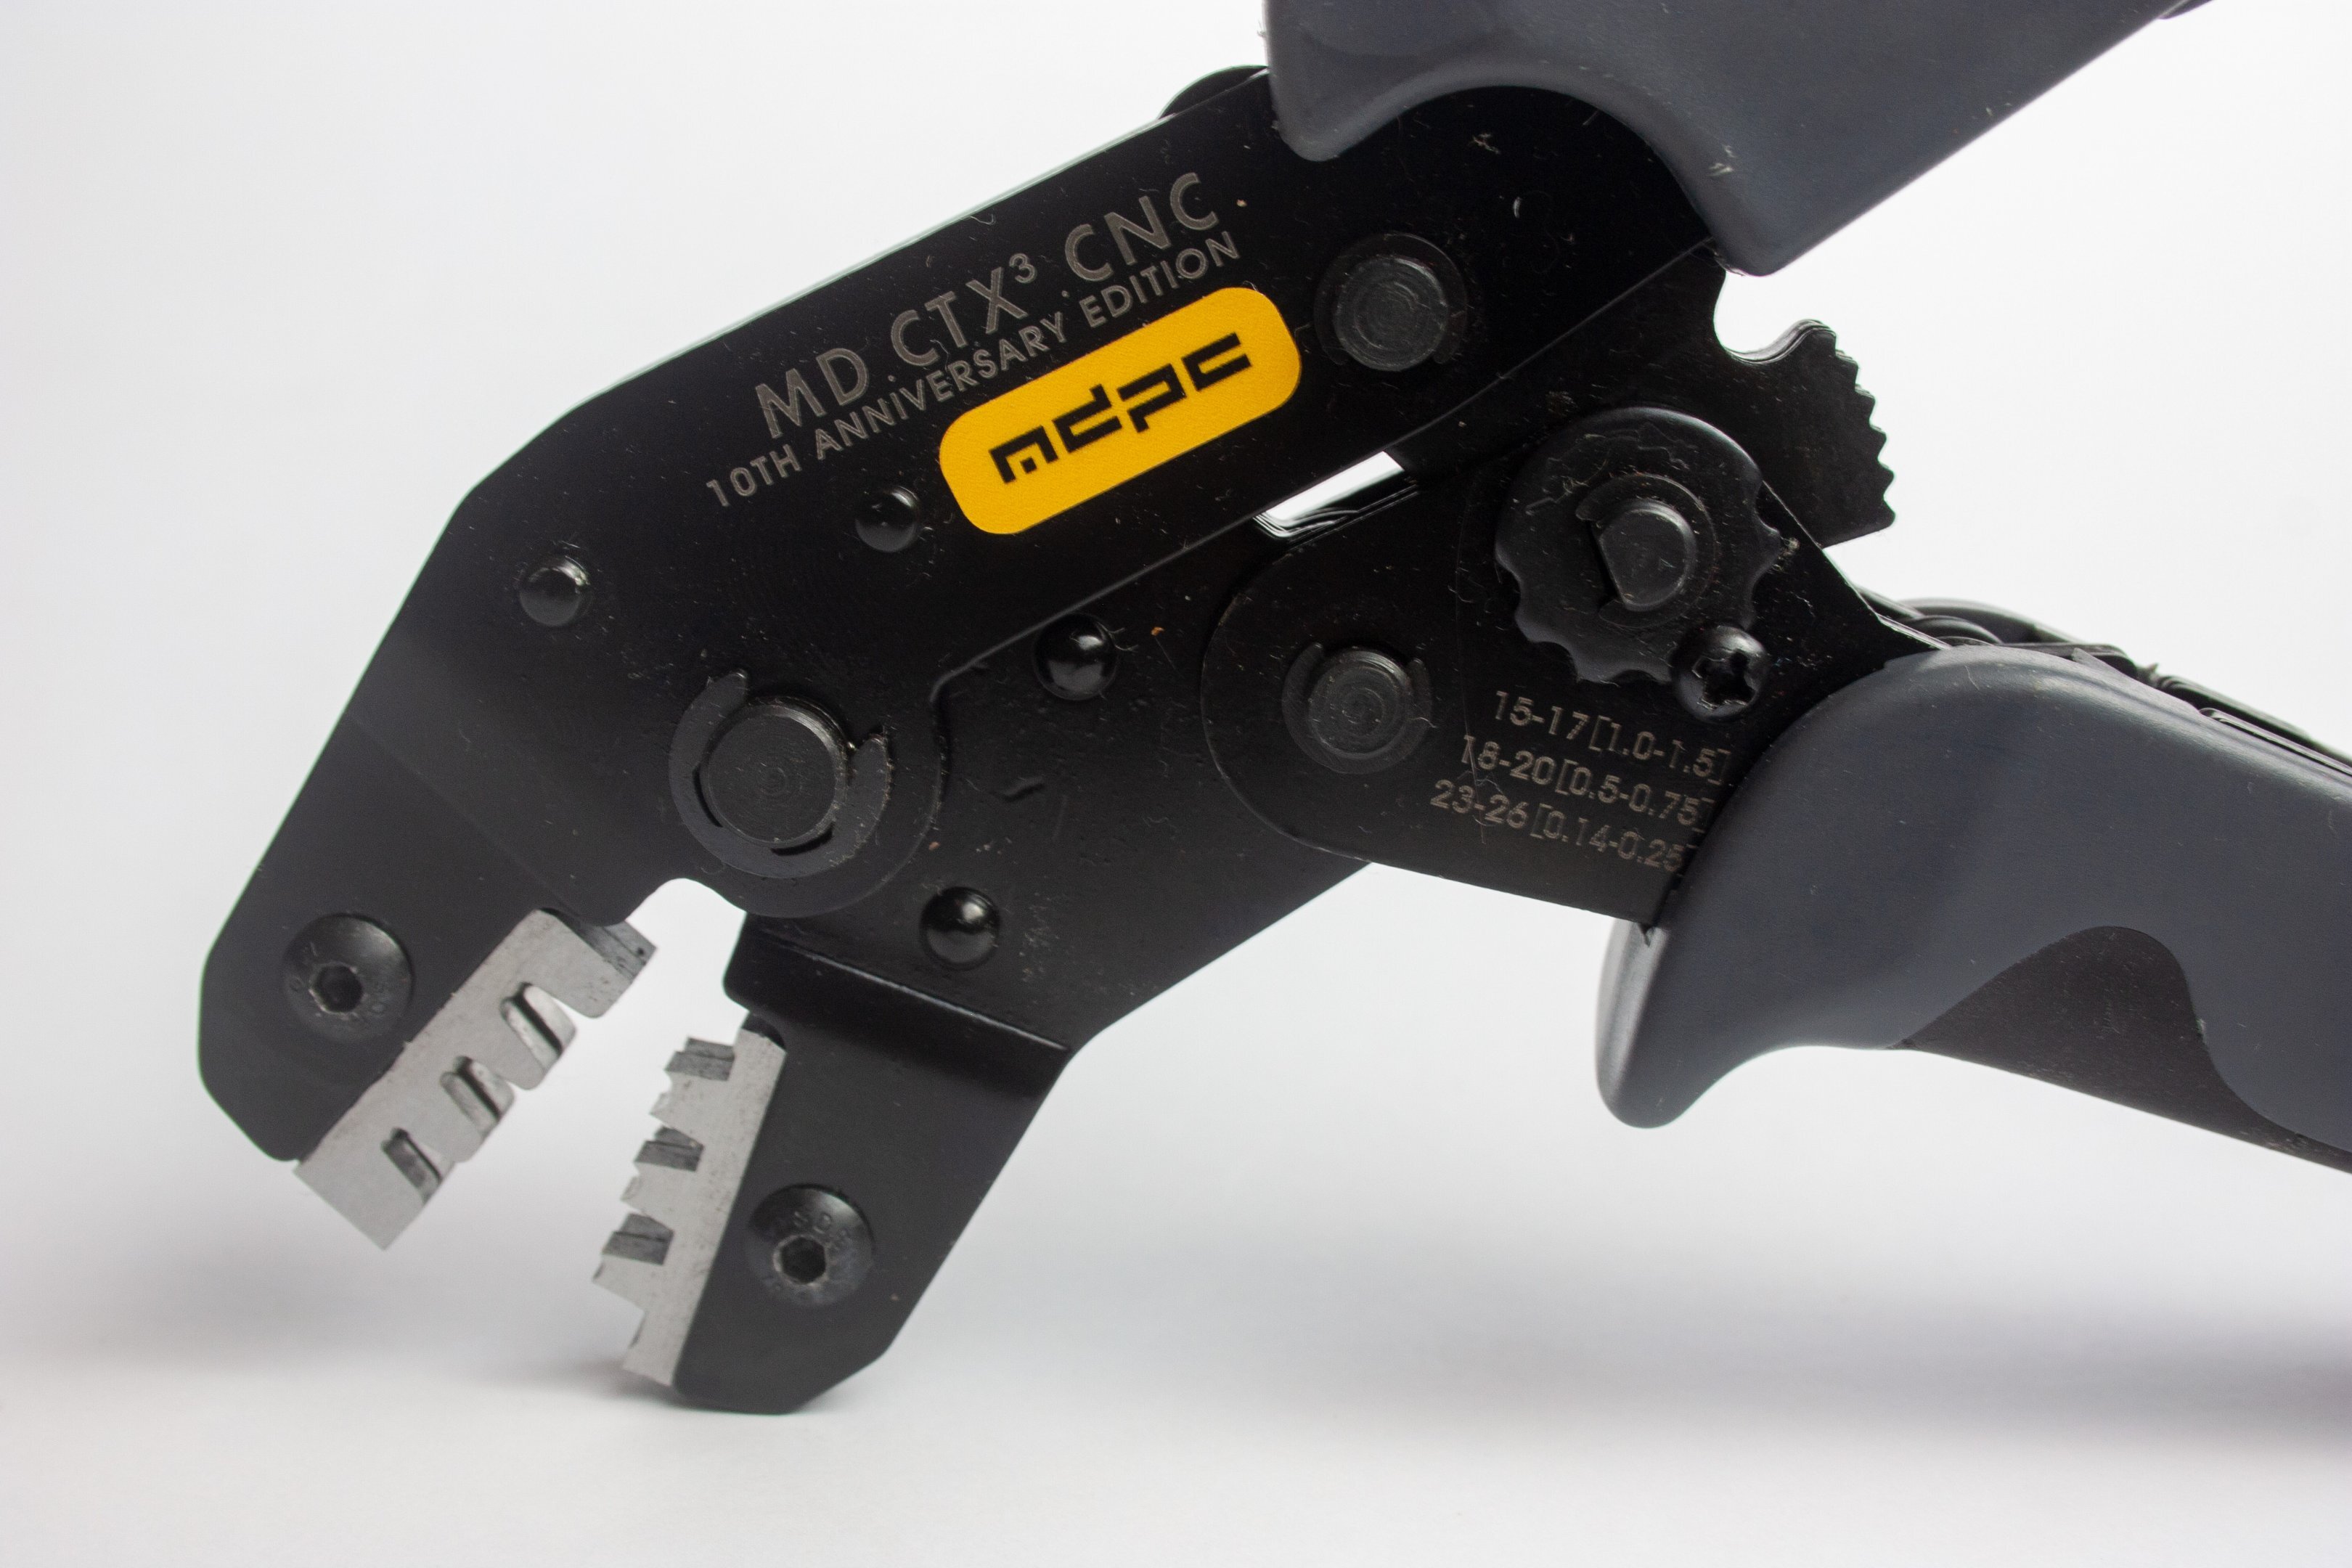
Thankyou! Cheers. I'm getting the hang of it- slowly. These smaller ones are much more of a faff than the regular 22AWG PSU ones. It's the MDPC Crimper. To get the right crimp on the 26AWG I'm using the thinner side of the lowest set in the picture.
-
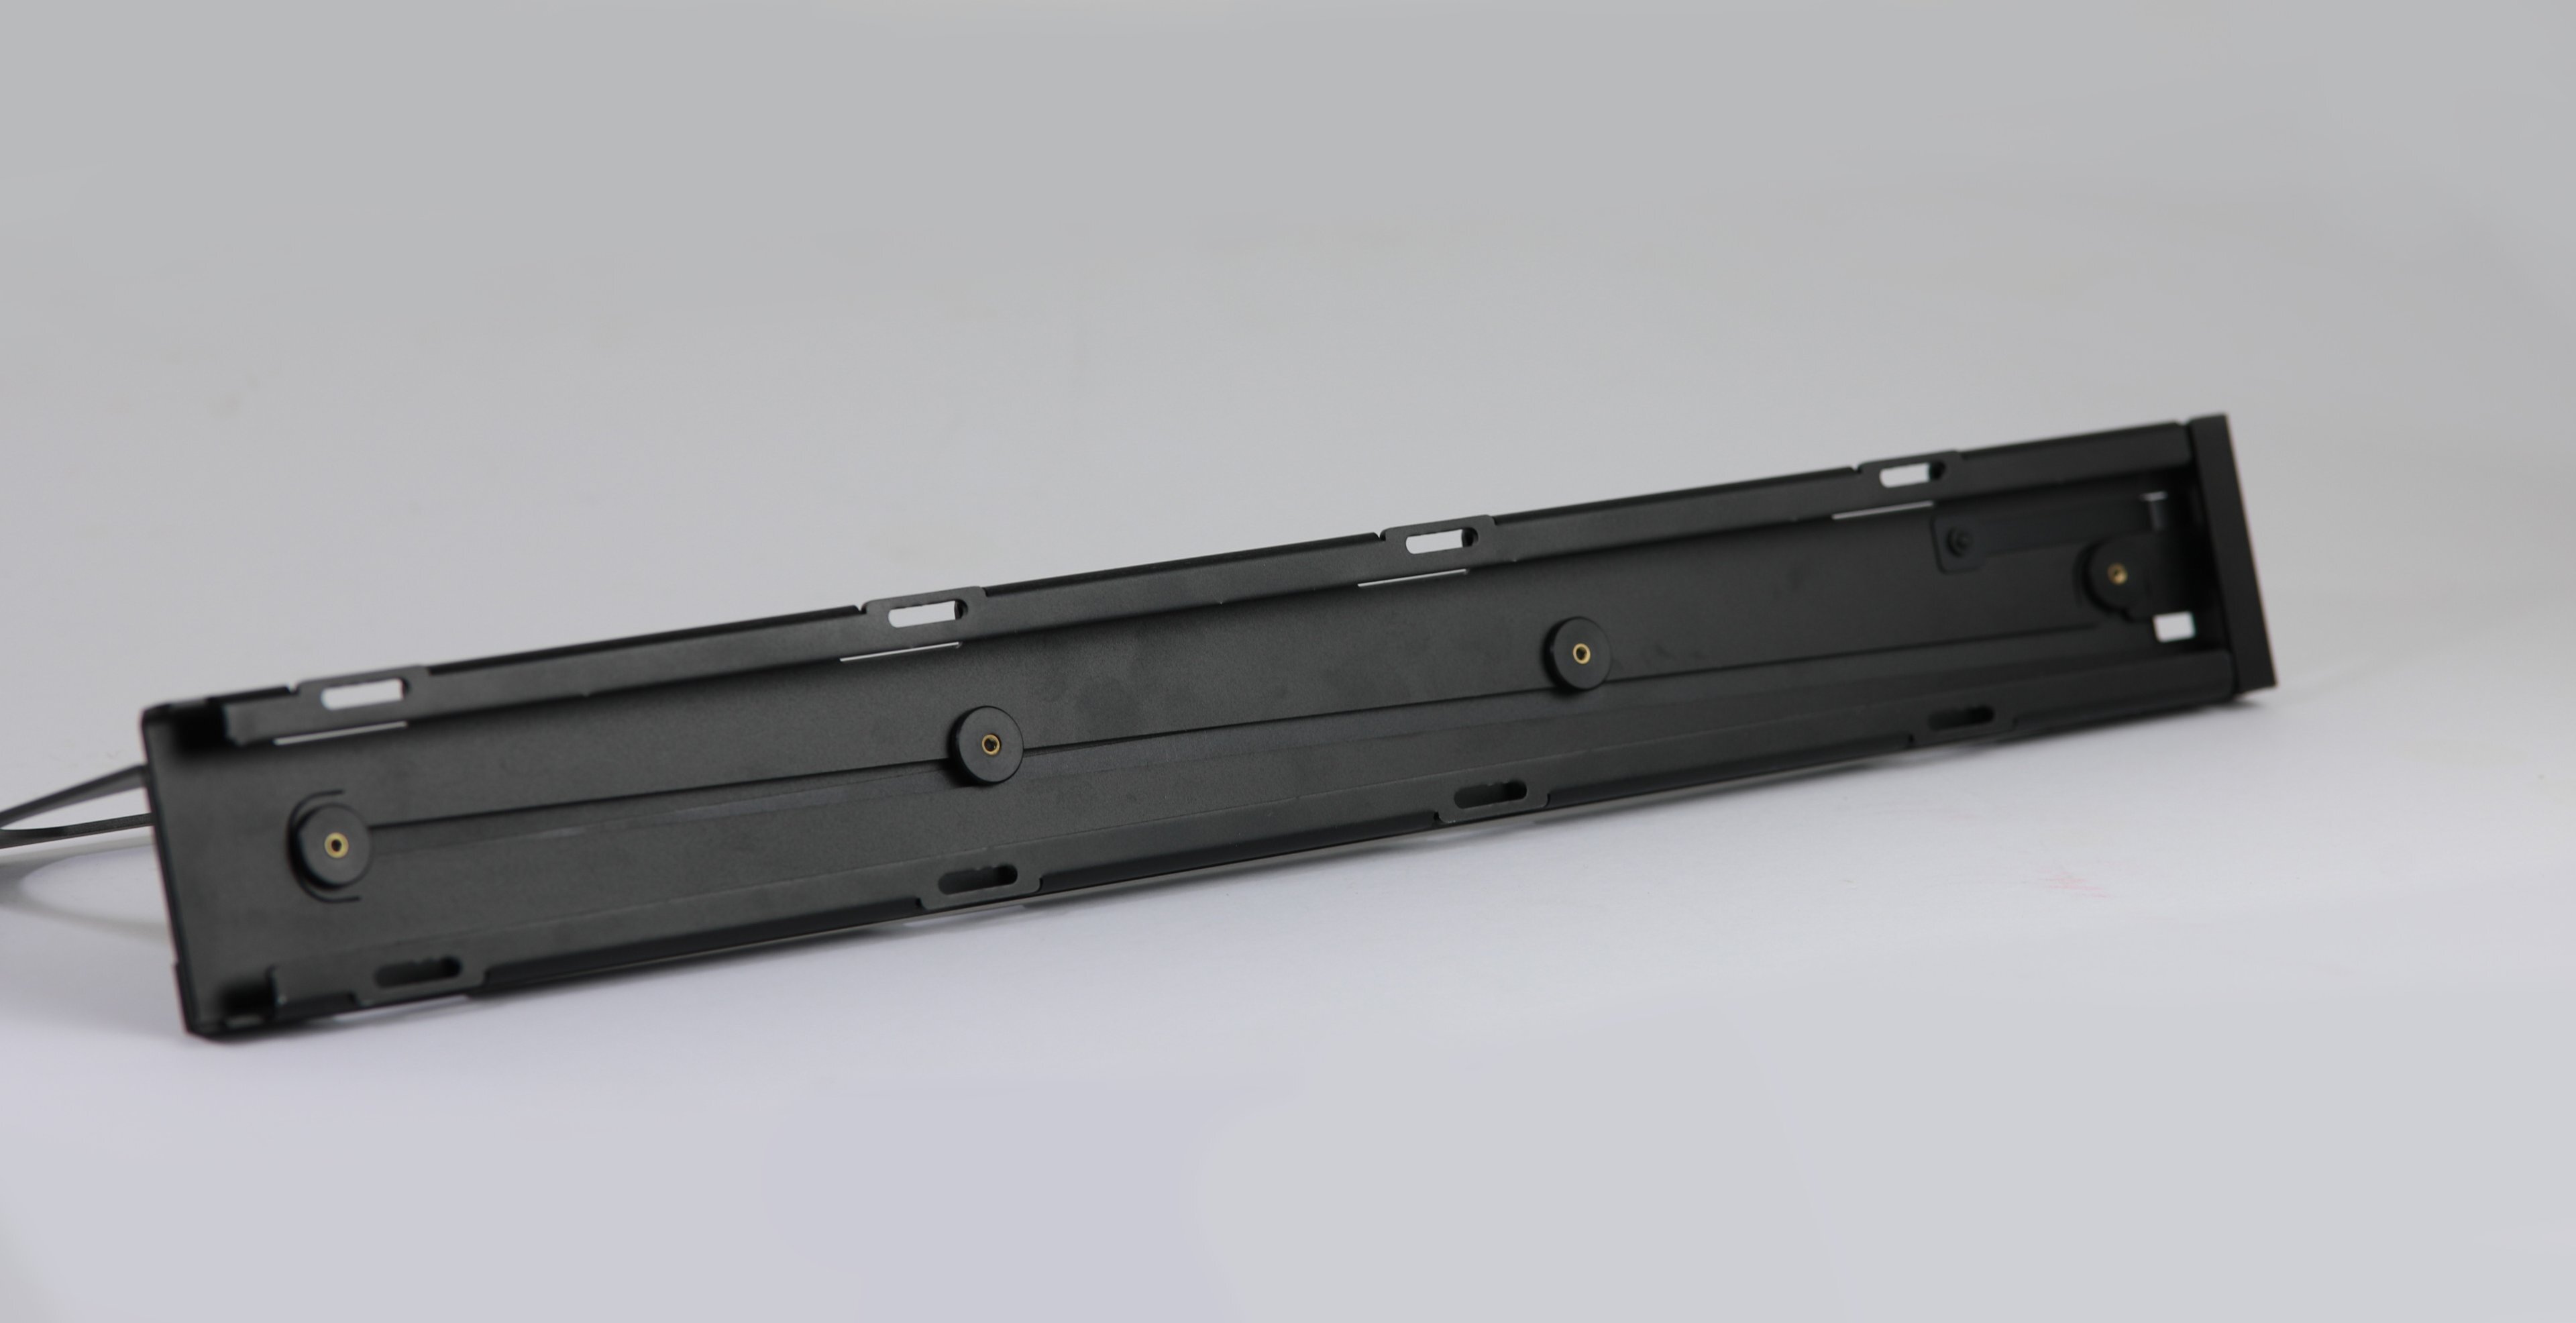
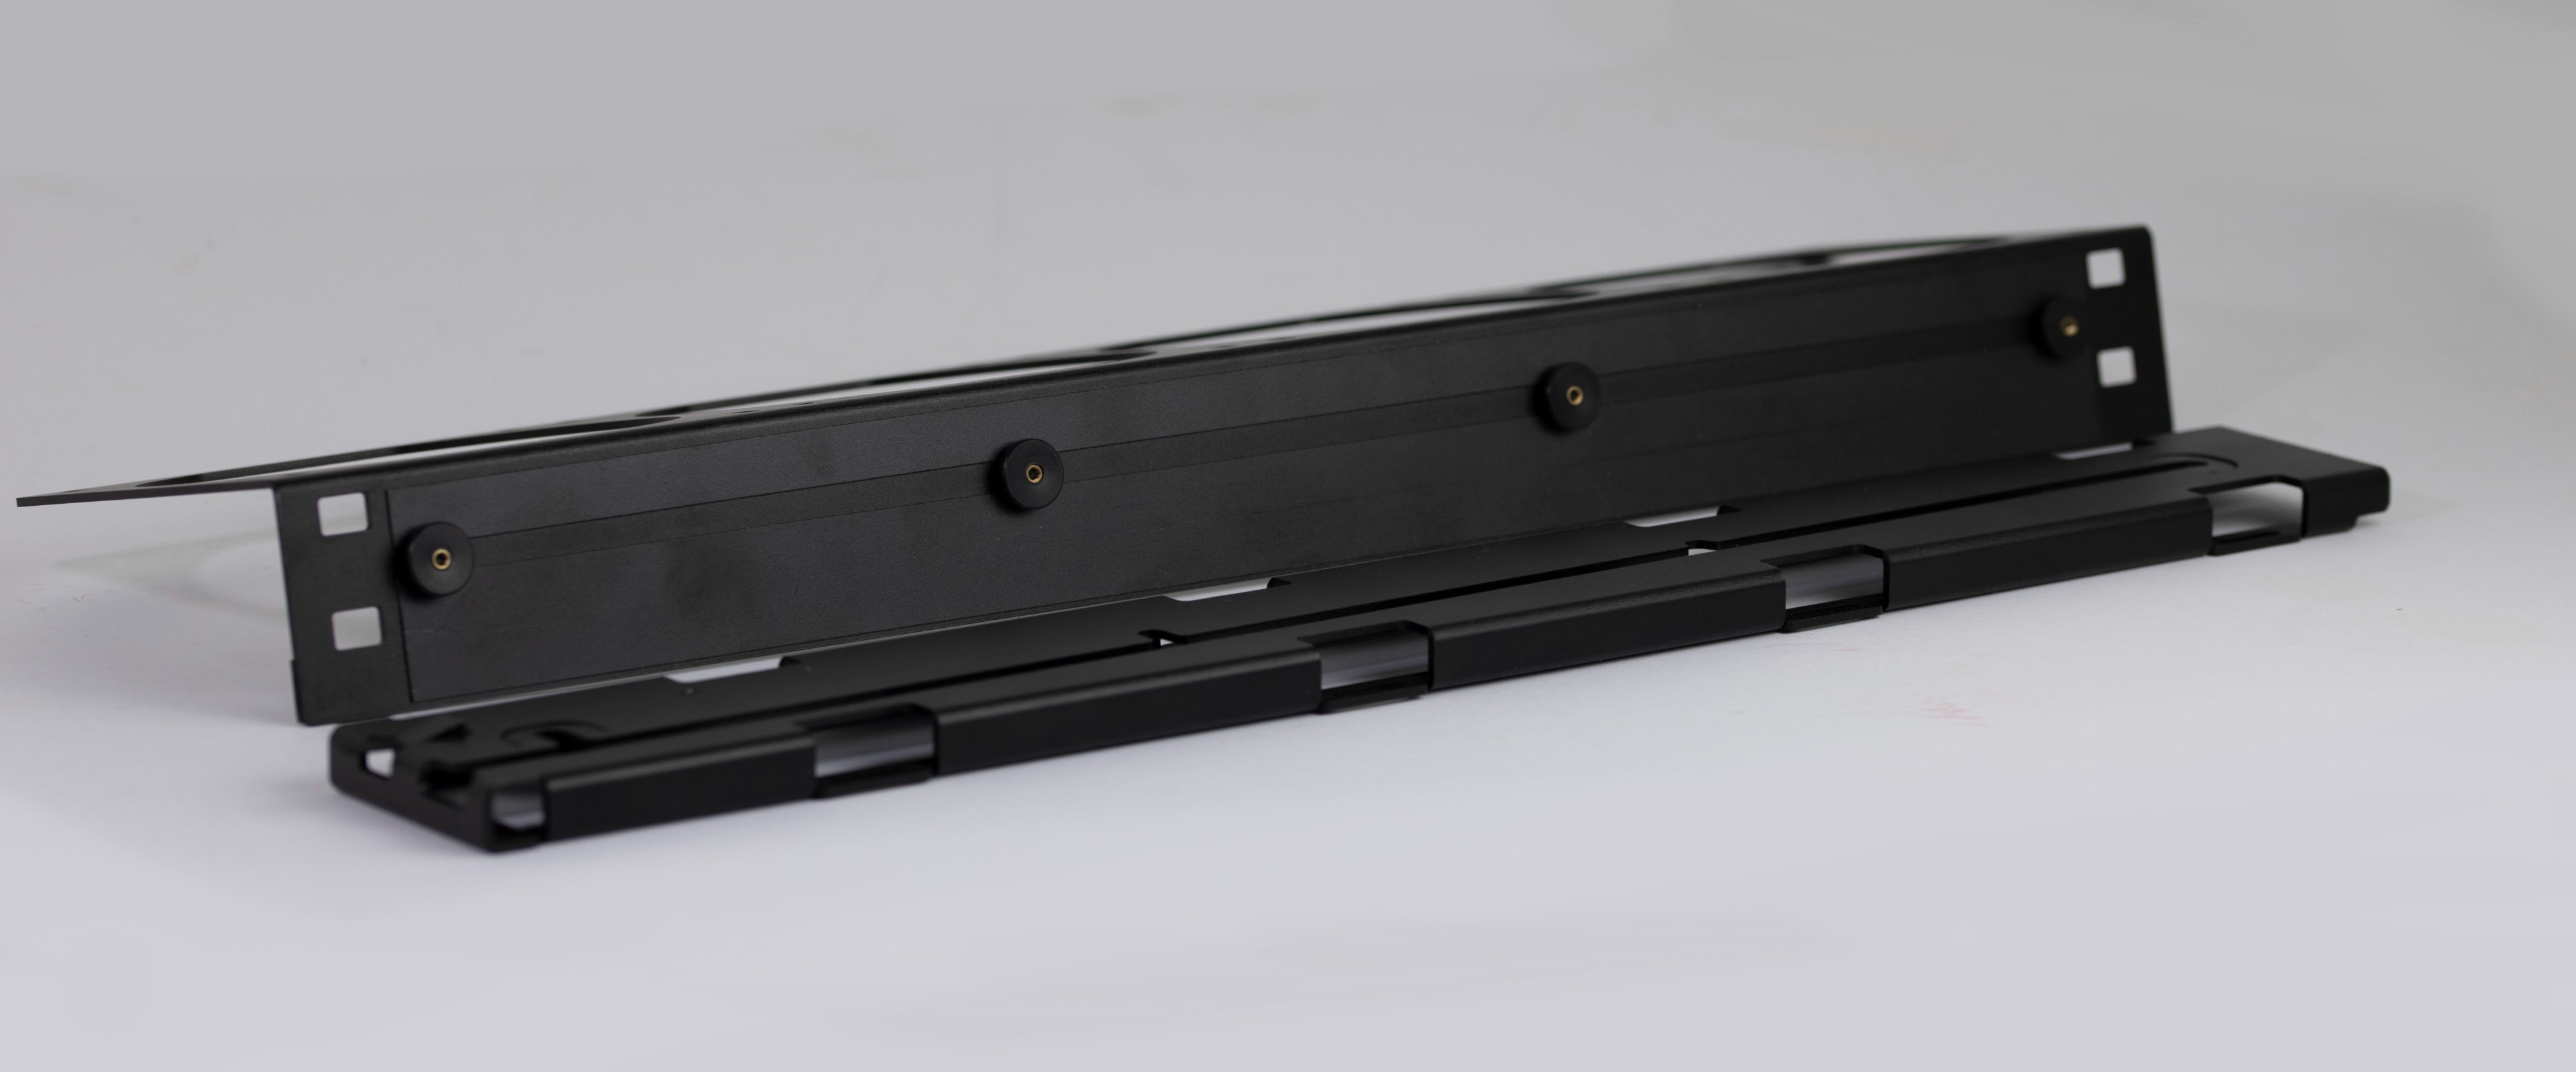
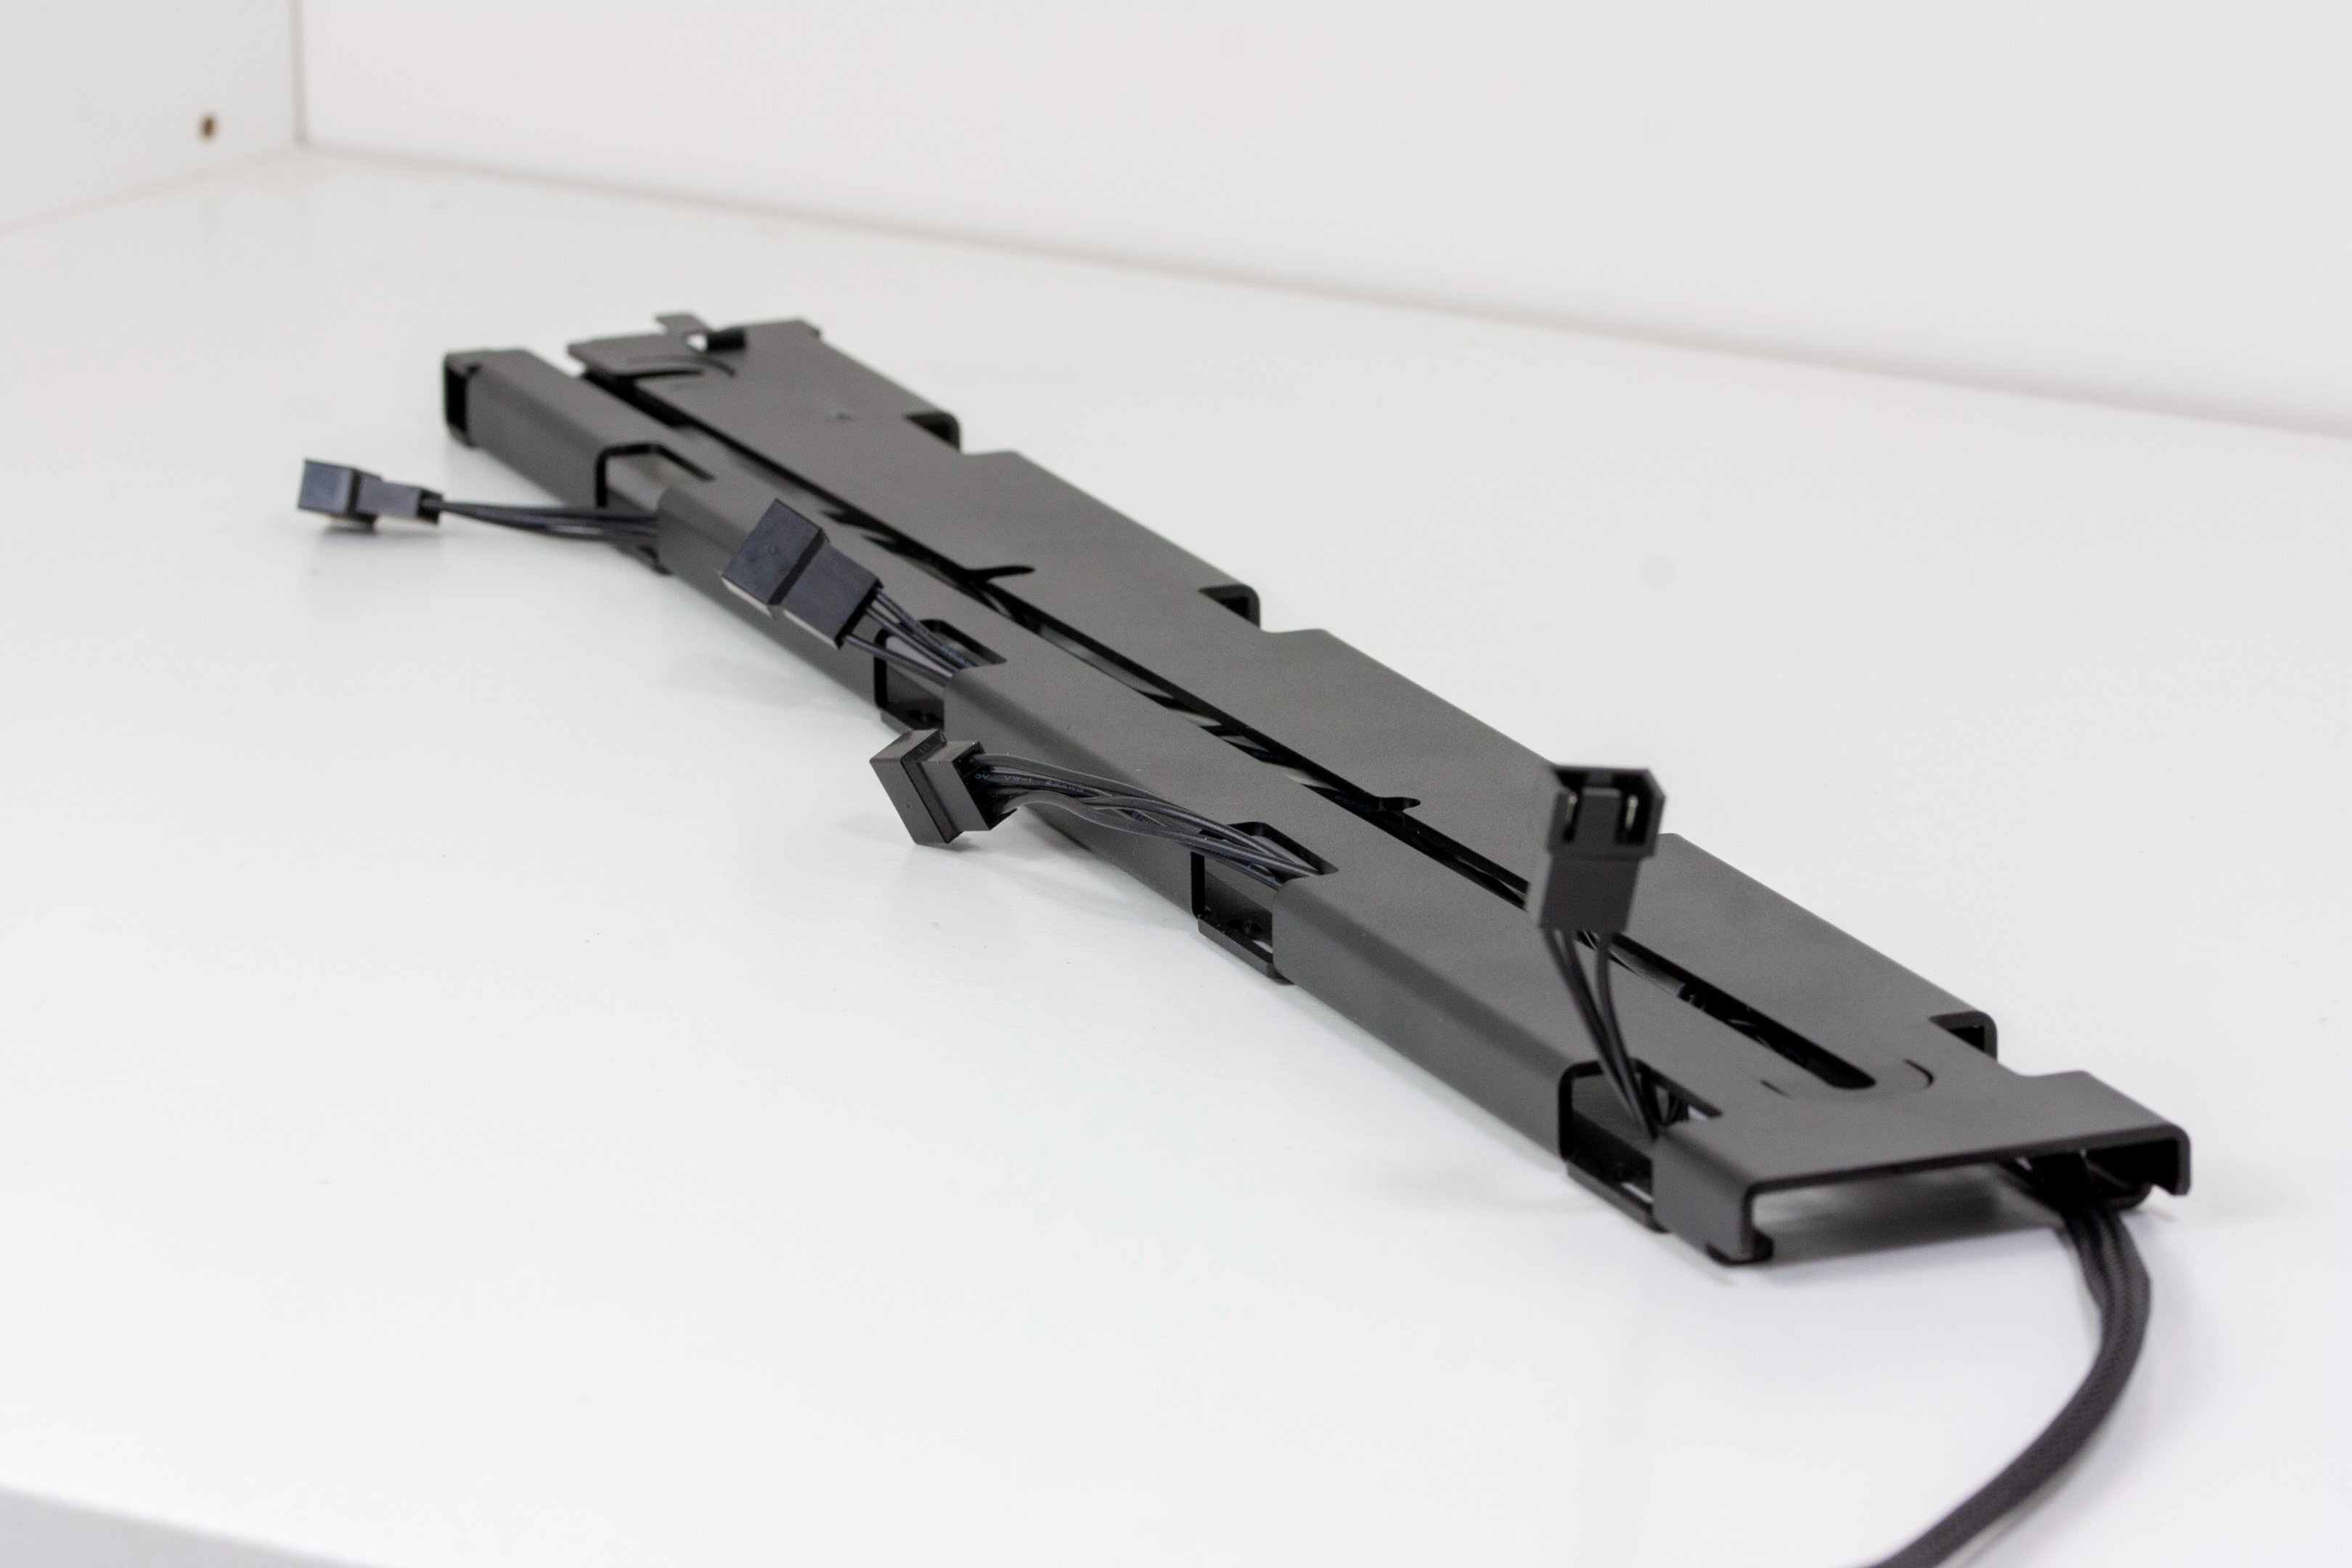
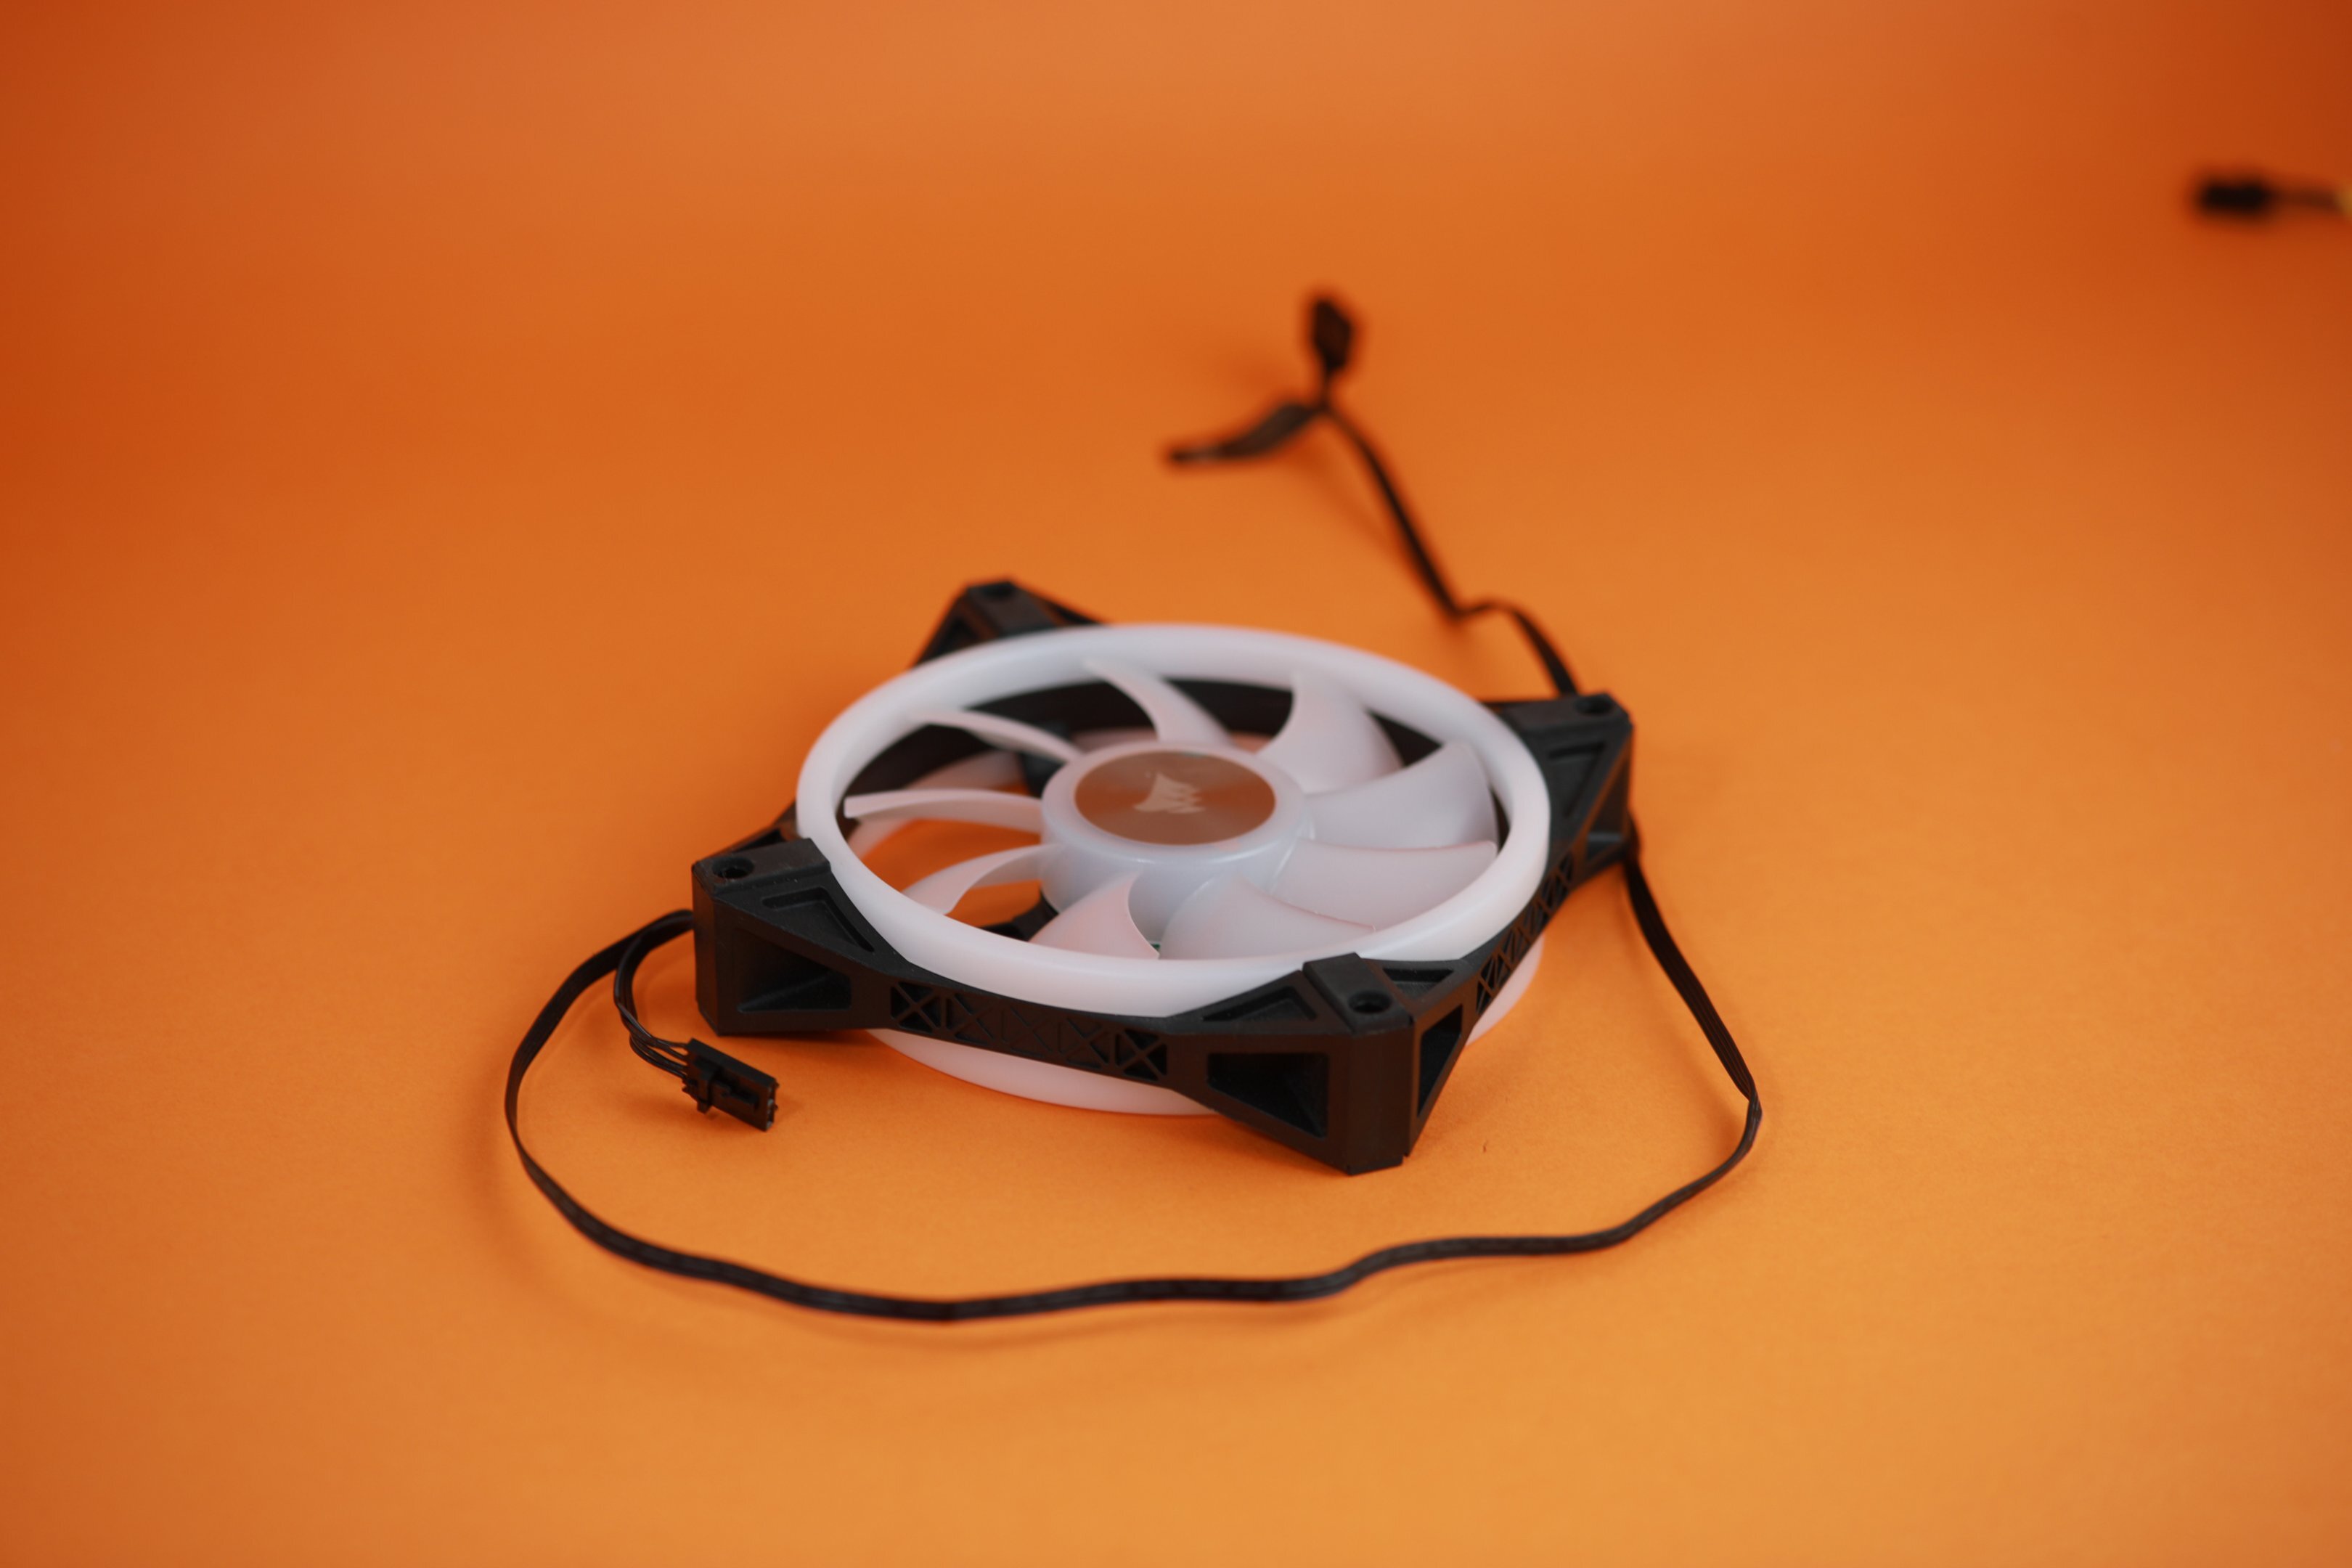
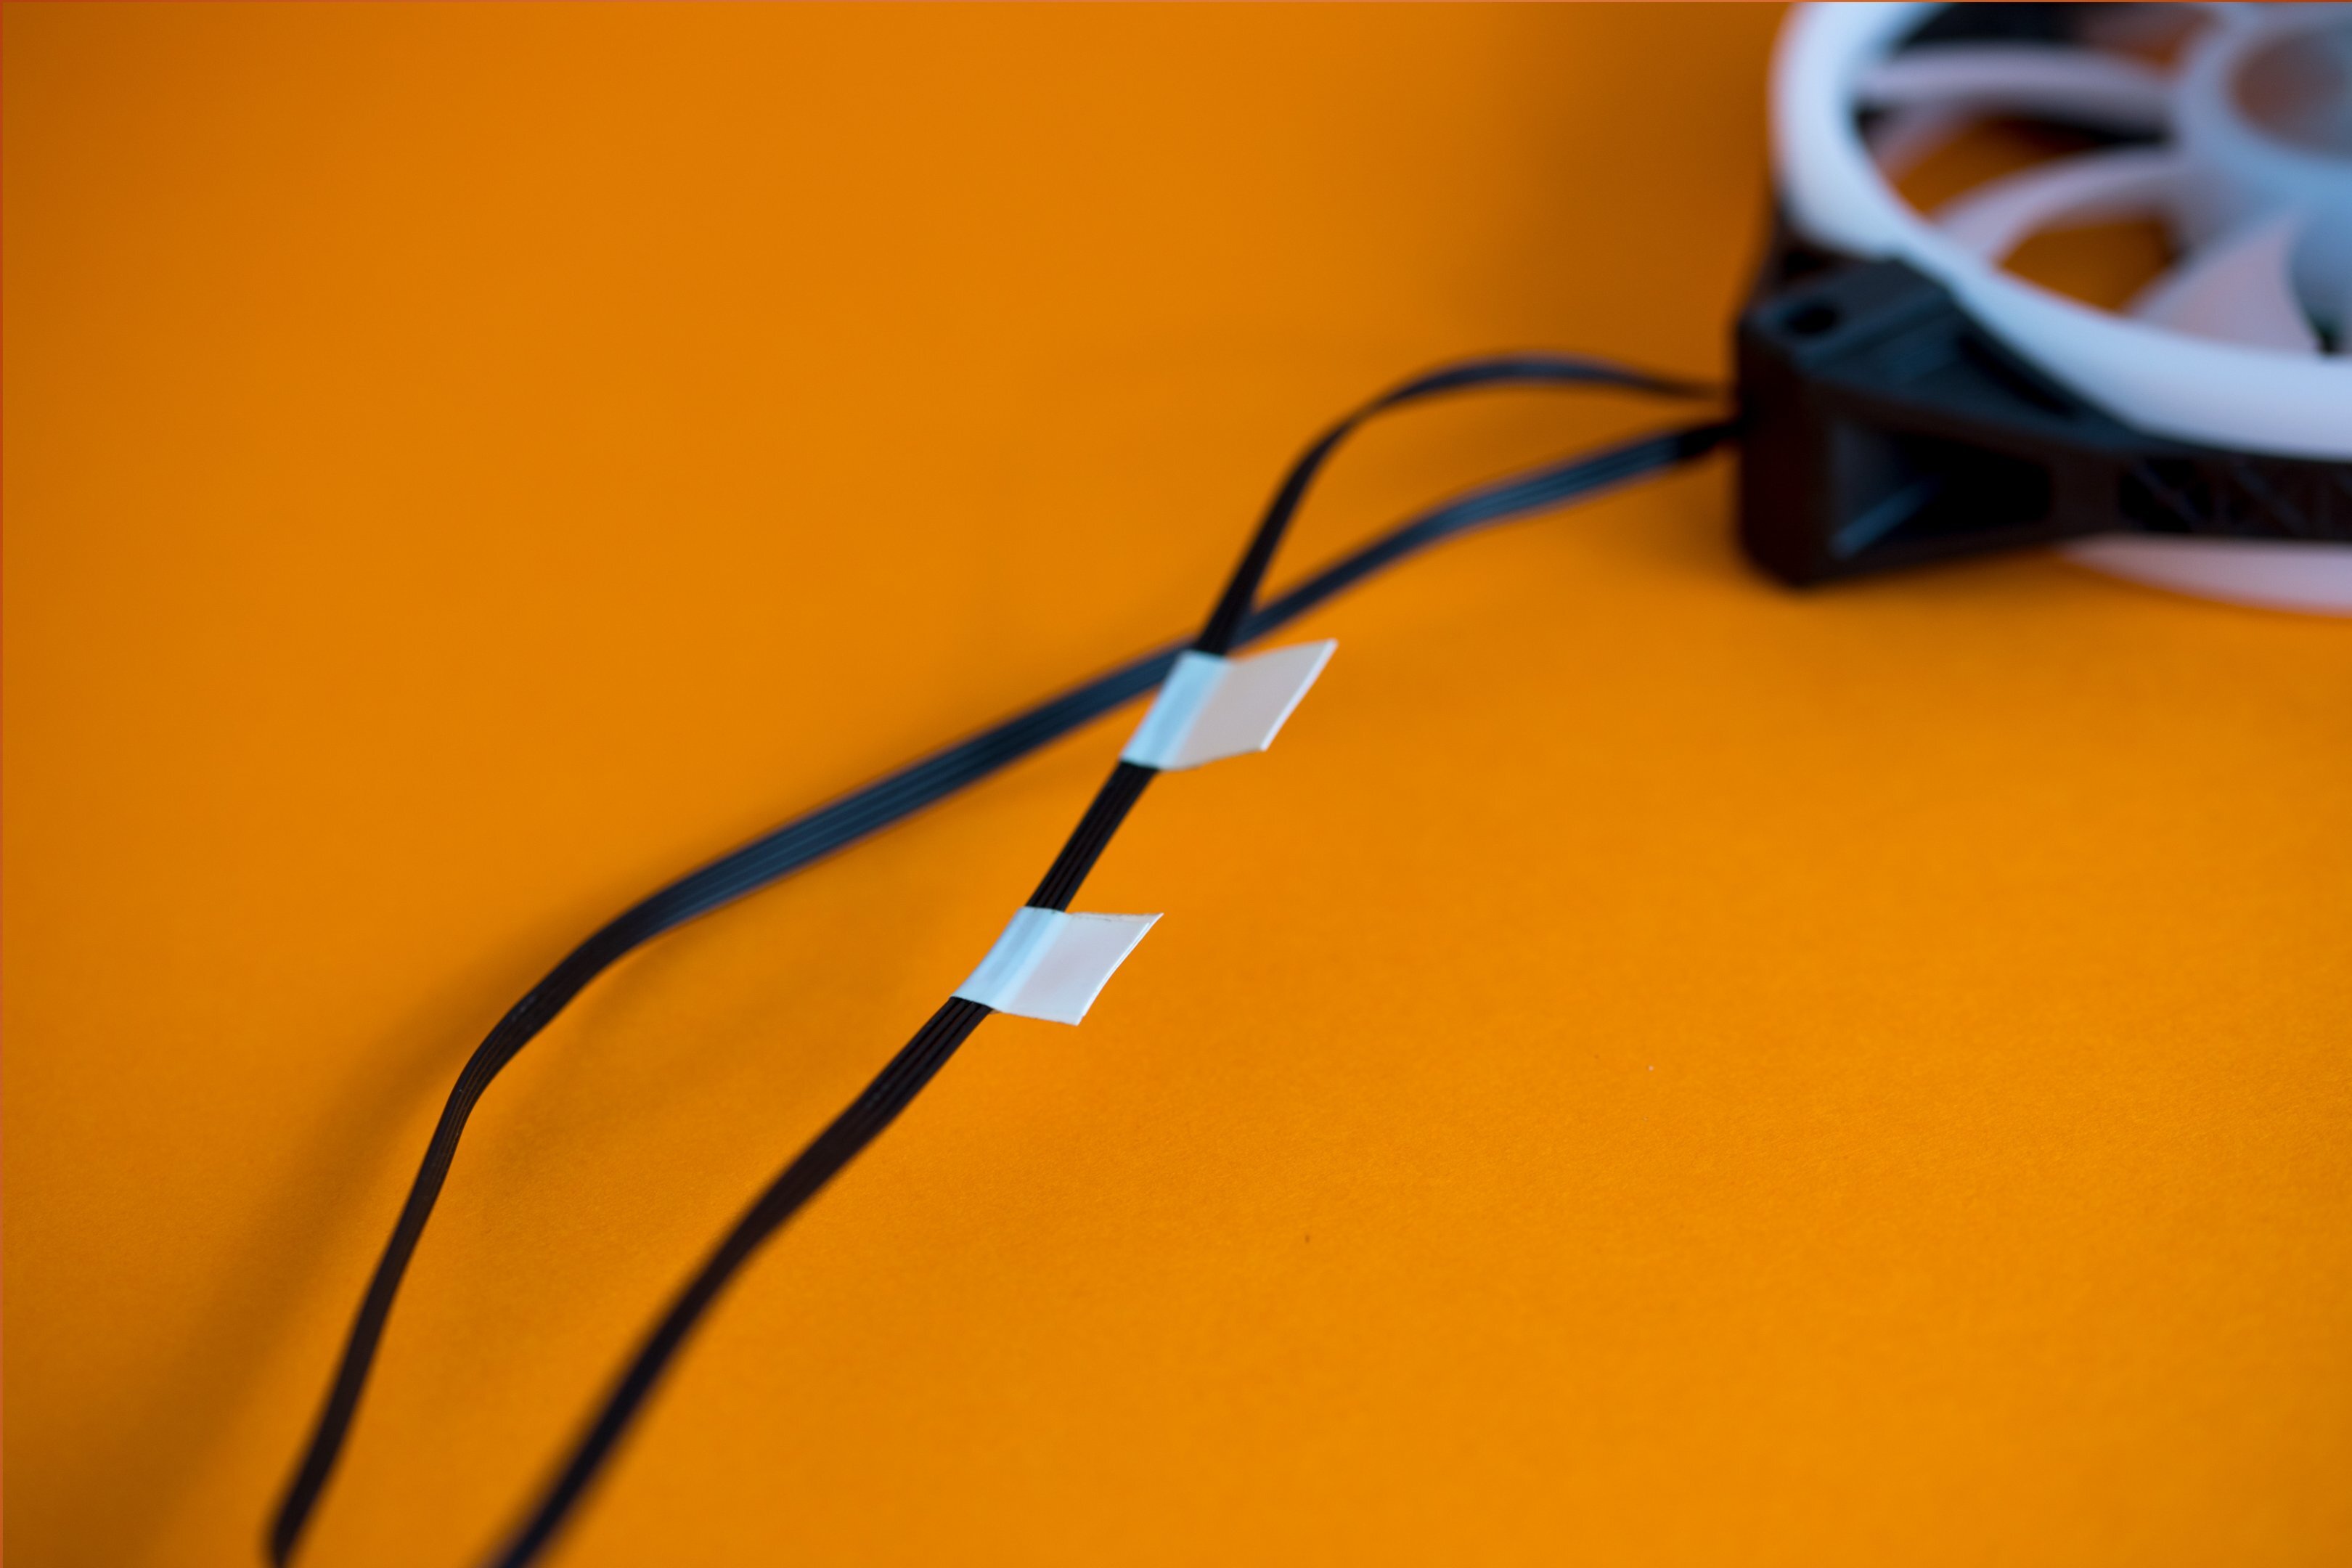
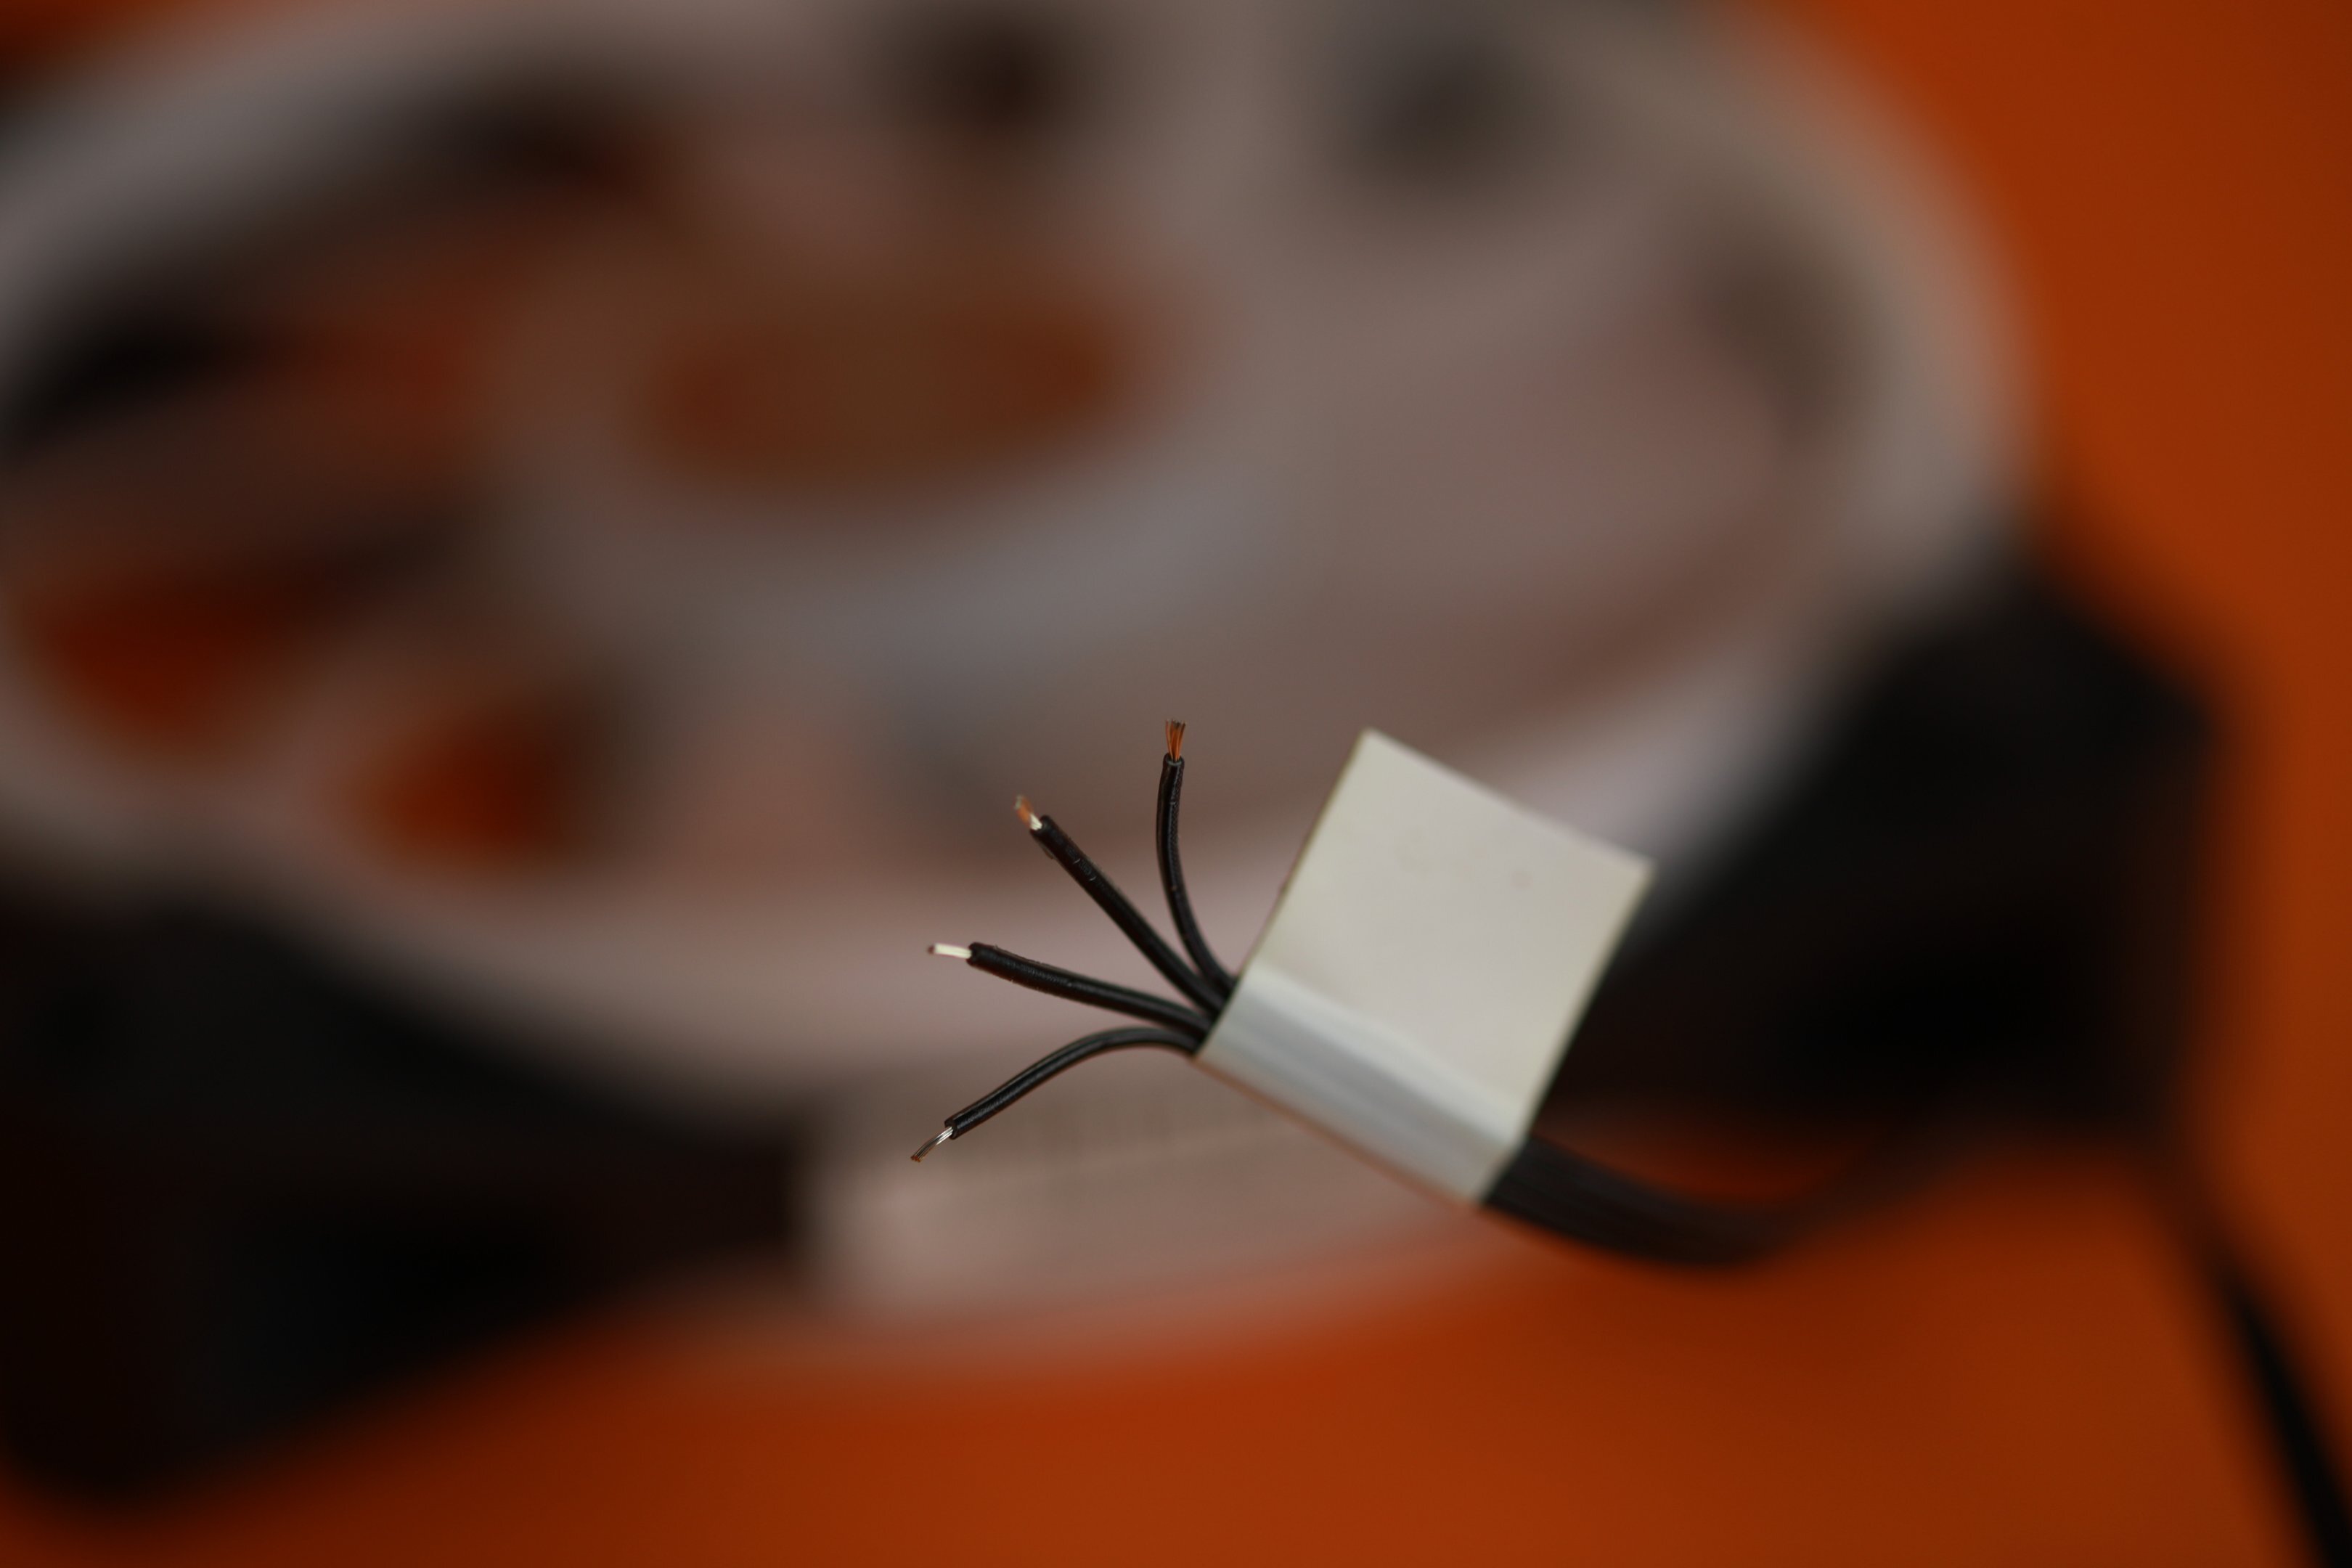
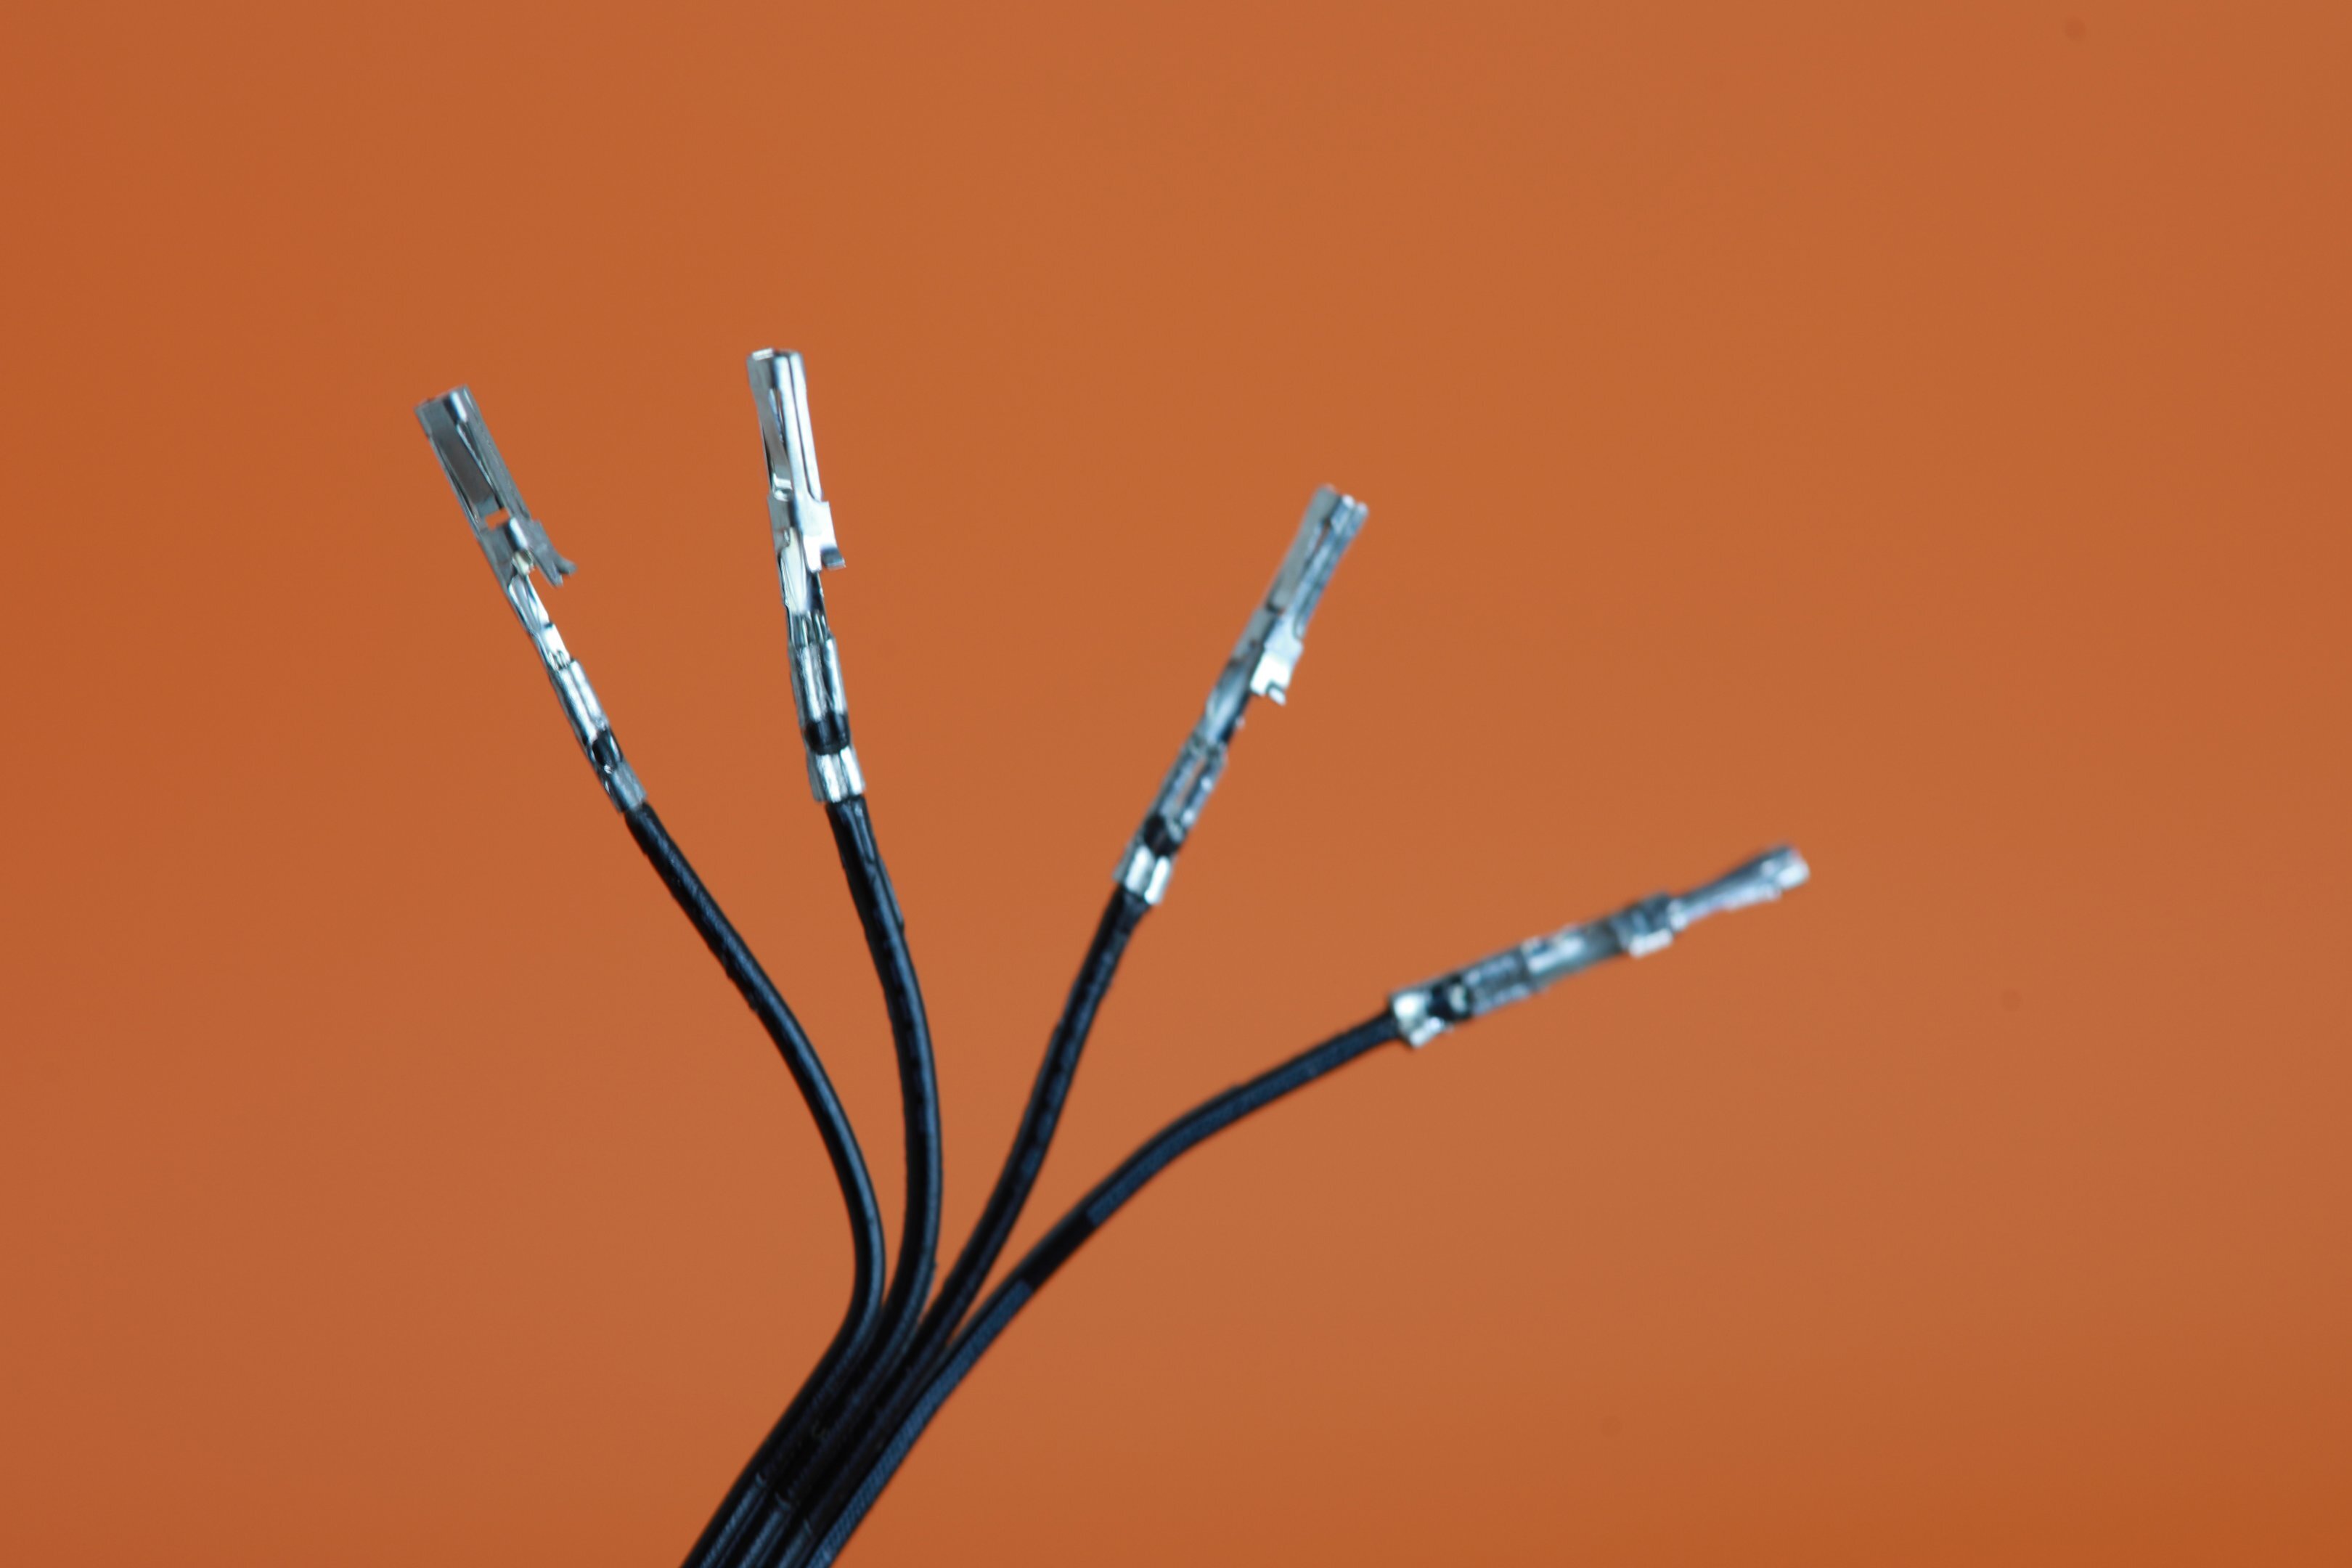
Update time. I'm working on the fans today. Here's the lower radiator bracket that came with the case. The whole thing is aluminium. The top section holds the fans, and it slides onto the bottom section. The little rubber grommits slide through the channel there and clips in. The bottom section screws into the case. And run a 4 way fan splitter cable through the bottom there. My fan cables are way too long! Every extra cm is just going to pile up in a mass of spaghetti in the bottom of this case, and there will be a LOT of cabling down here. So I'm going to shorten the RBG and PWM to fit. I'm going to make an RGB extension cable to match the 4-way fan splitter cable. I've picked up a 26-AWG stripper for these RGB/PWM cables, they are so tiny! Along with the compatible Corsair RGB headers and male/female crimp terminals. A bit tricky to find, so if anyone comes across this in the future, here's the relevant parts for the UK. Female Connector: (Molex 50-57-9404) https://uk.rs-online.com/web/p/wire-housings-plugs/6783161 Male Connector: (Molex 70107-0003) https://uk.rs-online.com/web/p/wire-housings-plugs/6795978 Female Crimp Terminal: (Molex 22AWG 16-02-0102) https://uk.rs-online.com/web/p/crimp-contacts/6794742 Male Crimp Terminal: (Molex 22AWG 16-02-0114) https://uk.rs-online.com/web/p/crimp-contacts/6794742 These crimp terminals are designed for 22AWG, but the actual wires are closer to 26. The crimping can be really fiddly. Here's how to do it. Step 1: Take a piece of Tape to remember which way round the wires connect before you cut it! Wires cut and stripped. Crimped. Gardeners fingers hah. The terminals are so damn tiny, it can be really fiddly. I found crimping the terminal to the plastic first, then the terminal to the stripped wire as separate operations with the crimping tool to be most effective. Back in the connector. Took bloomin ages actually, but I've done 4/6 RGB cables.... then all the PWM ones to go Totally worth it for those tidy cables though right? Finished RGB vs regular PWM. Hope you enjoy the orange background, I'm getting bored of white lightboxes xD More to come soon!
-
Oh, I was going to link this video from Linus about the case if anyone's interested in it.
-
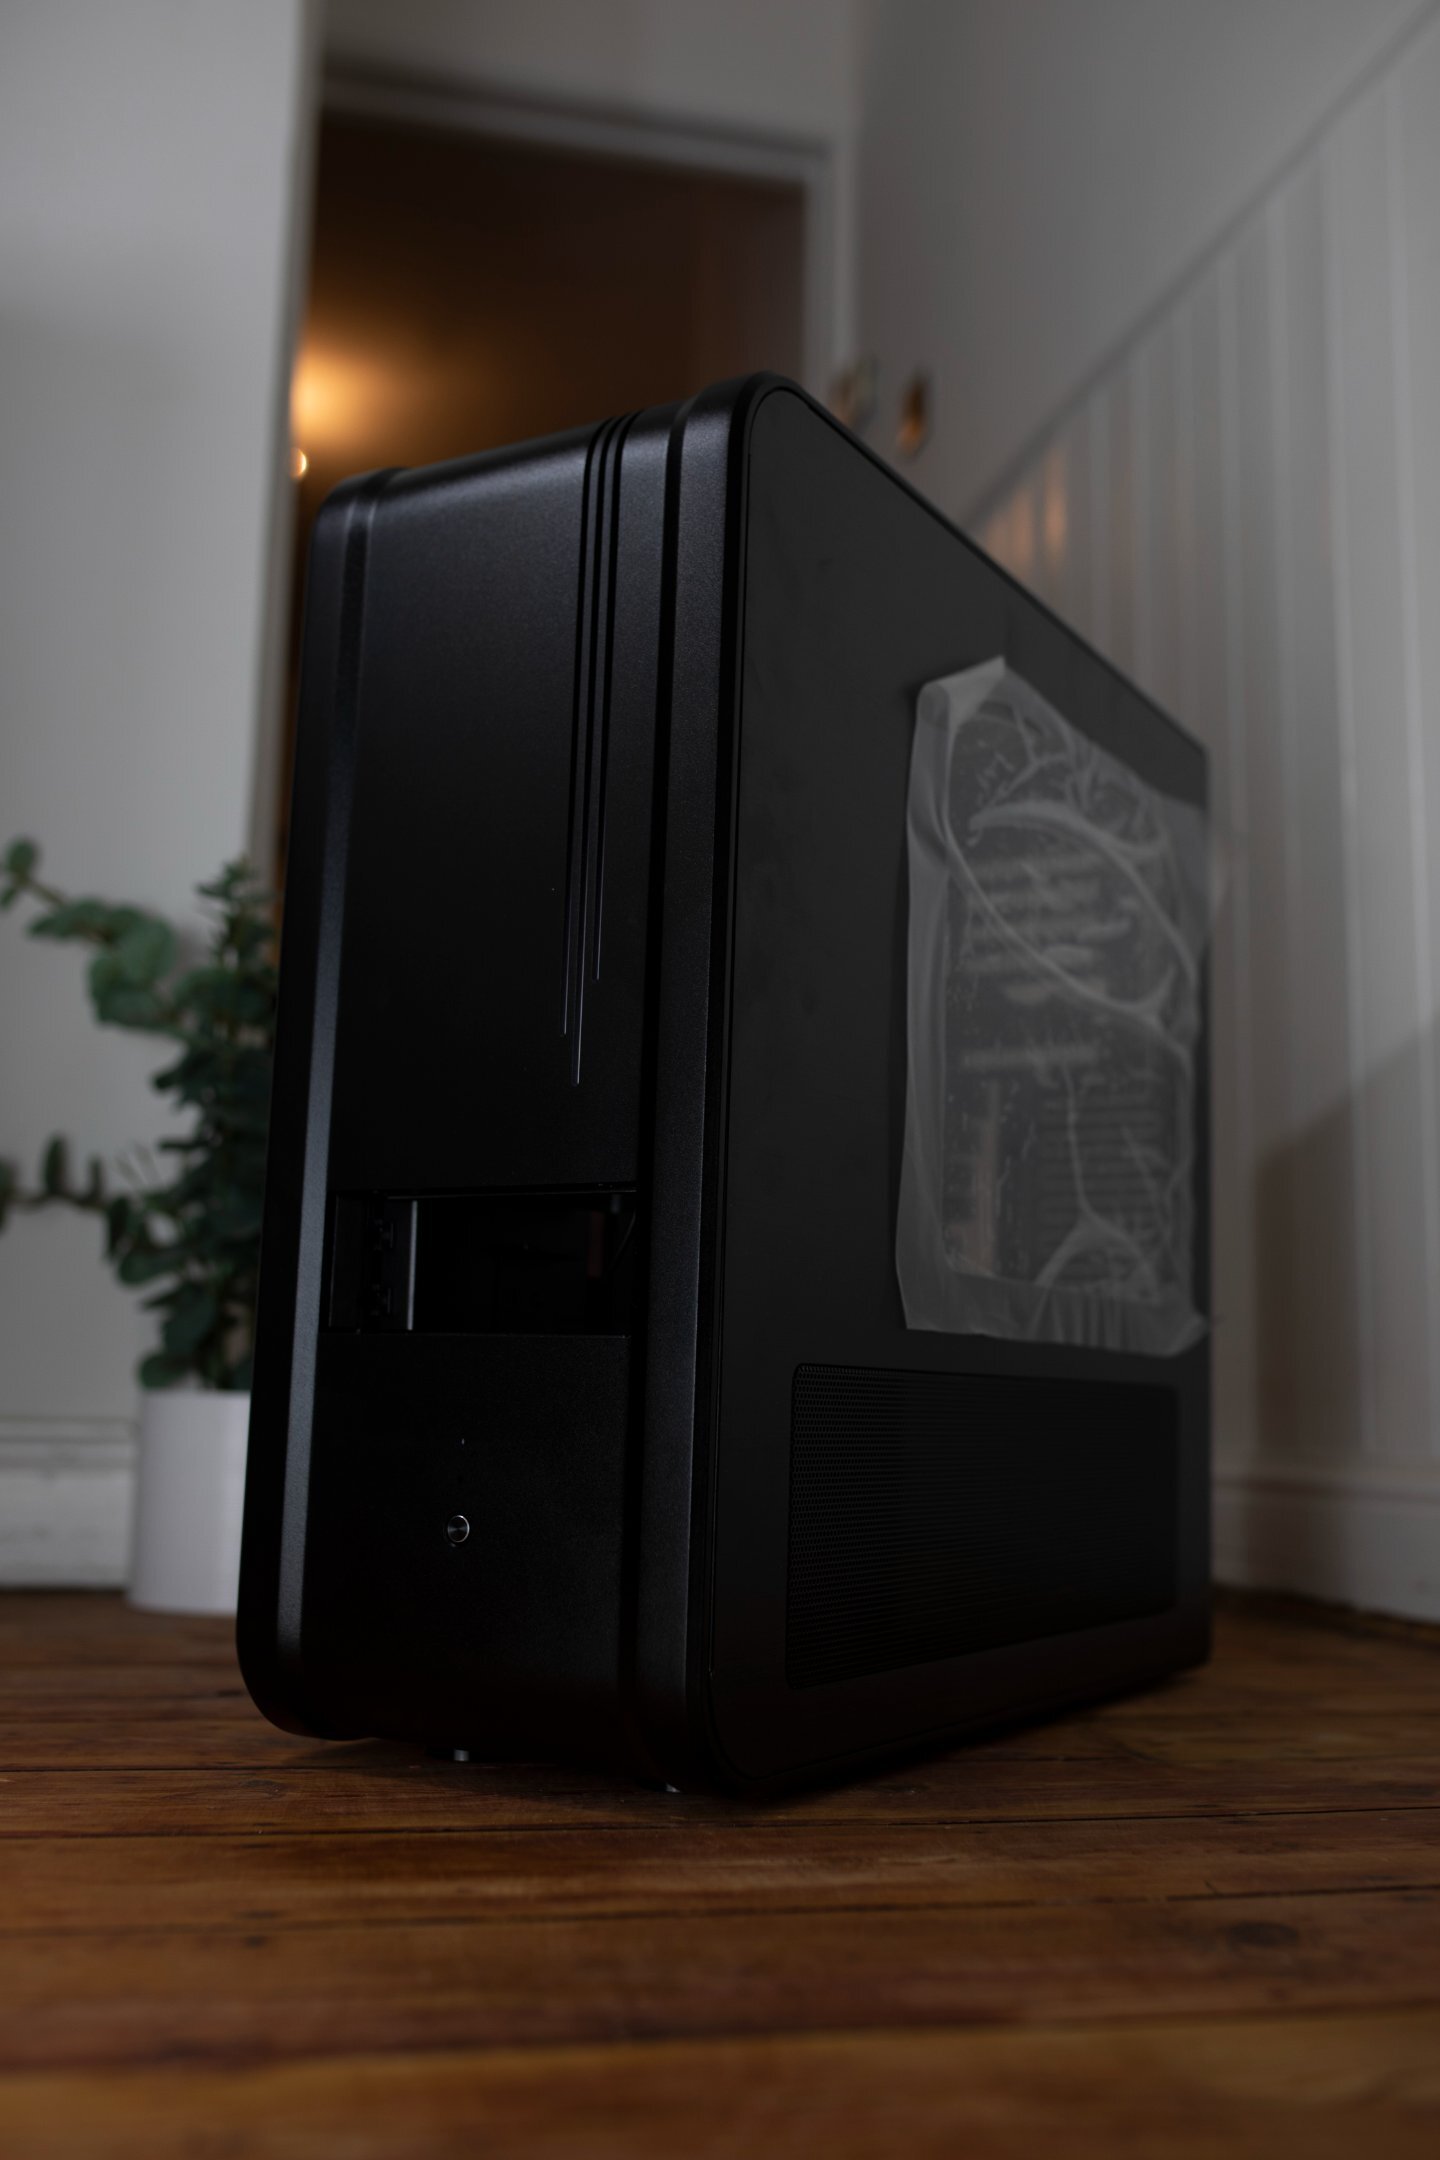
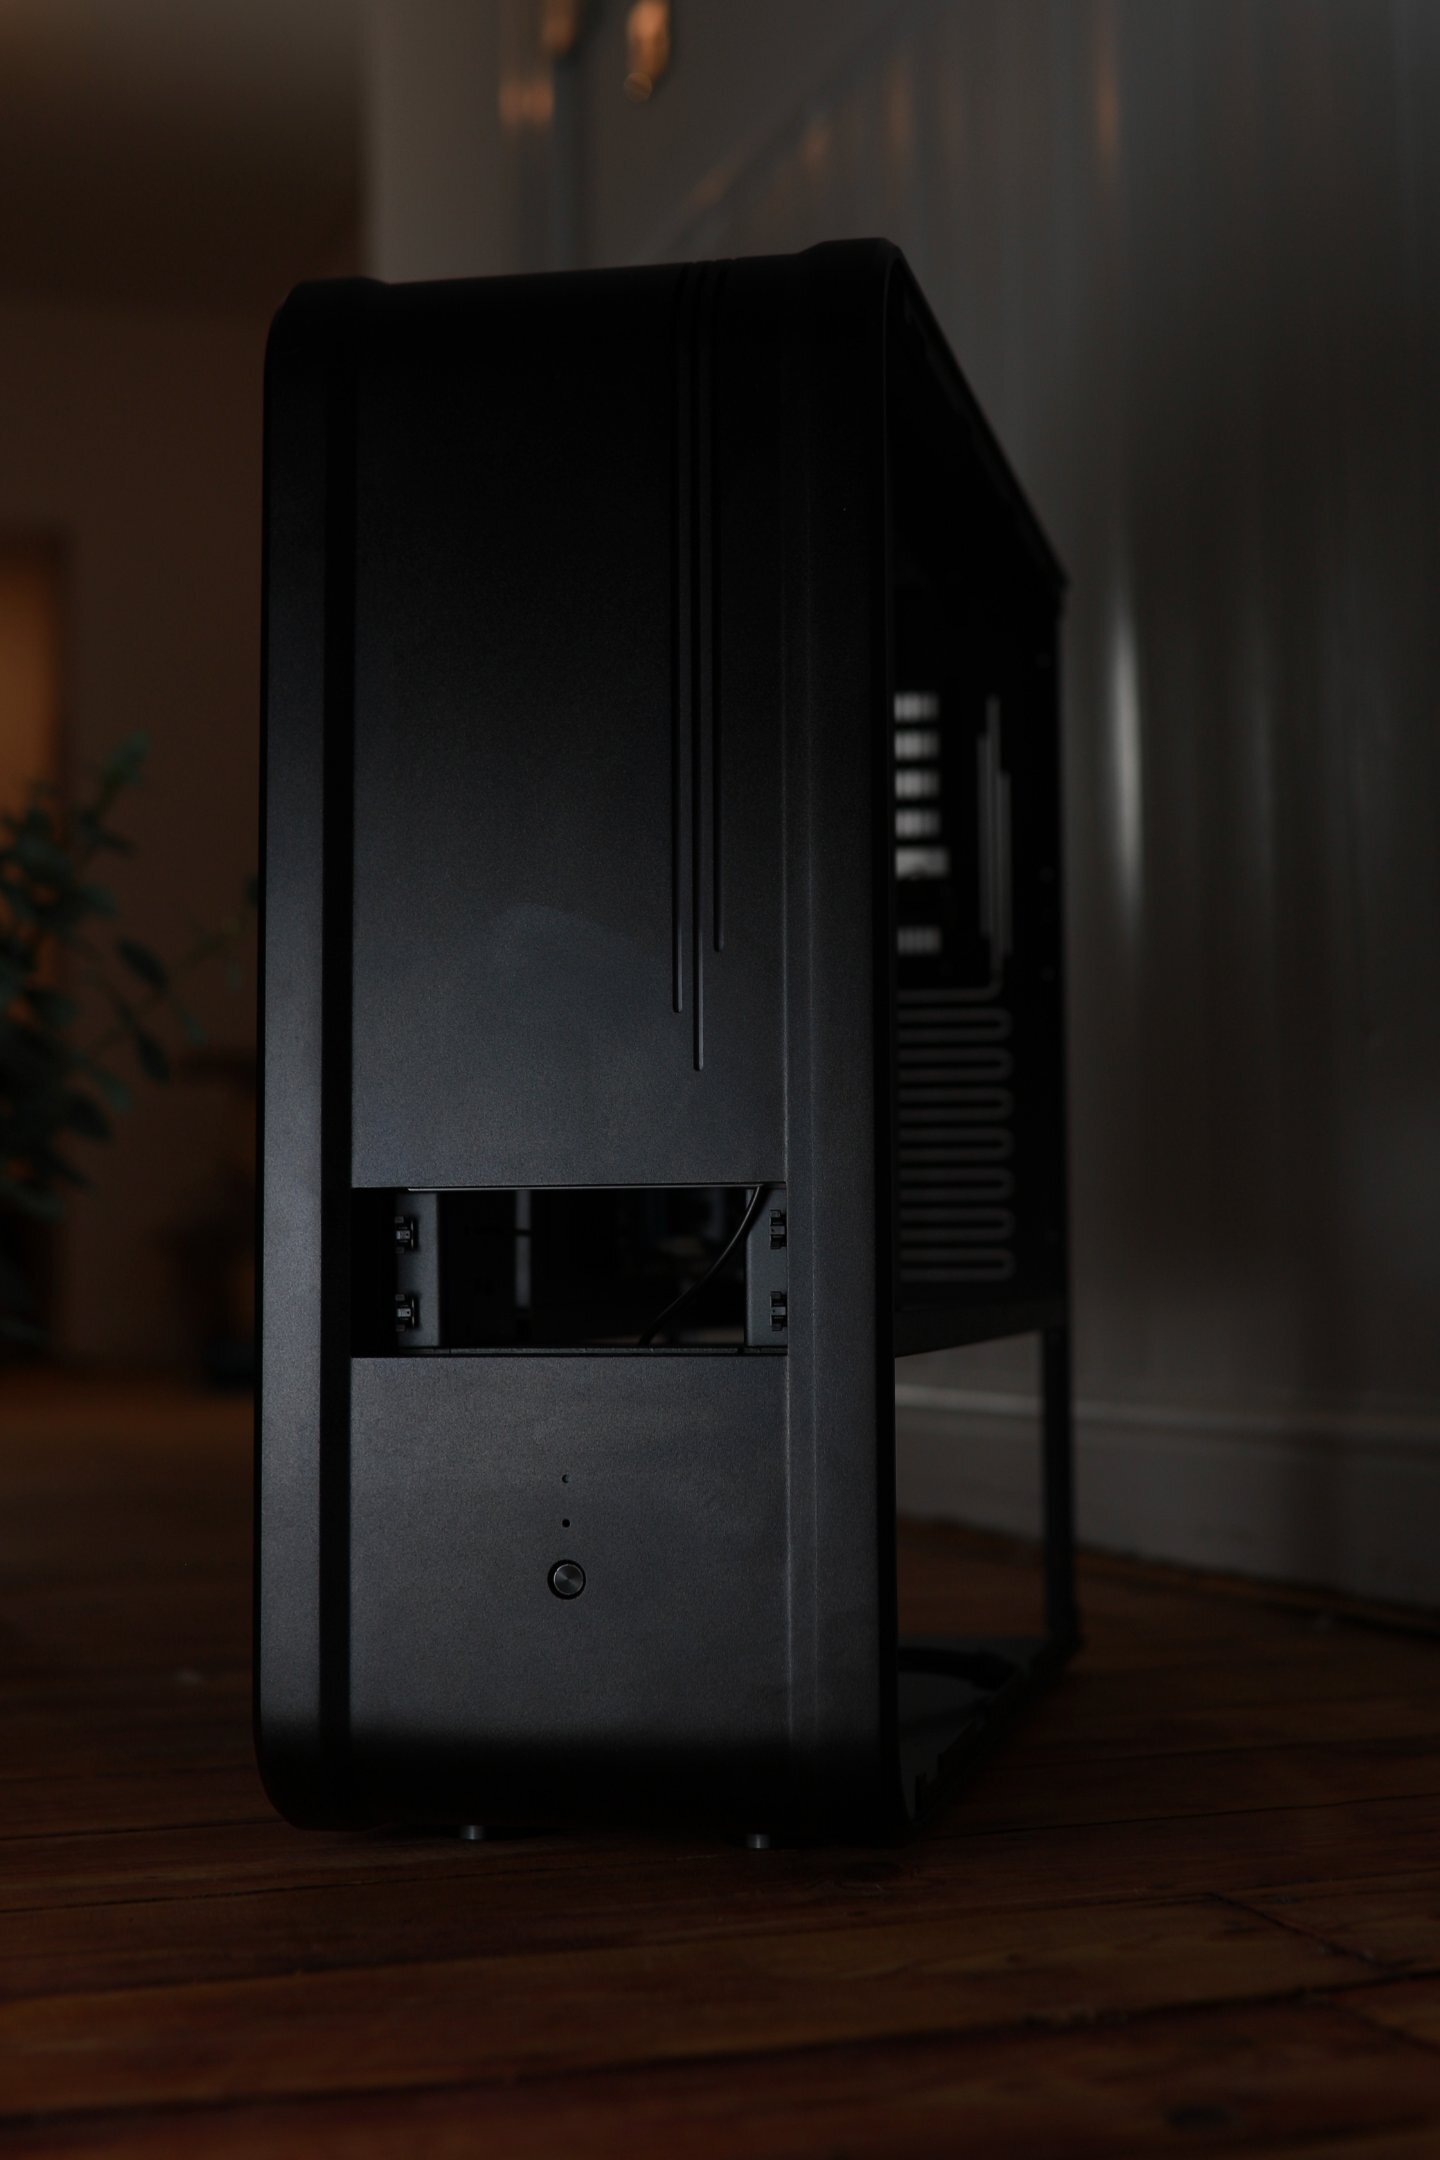
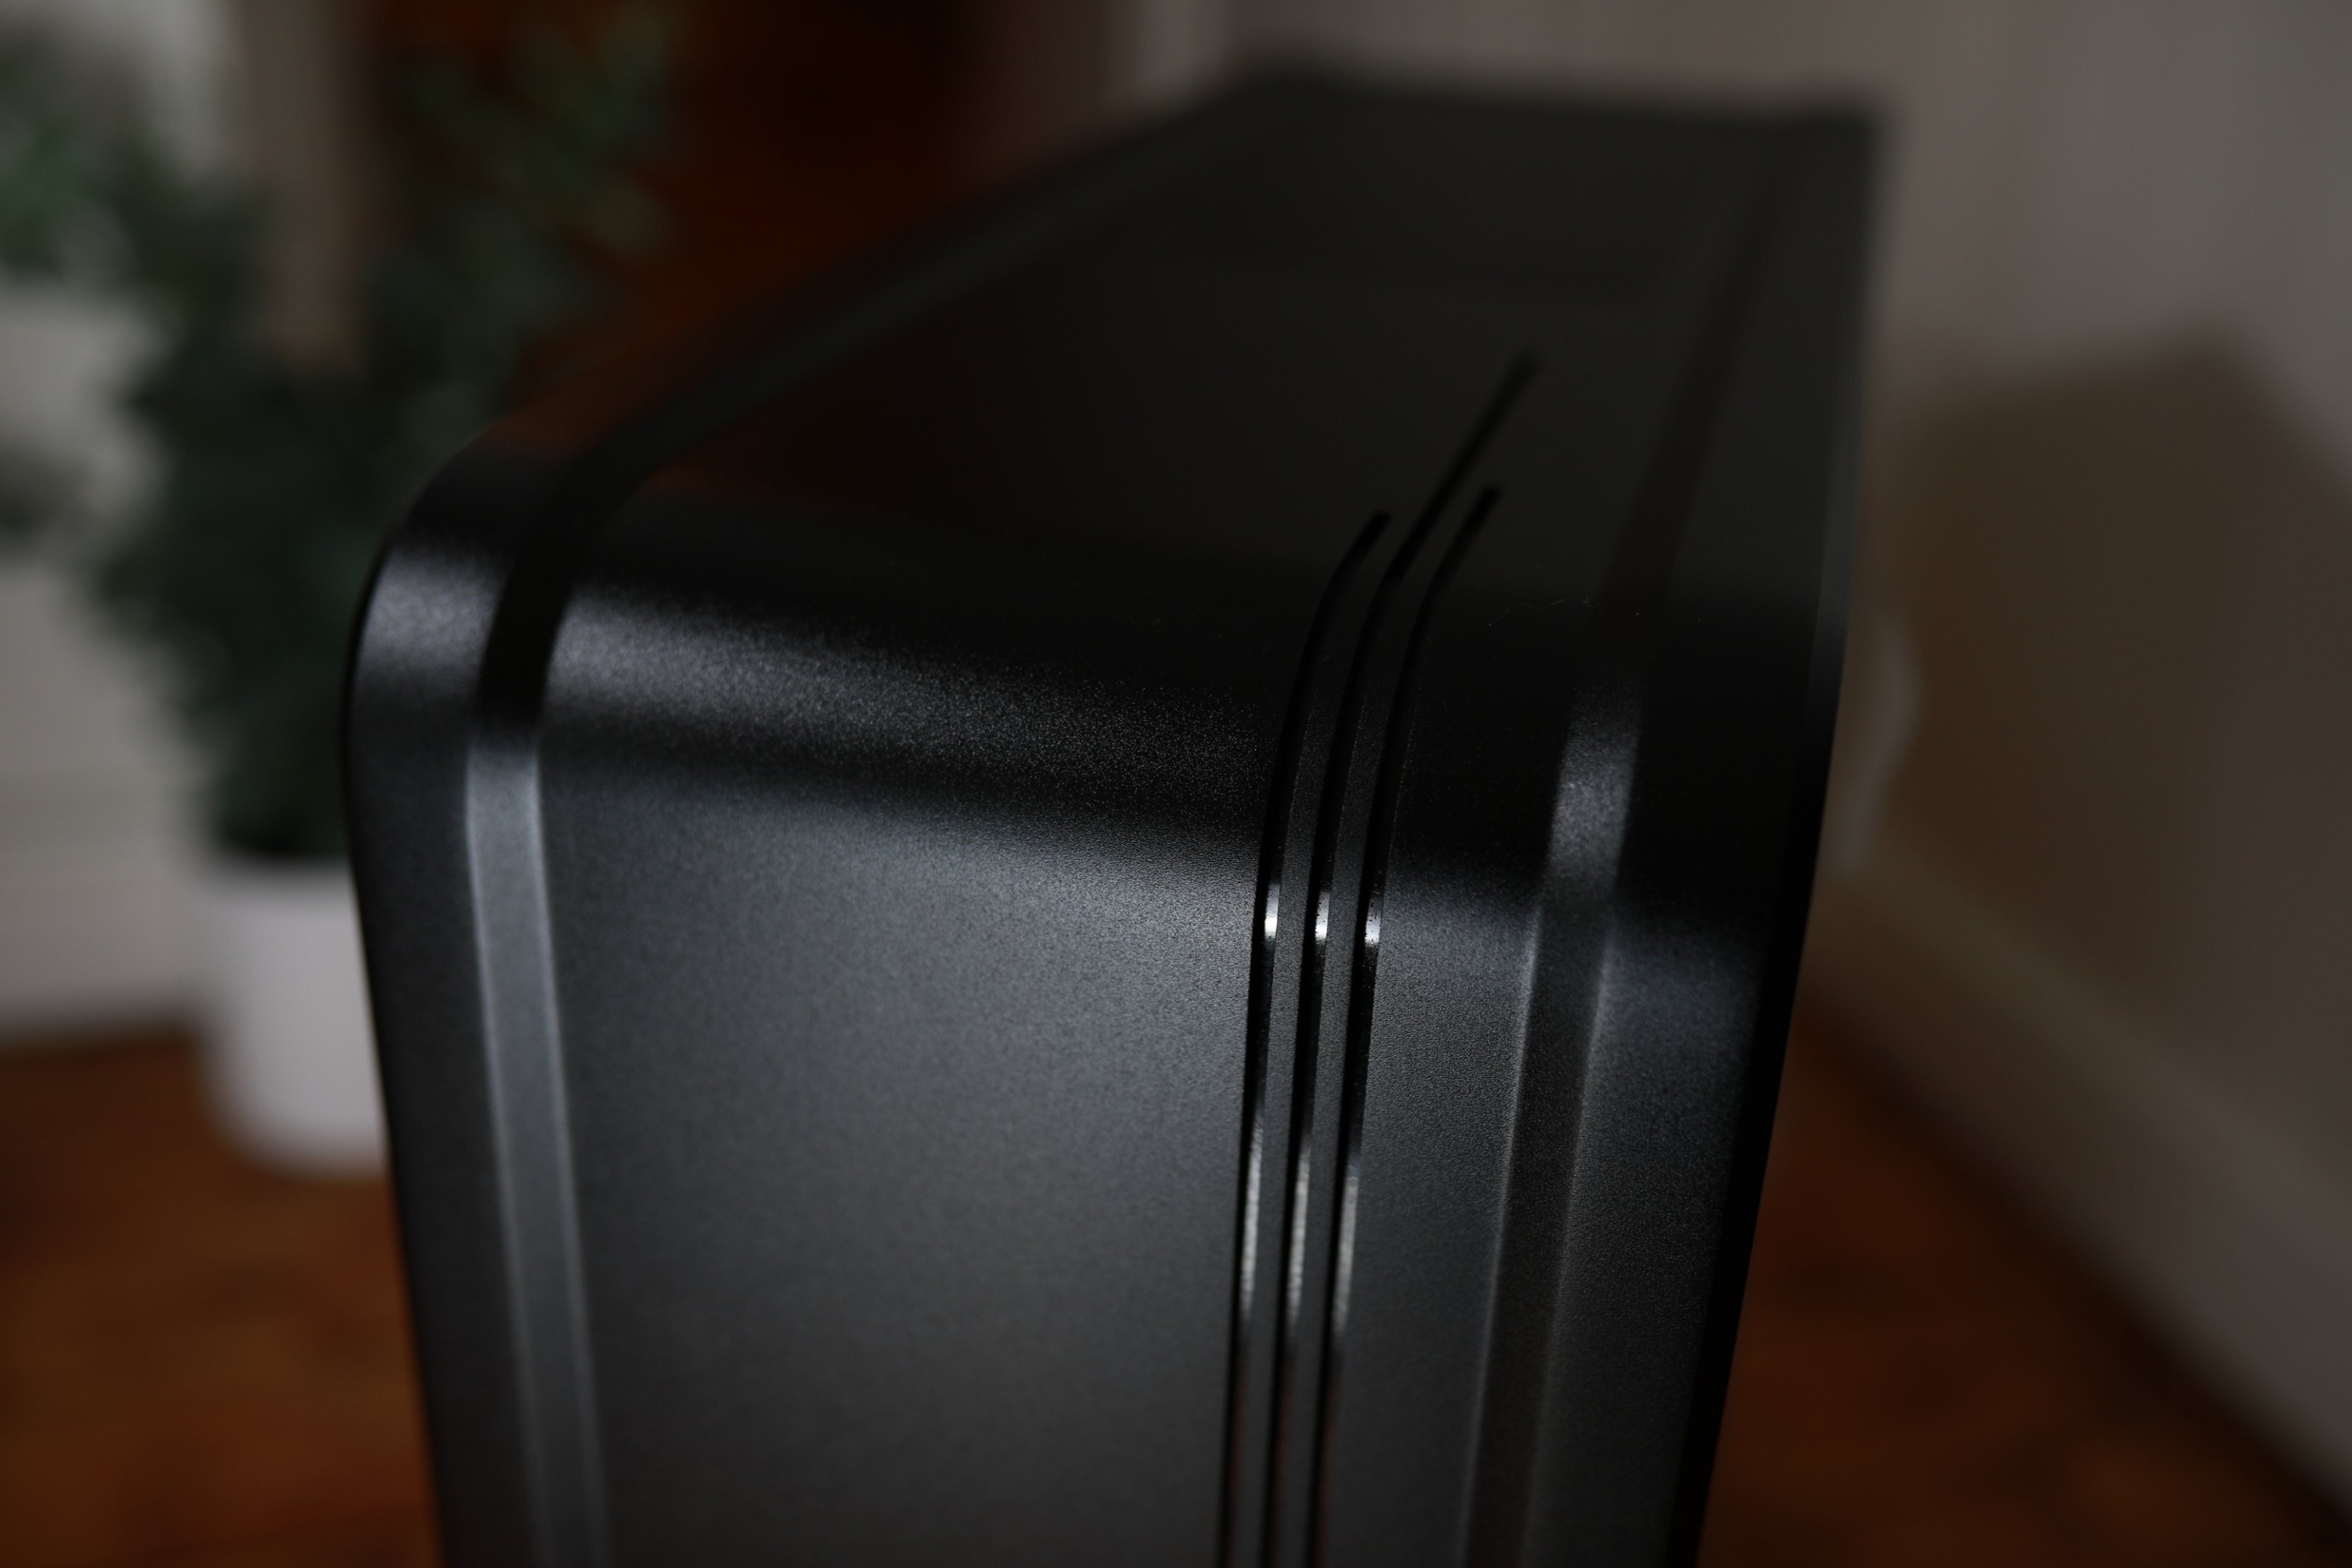
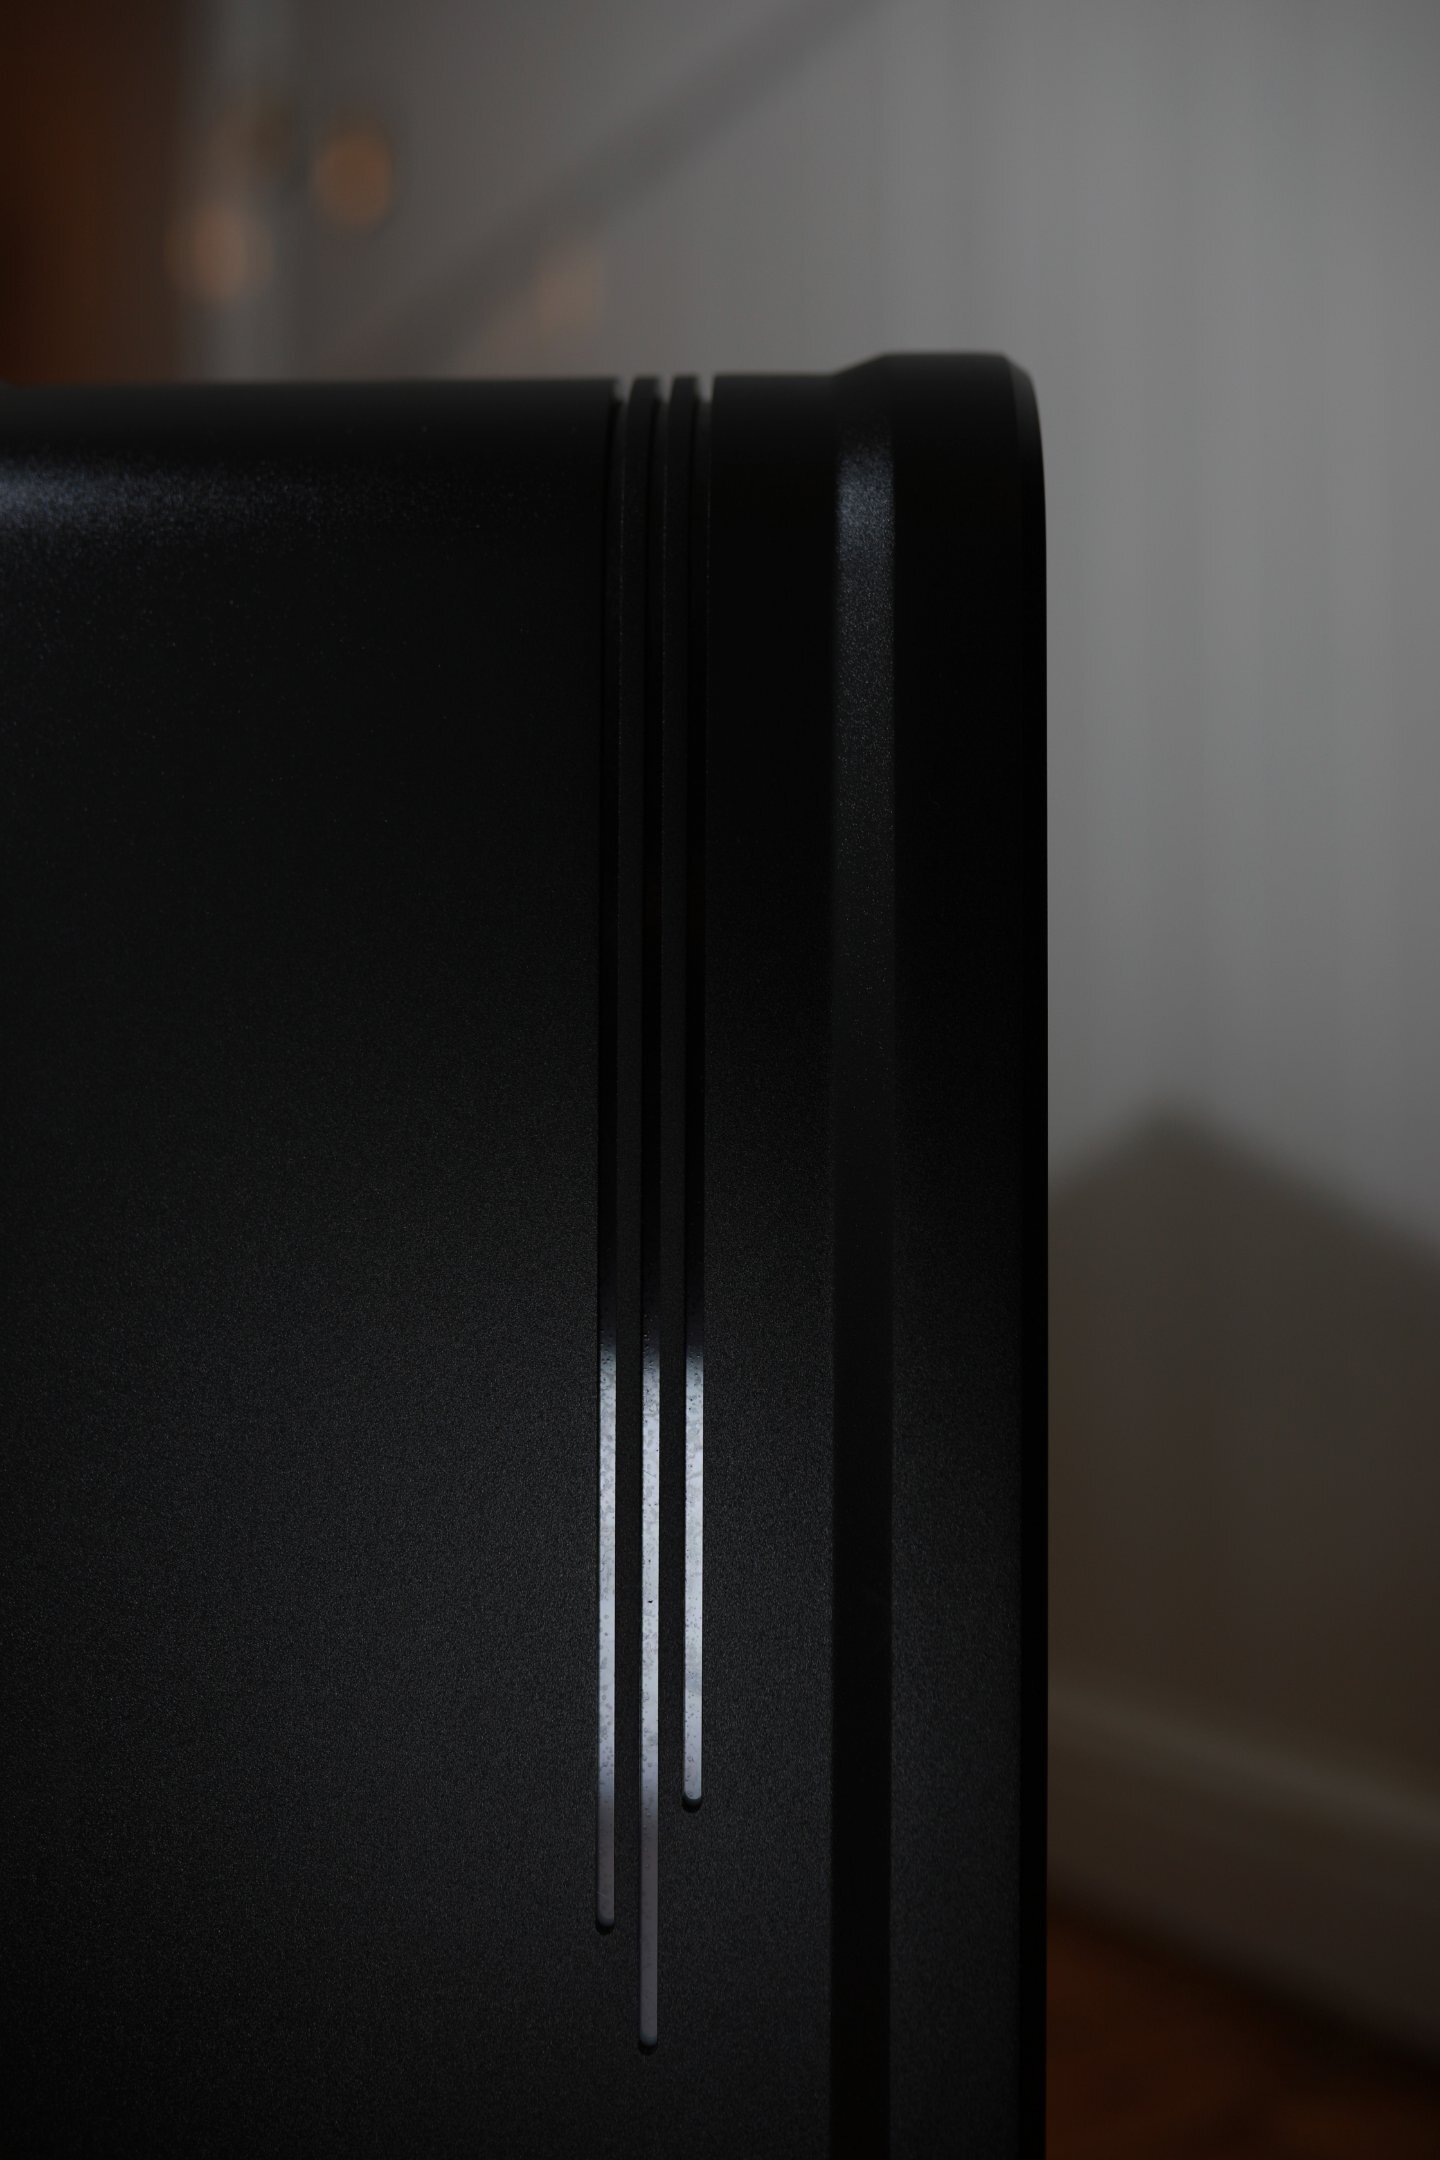
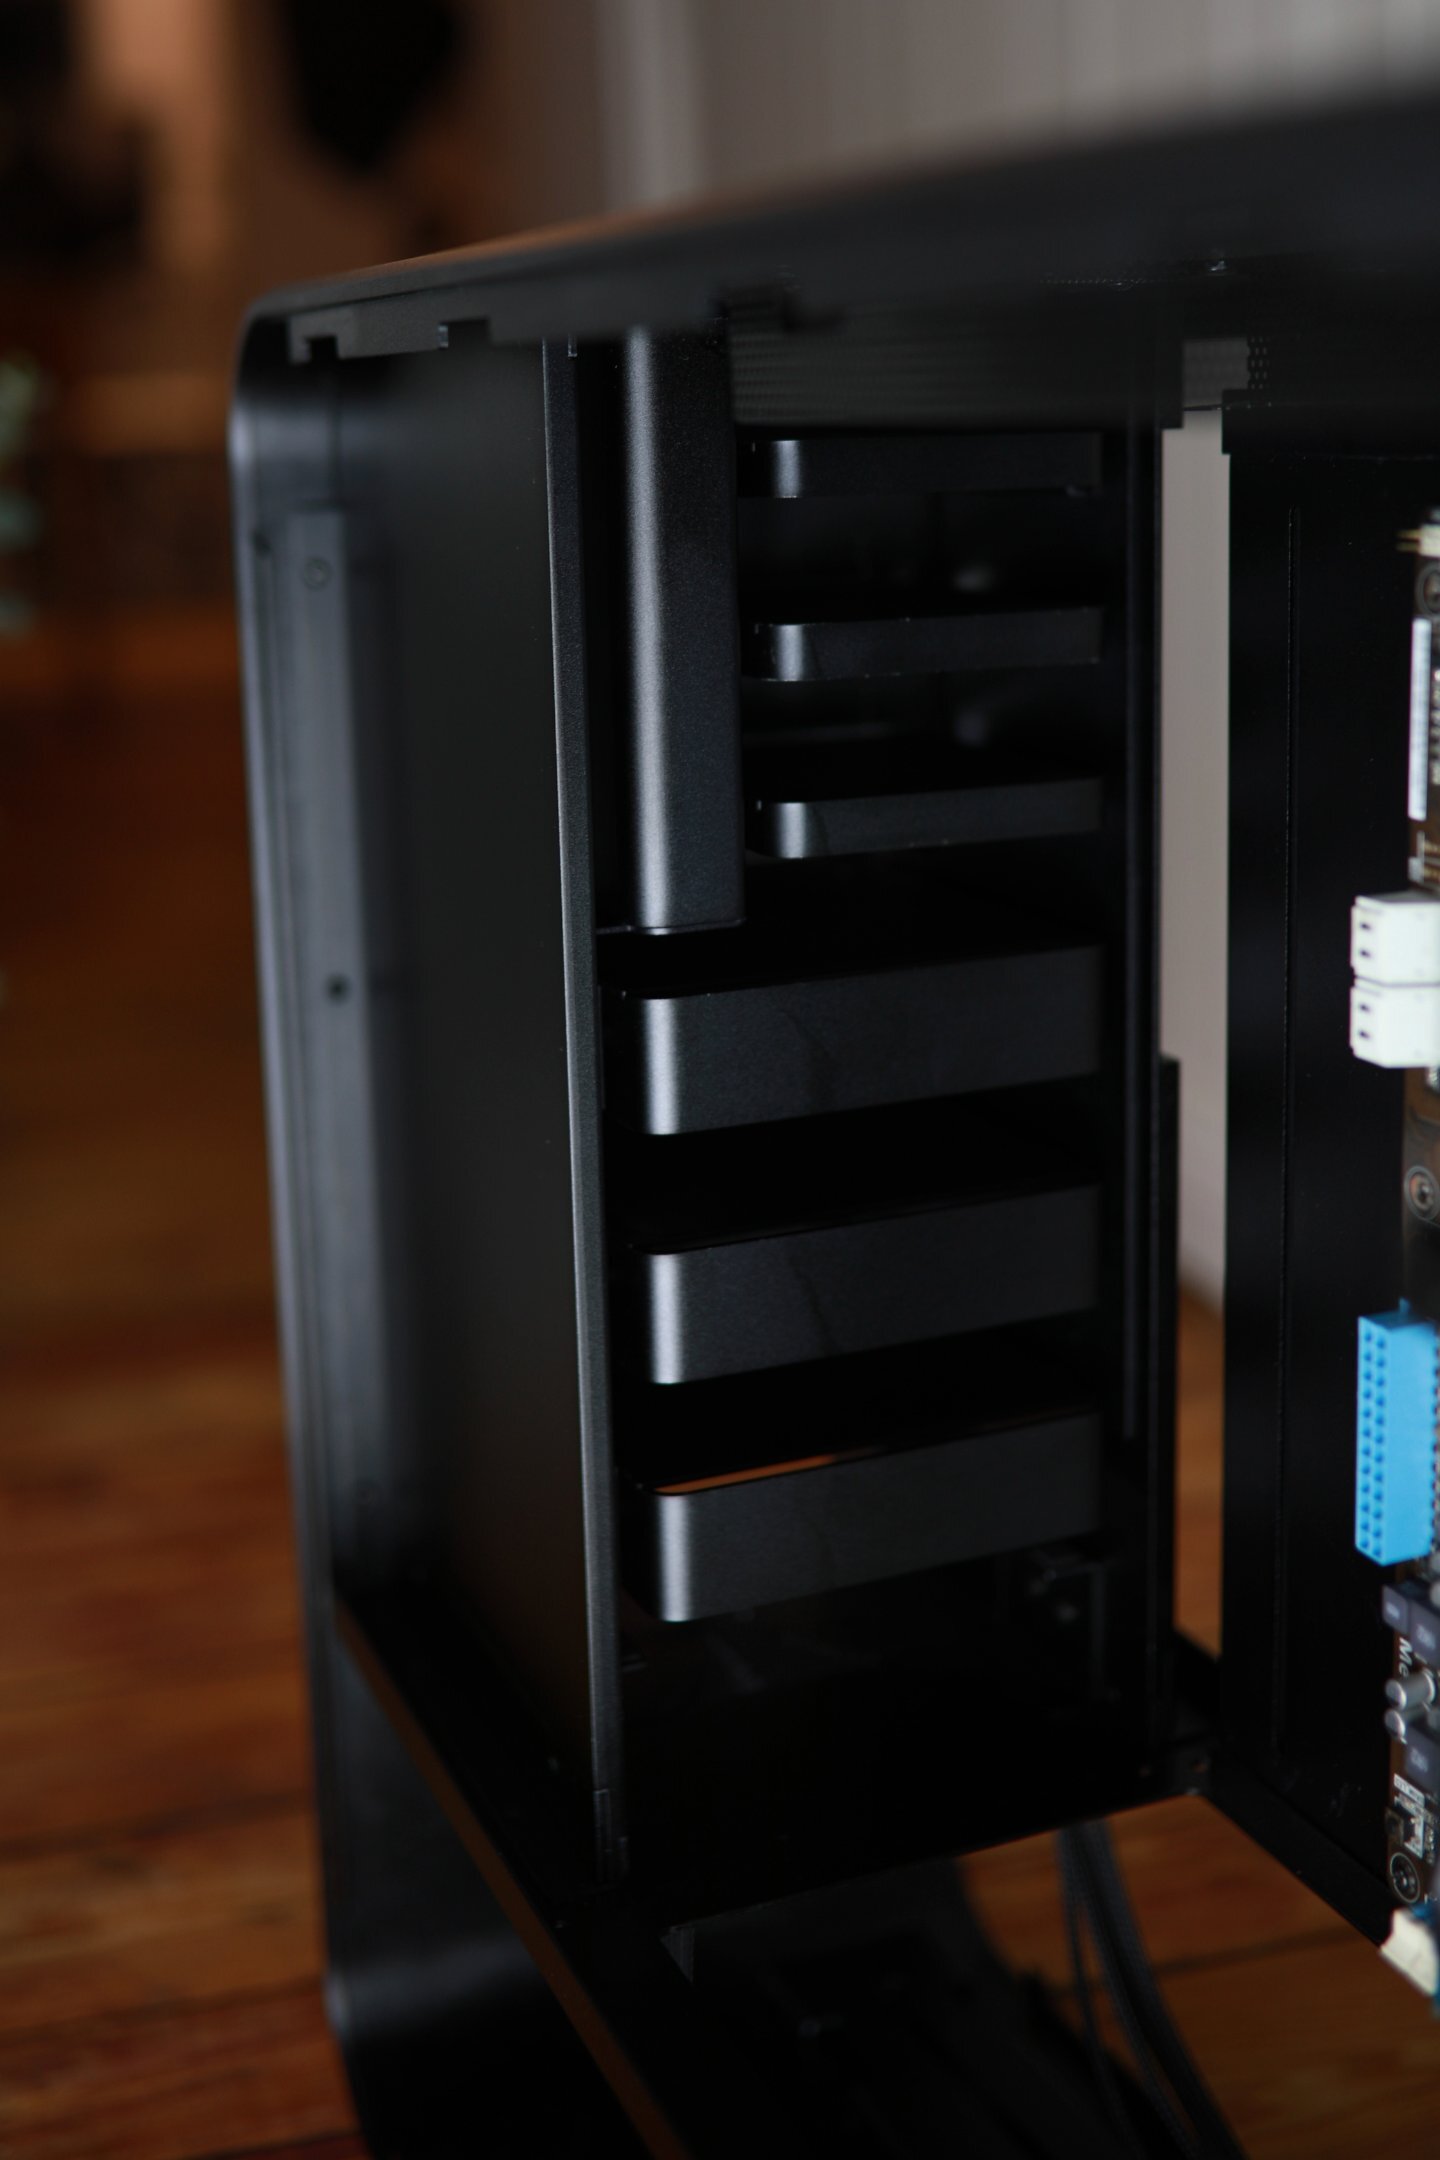
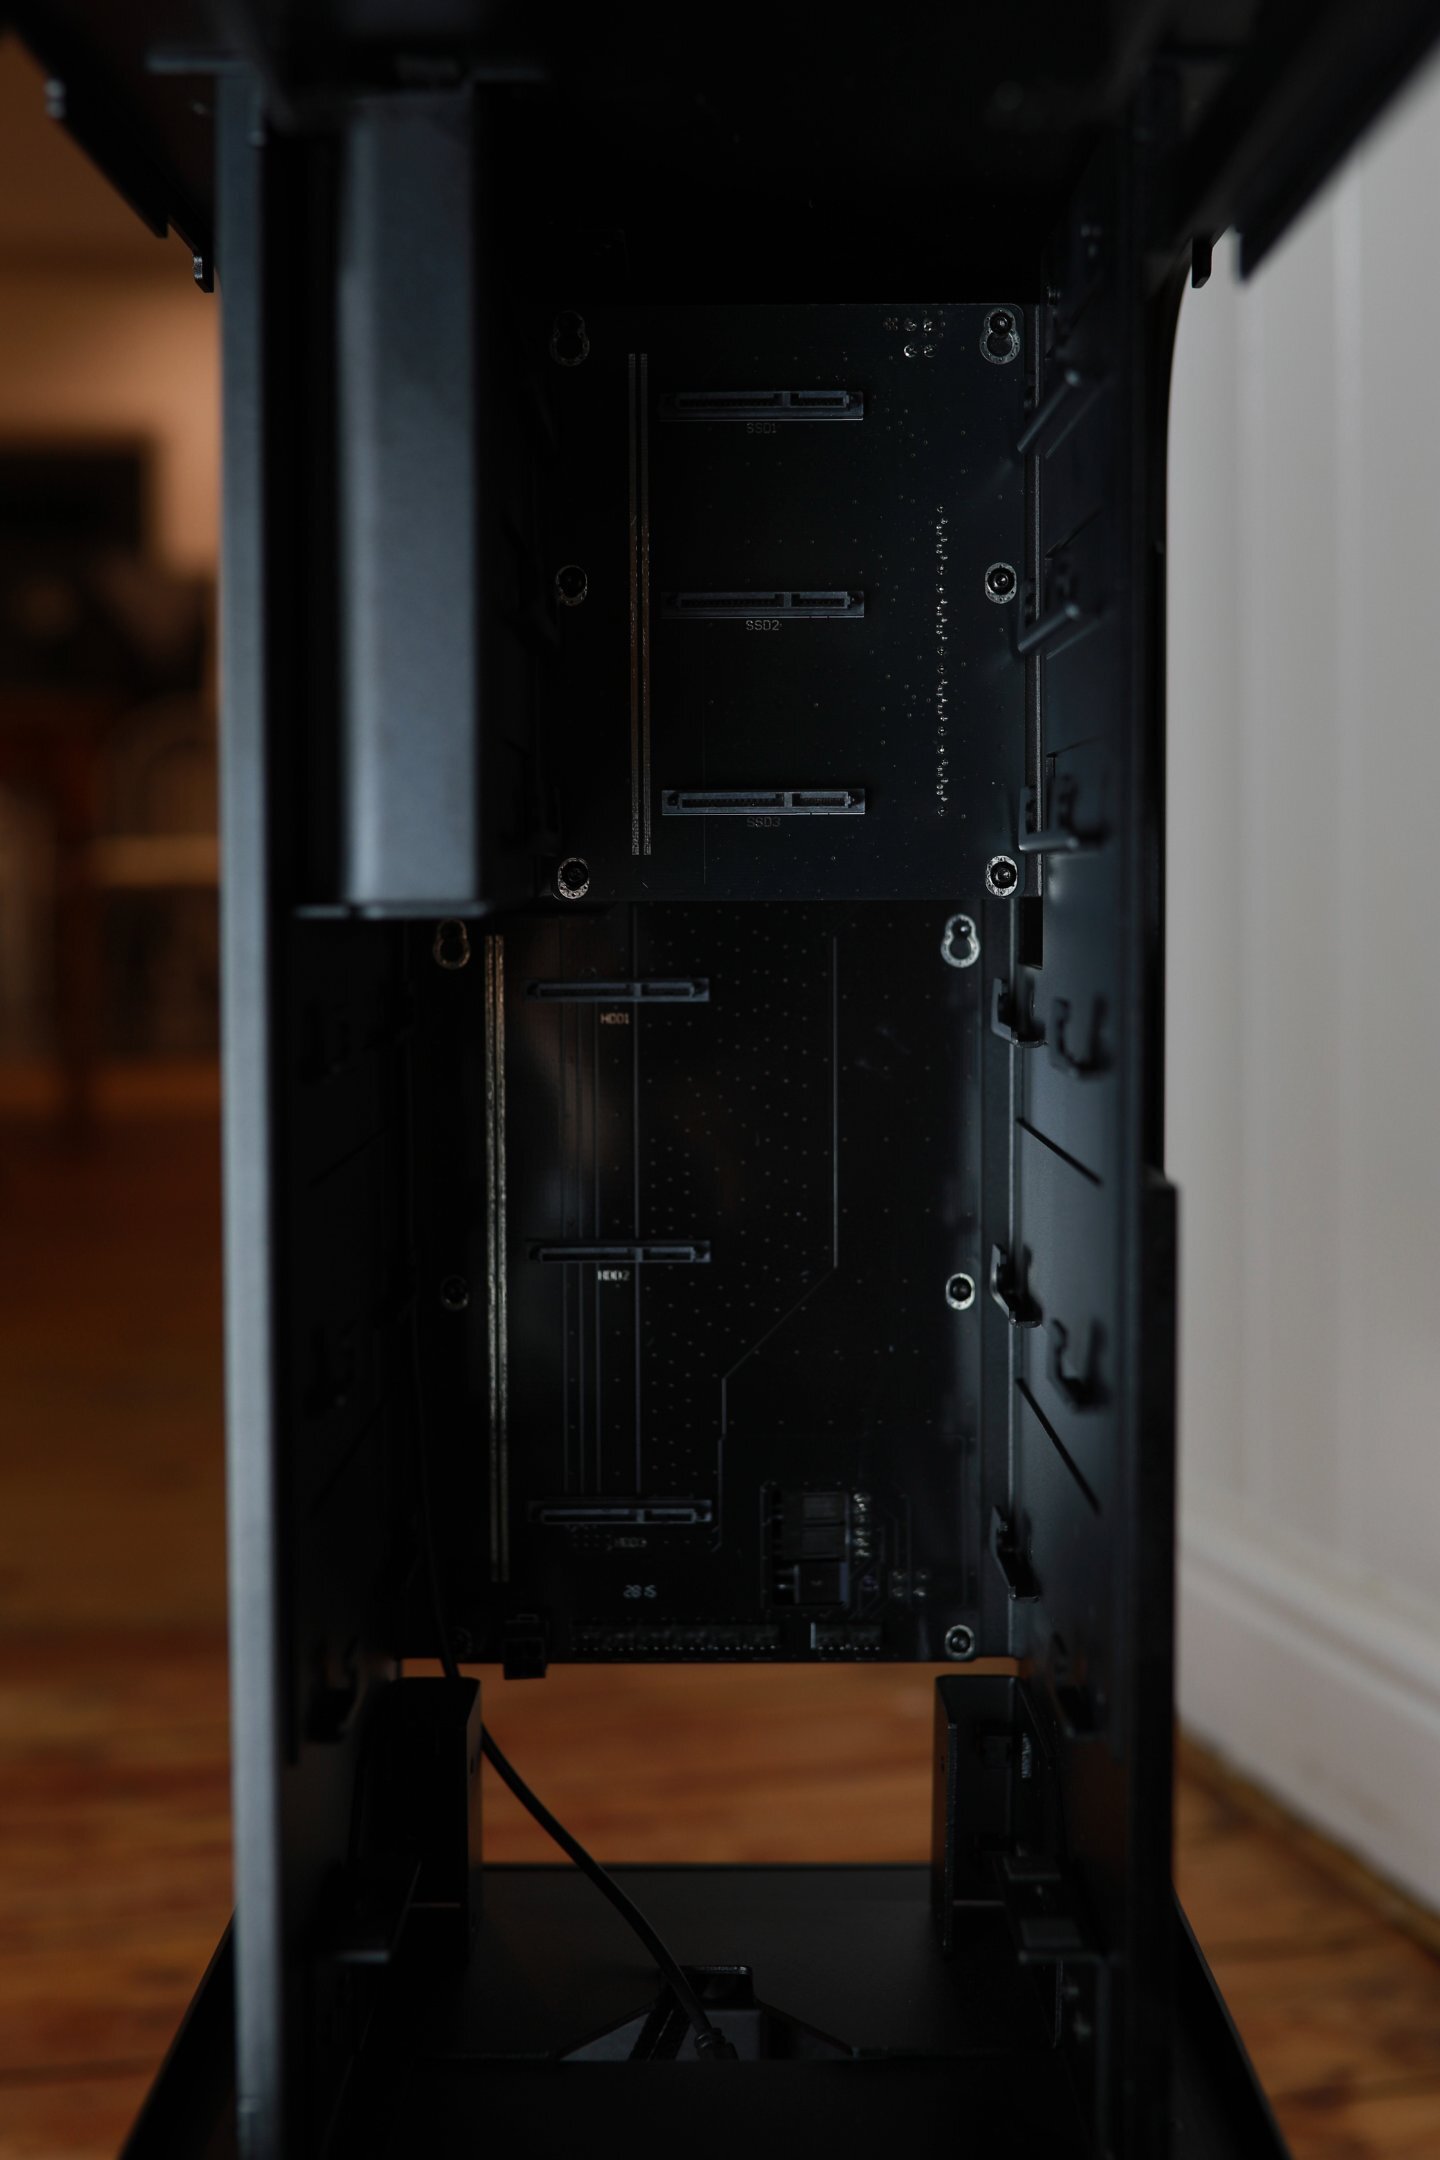
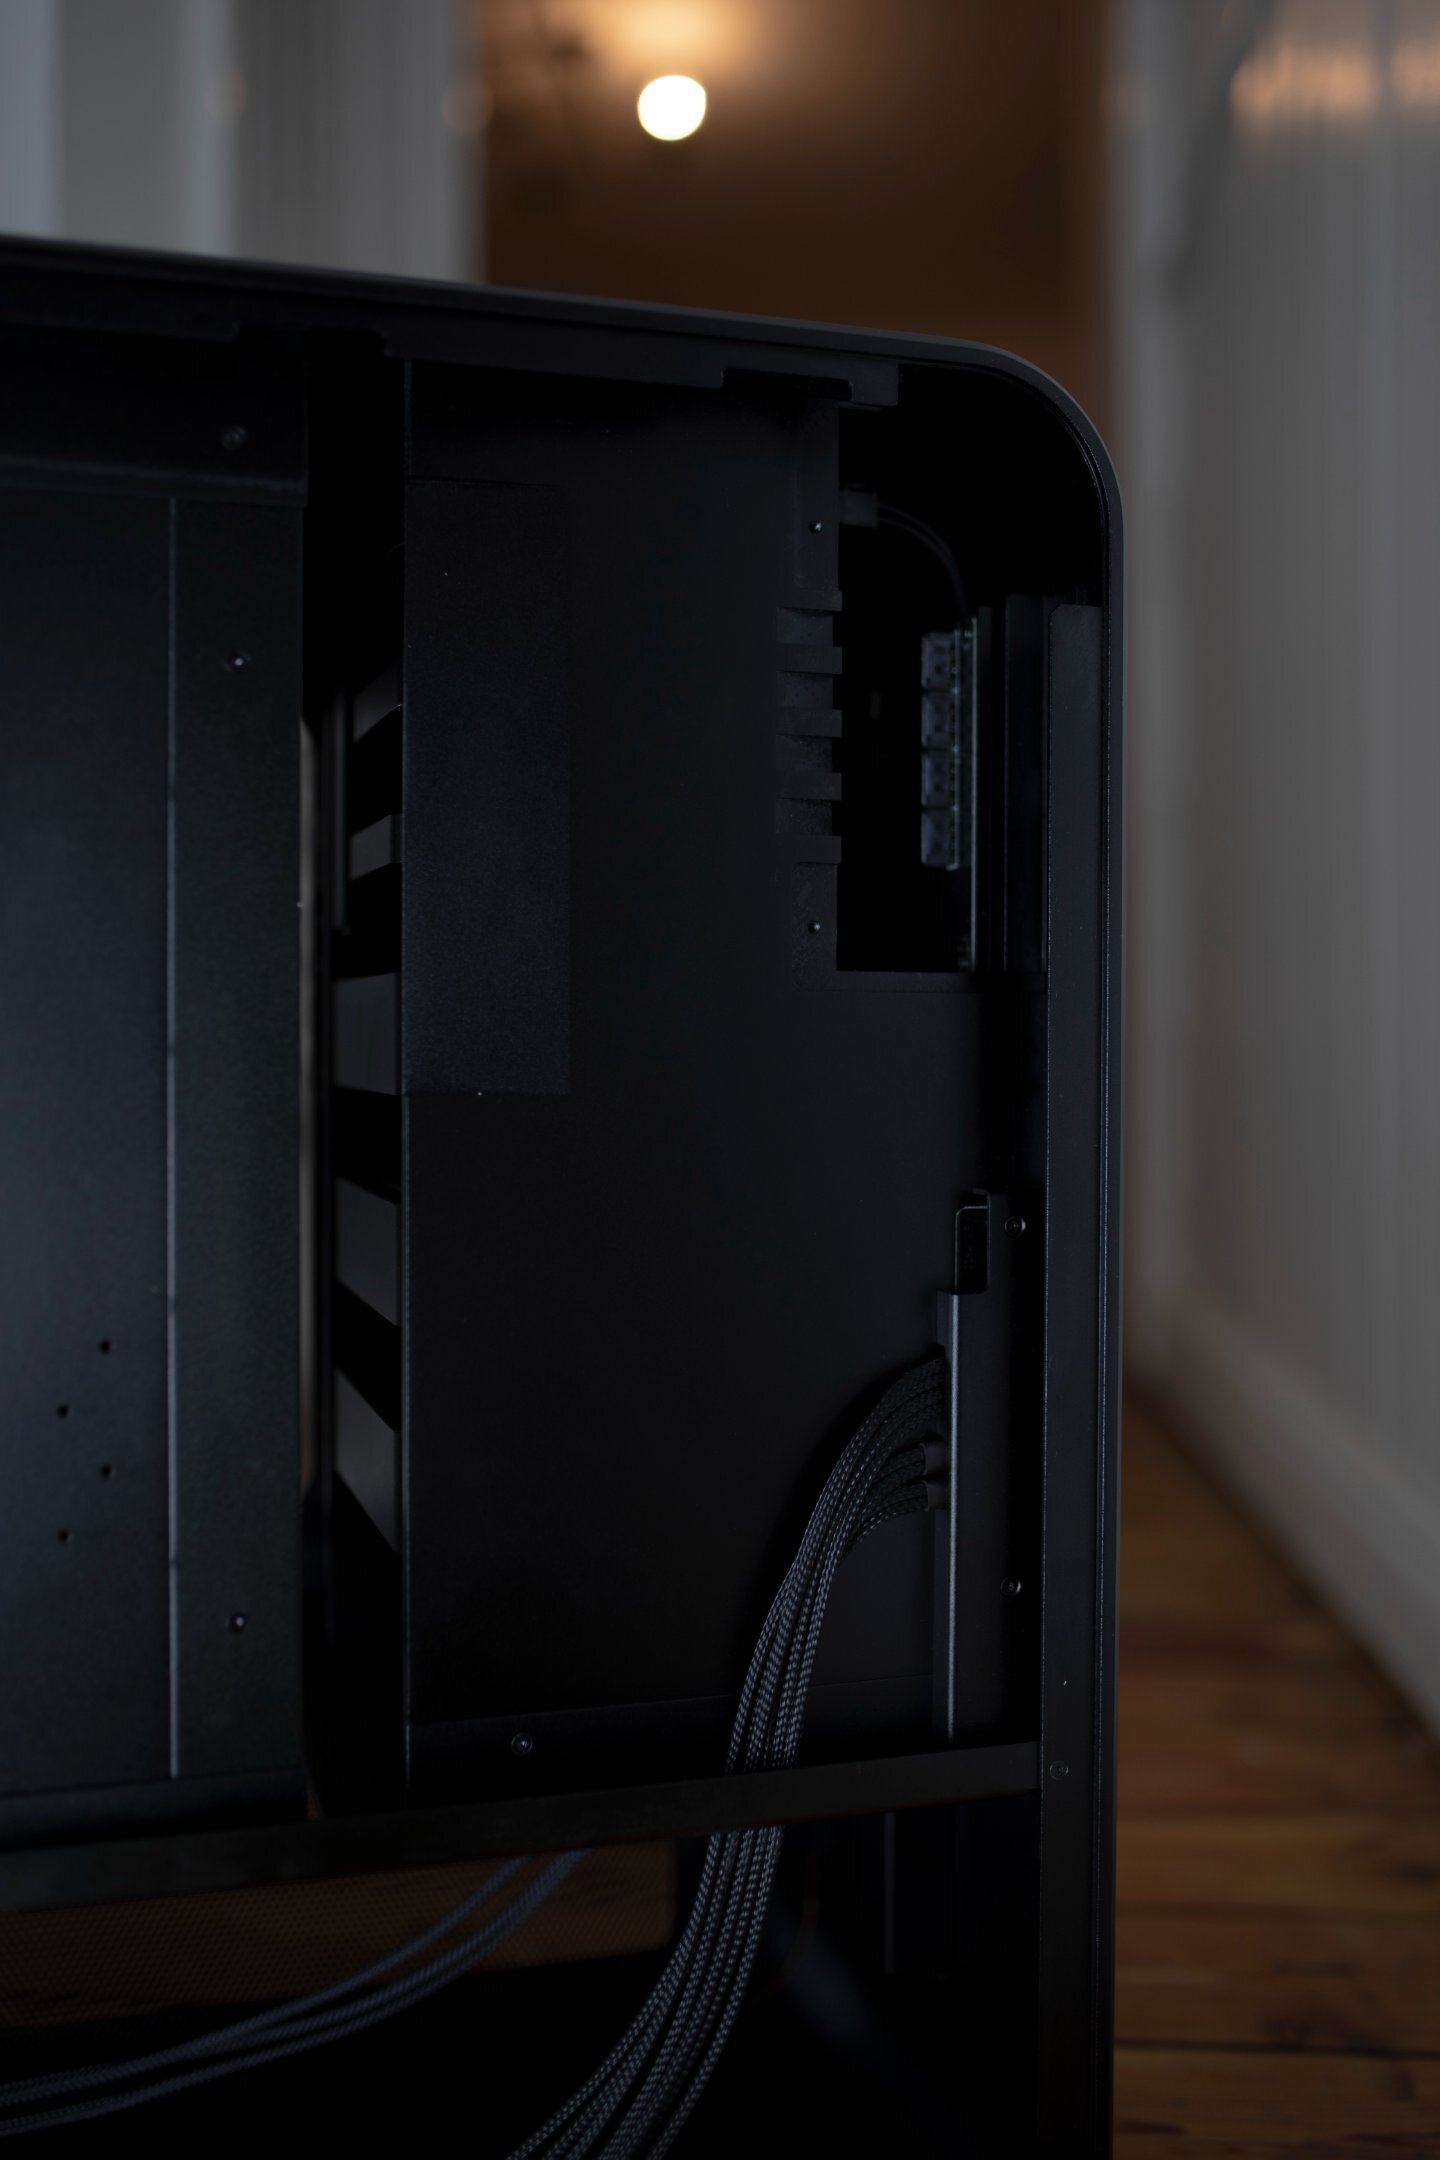
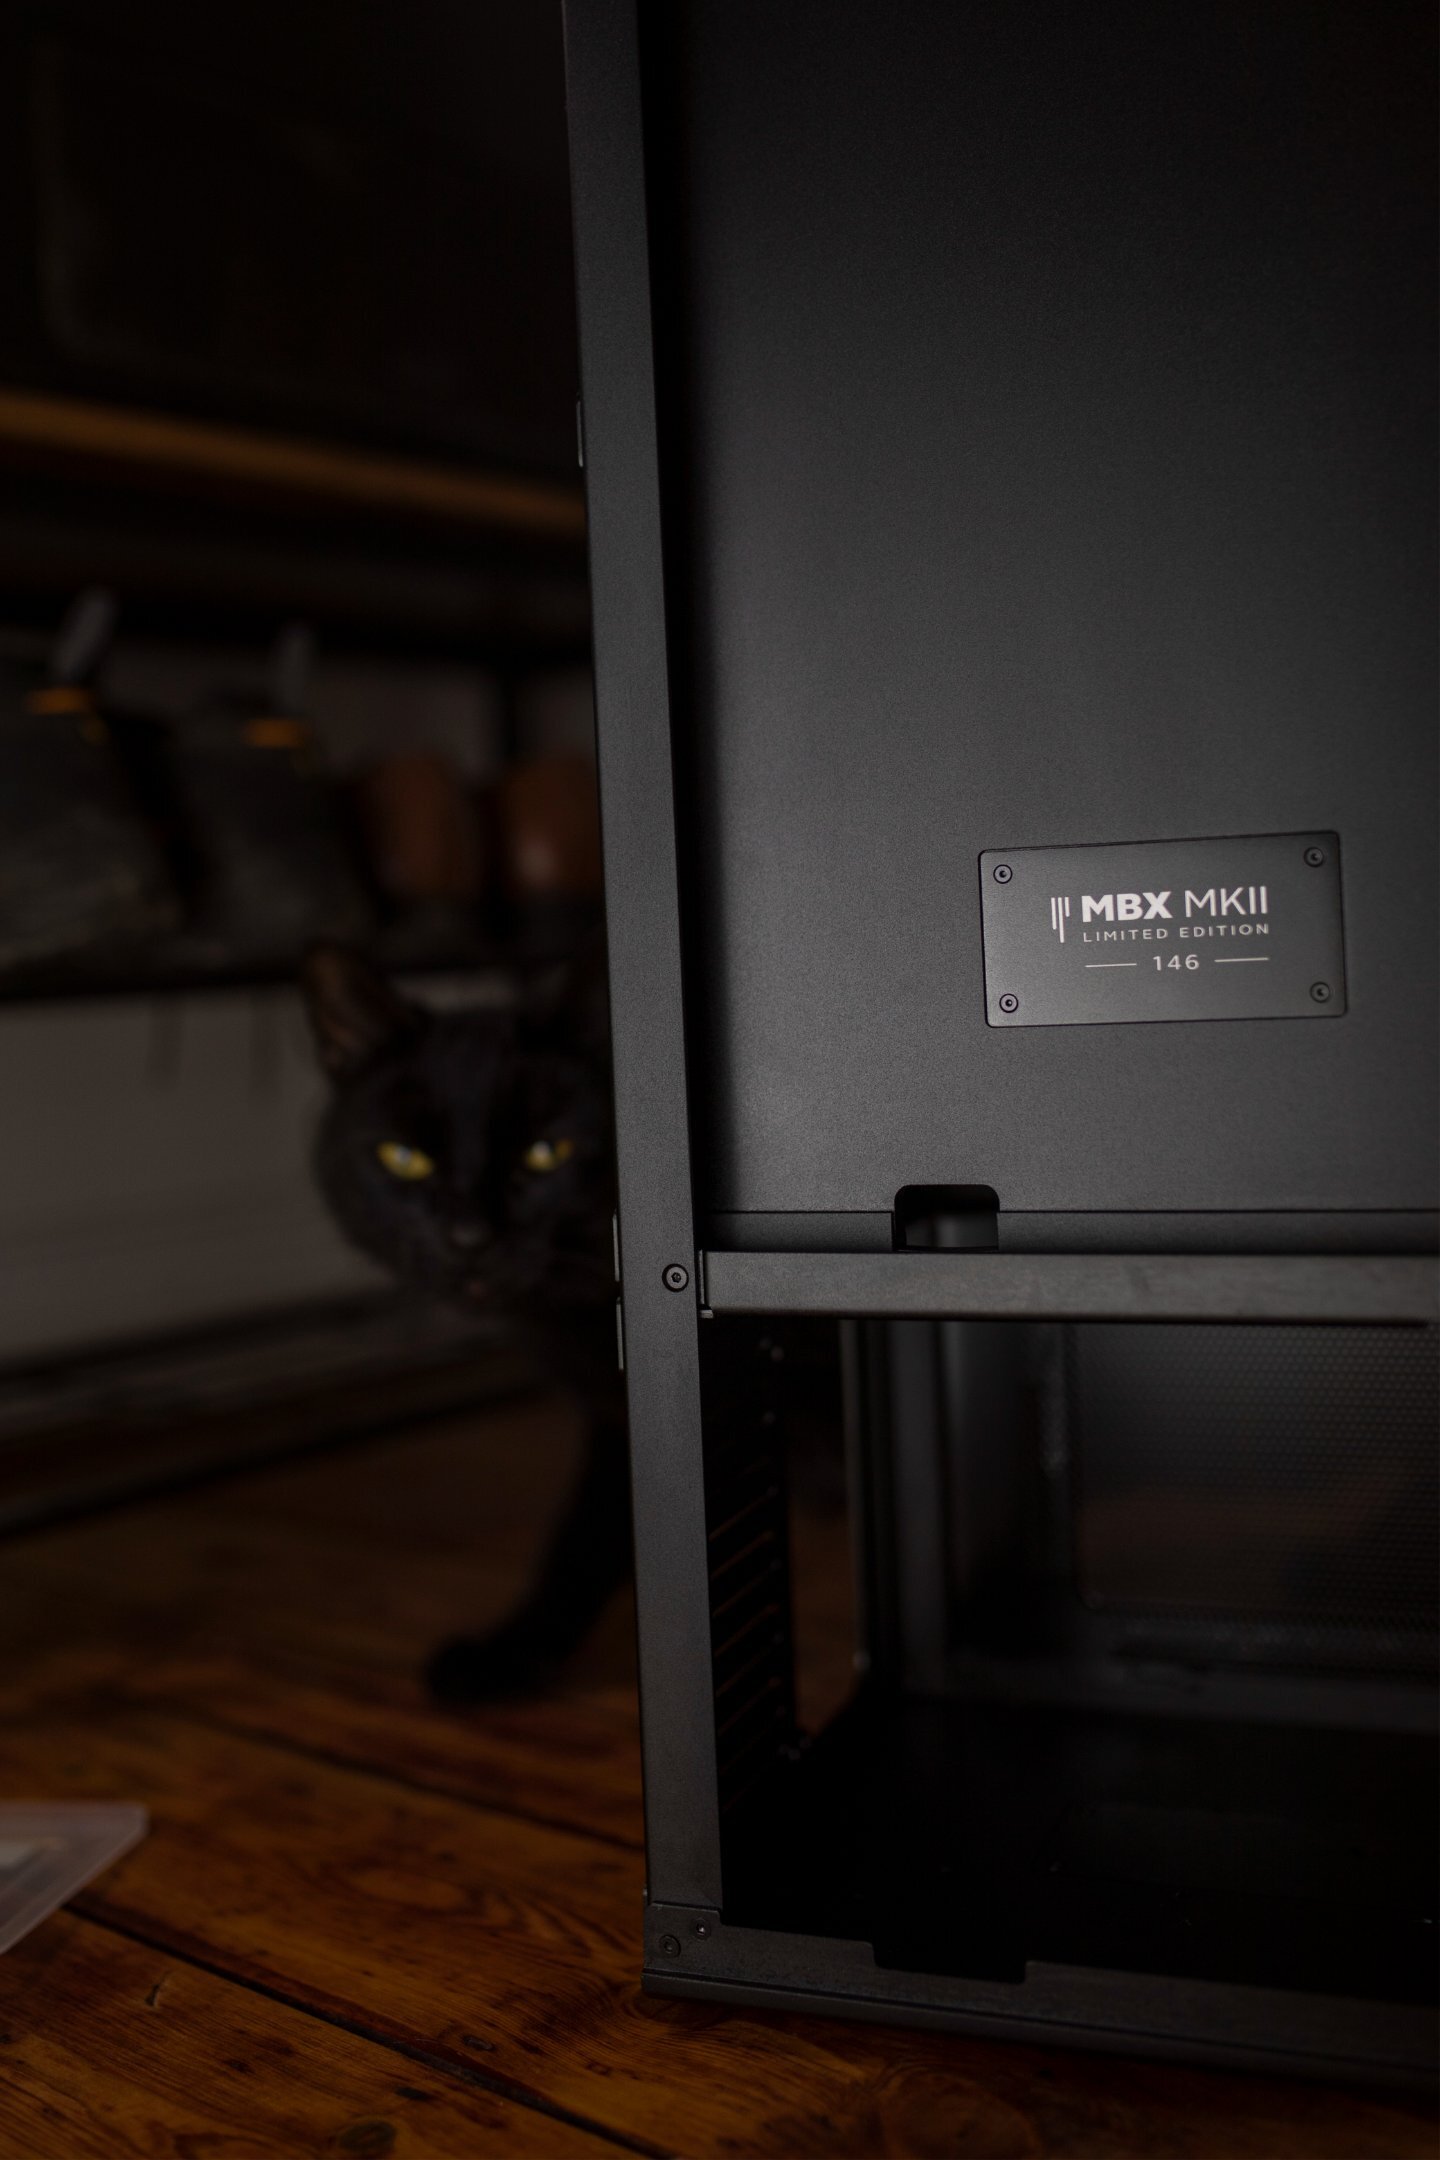
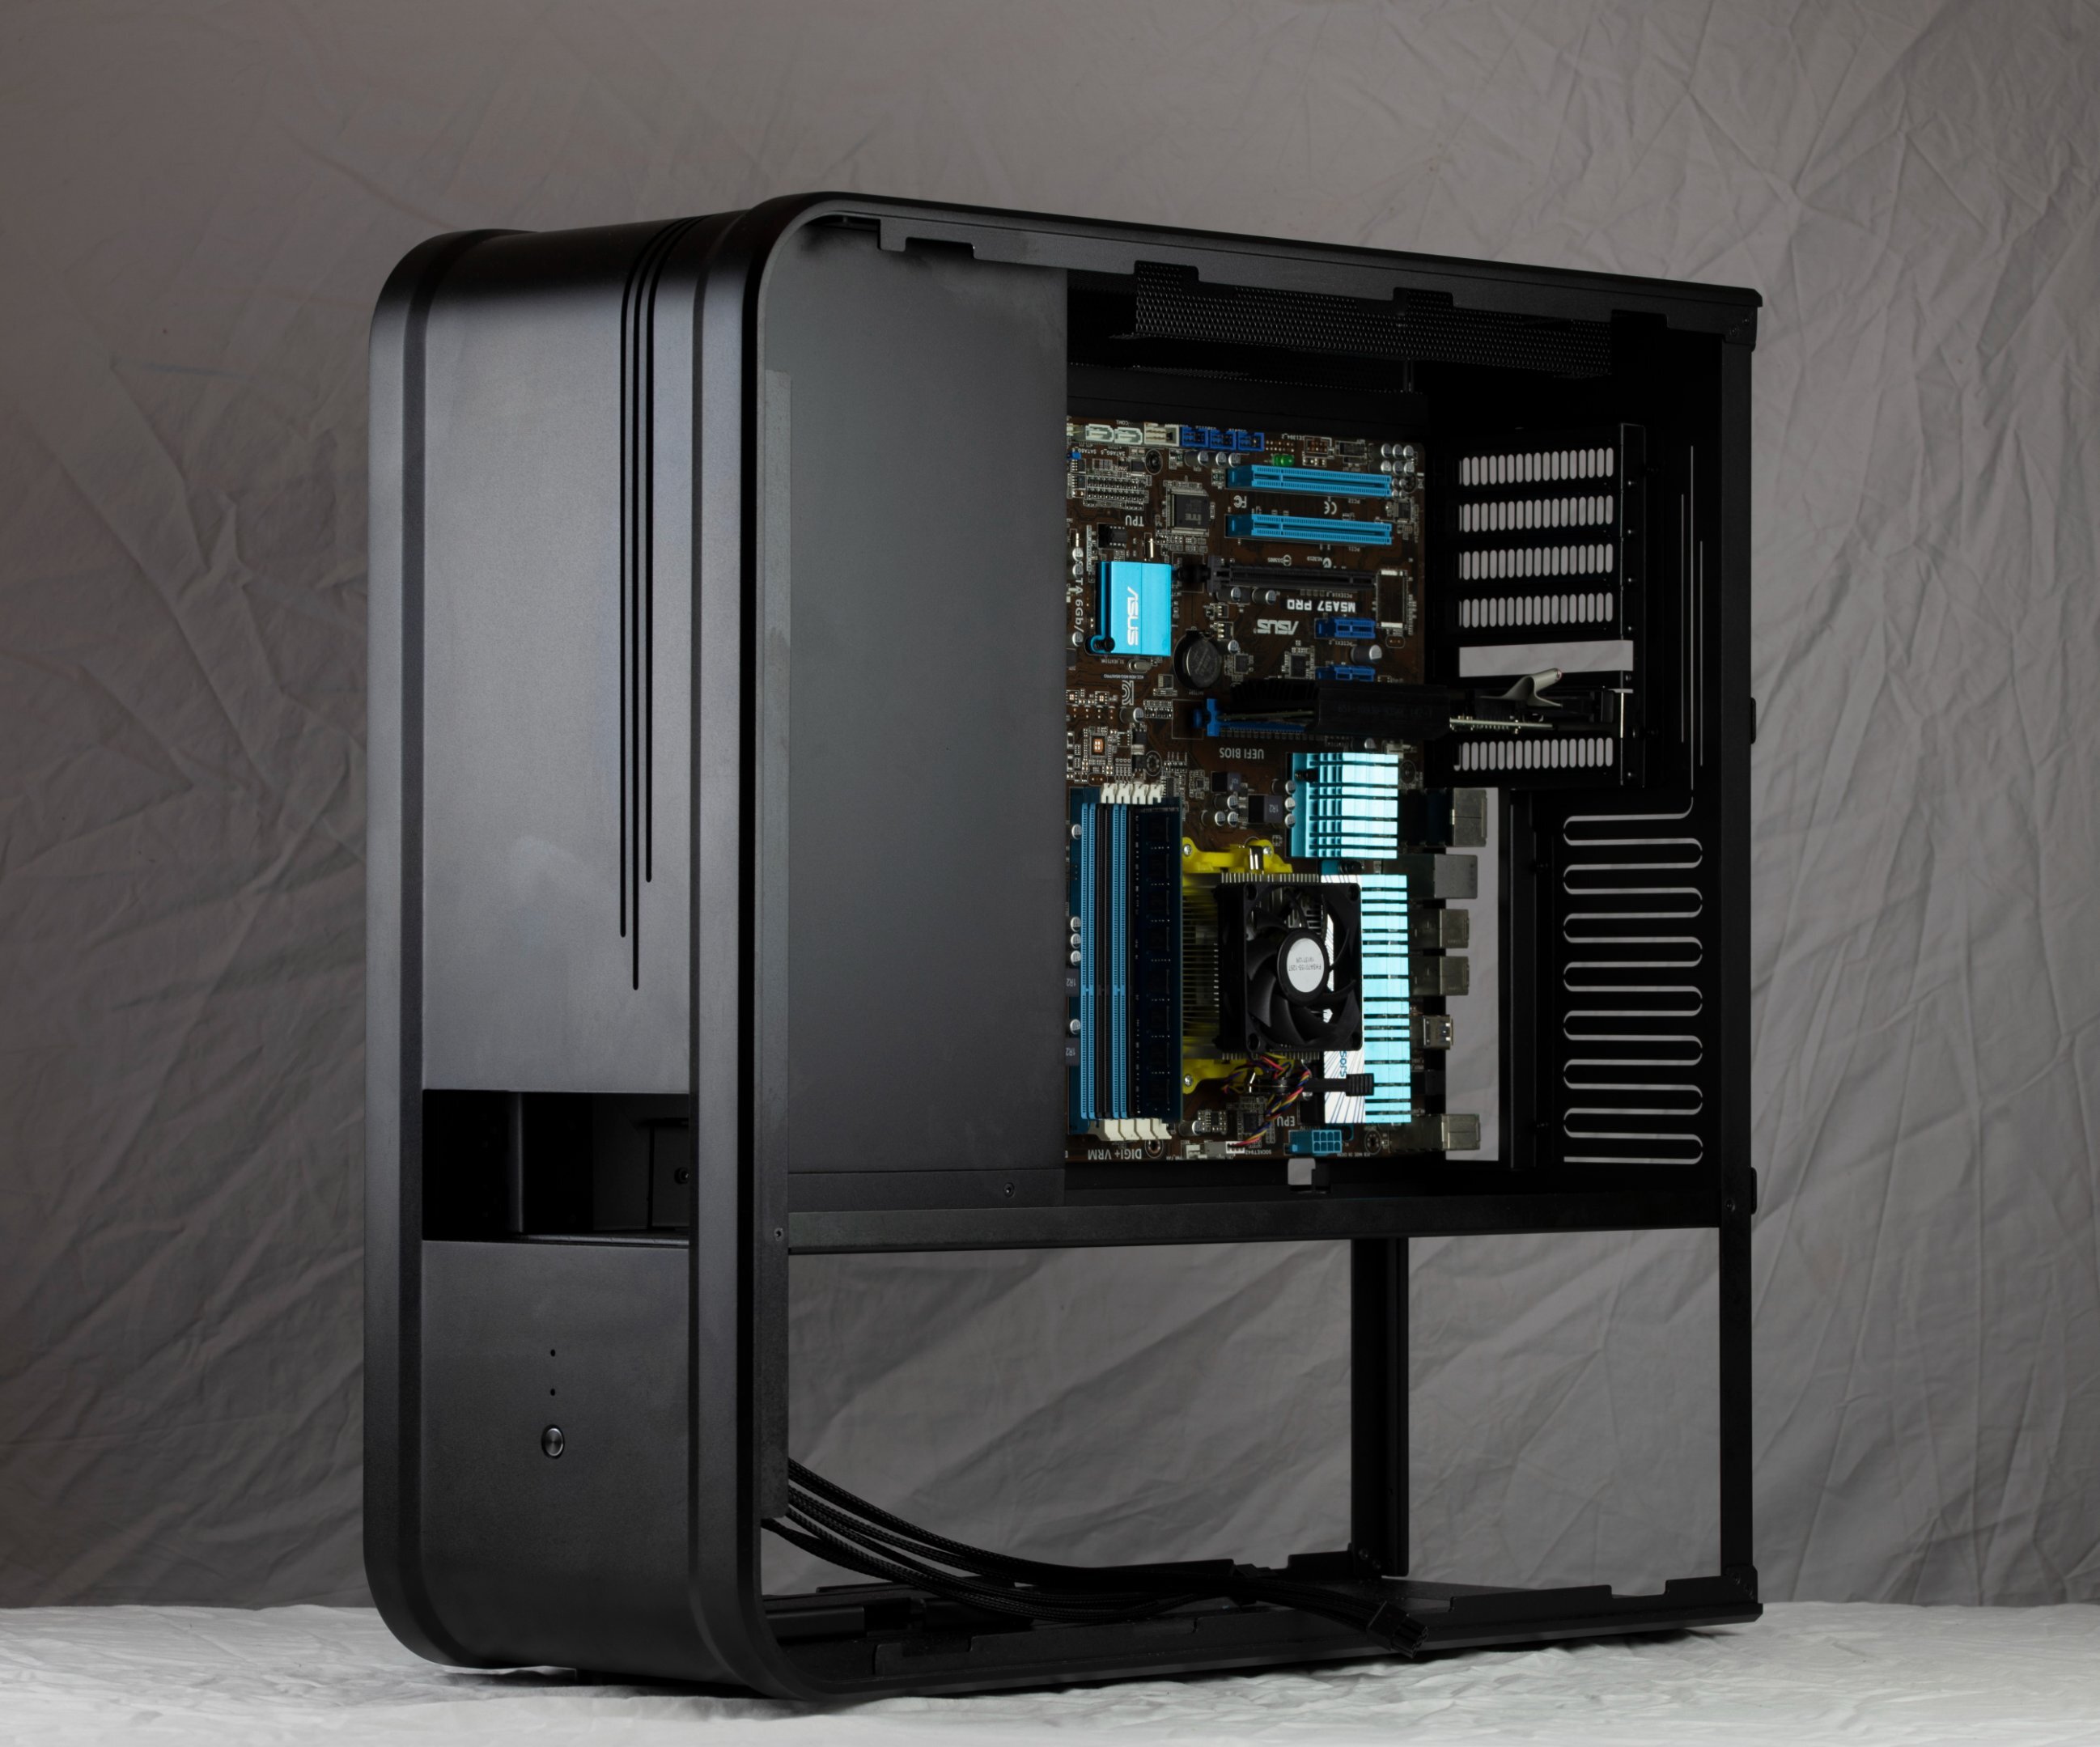
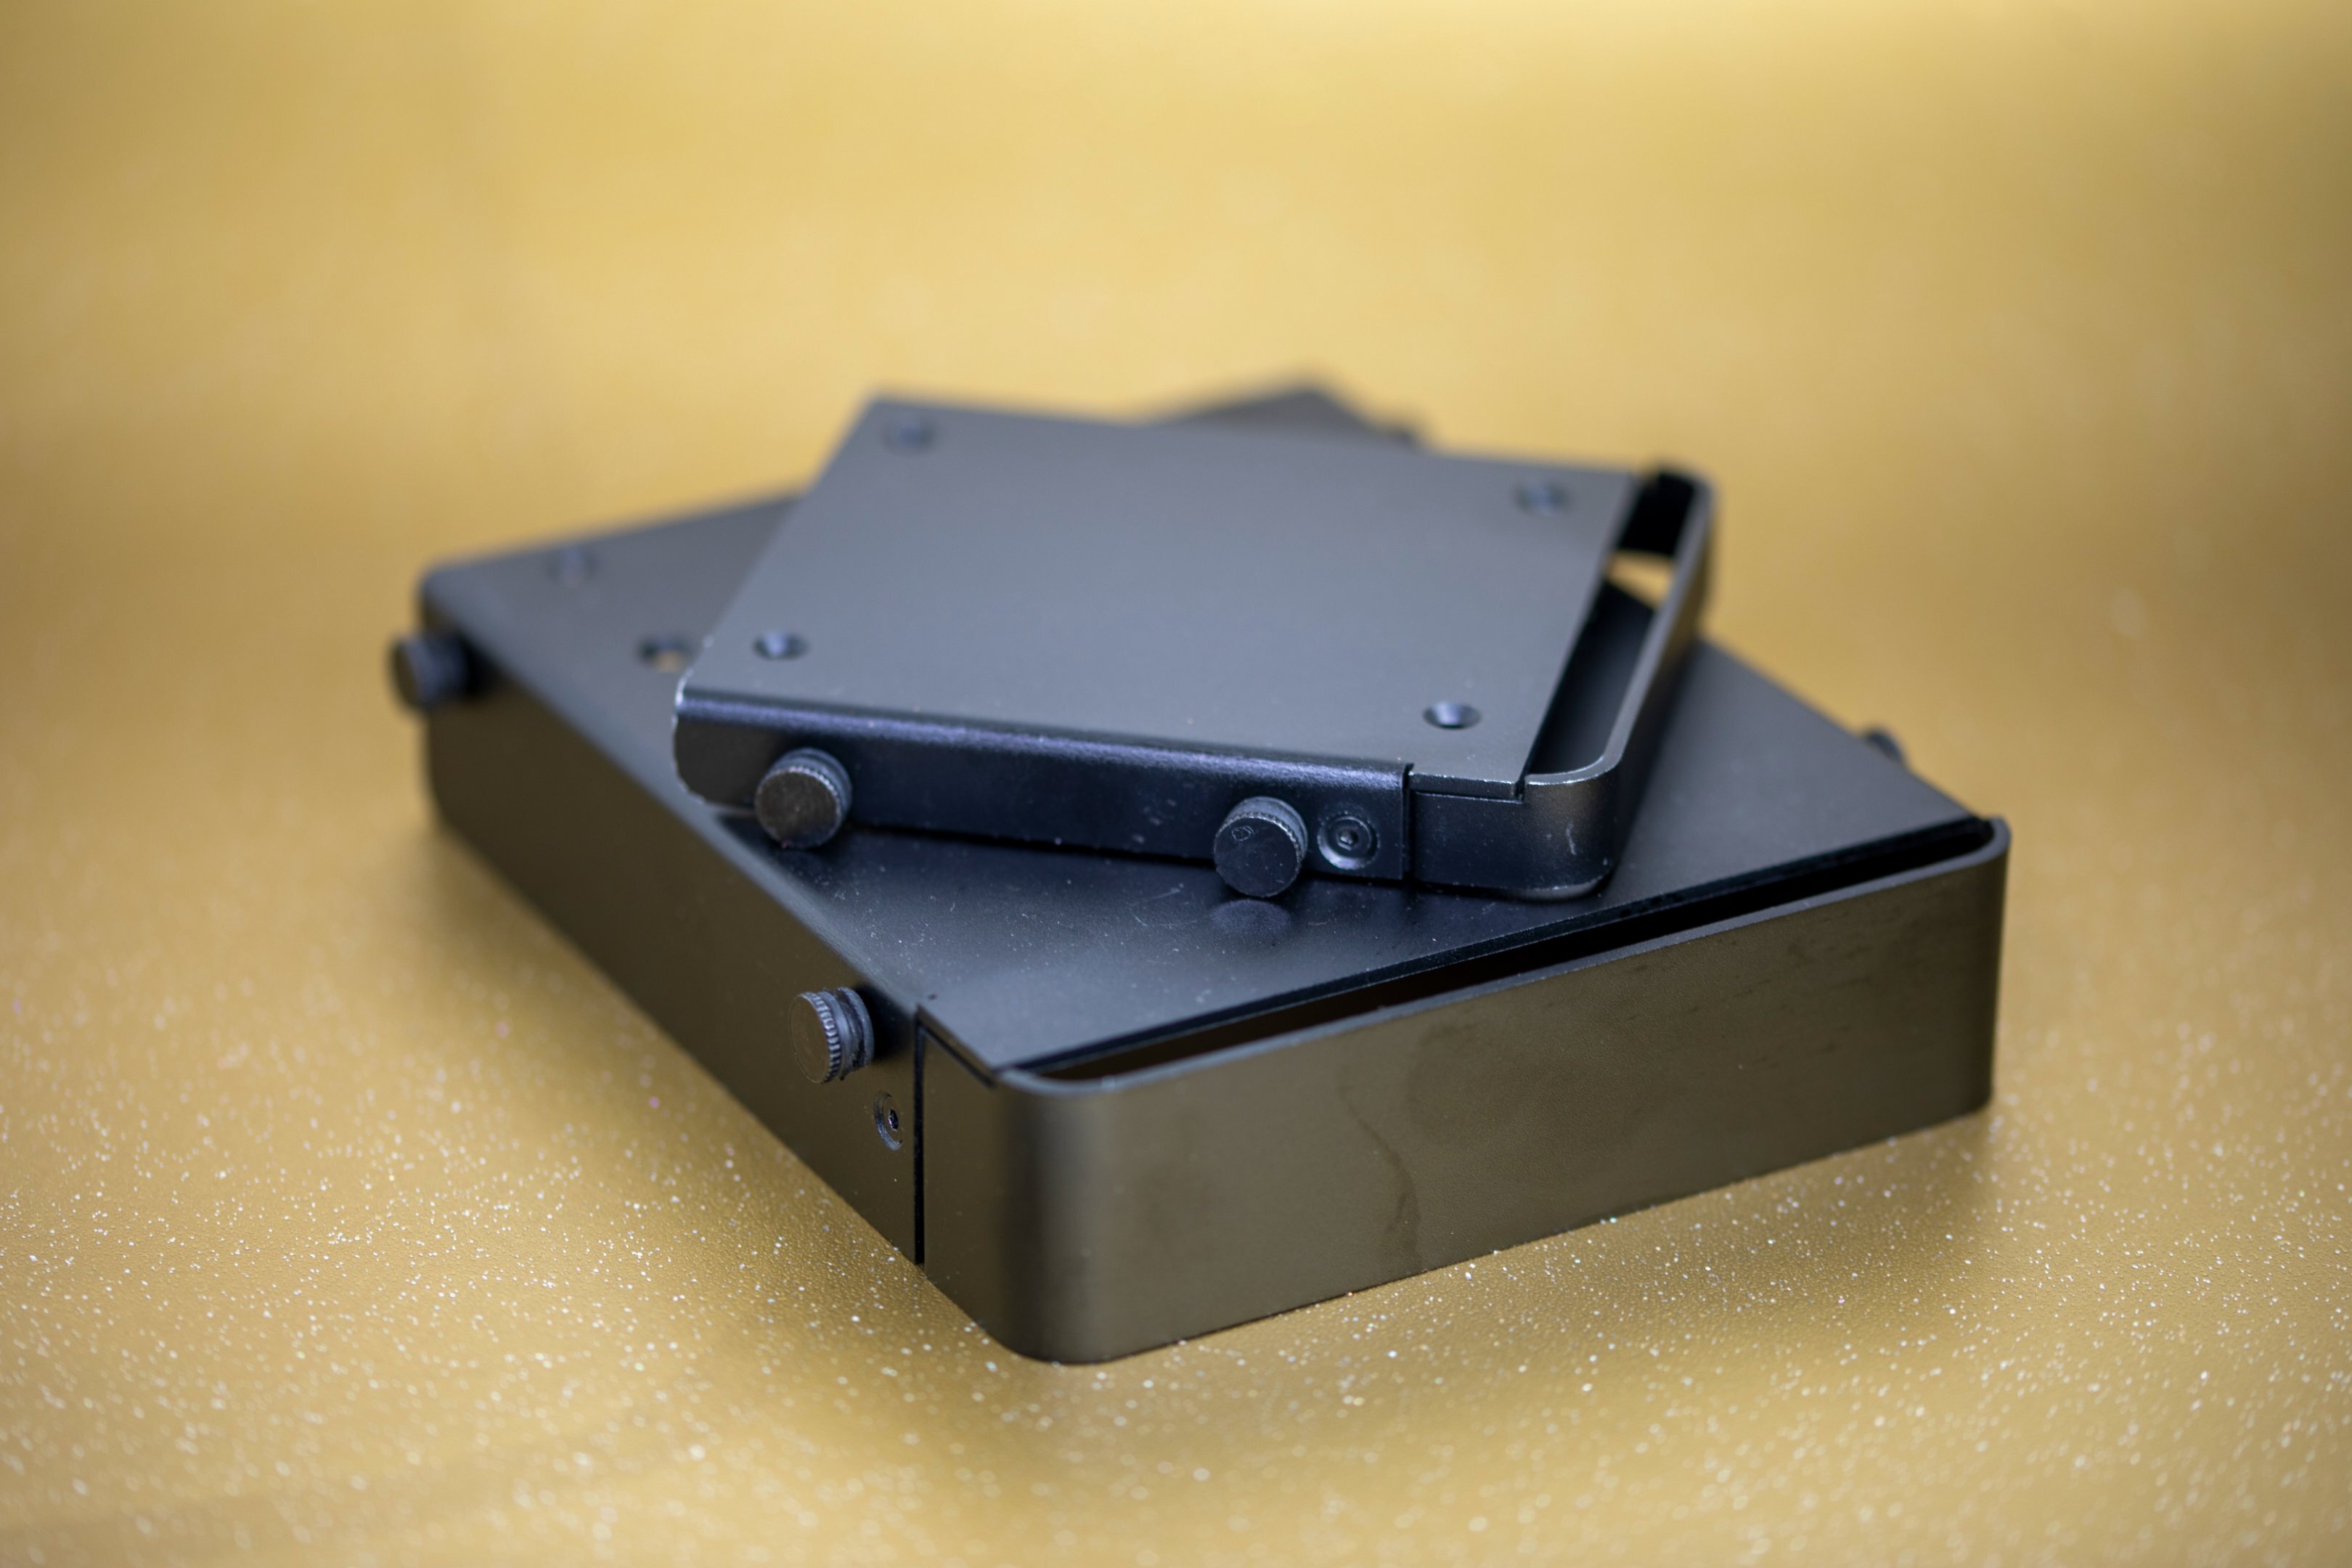
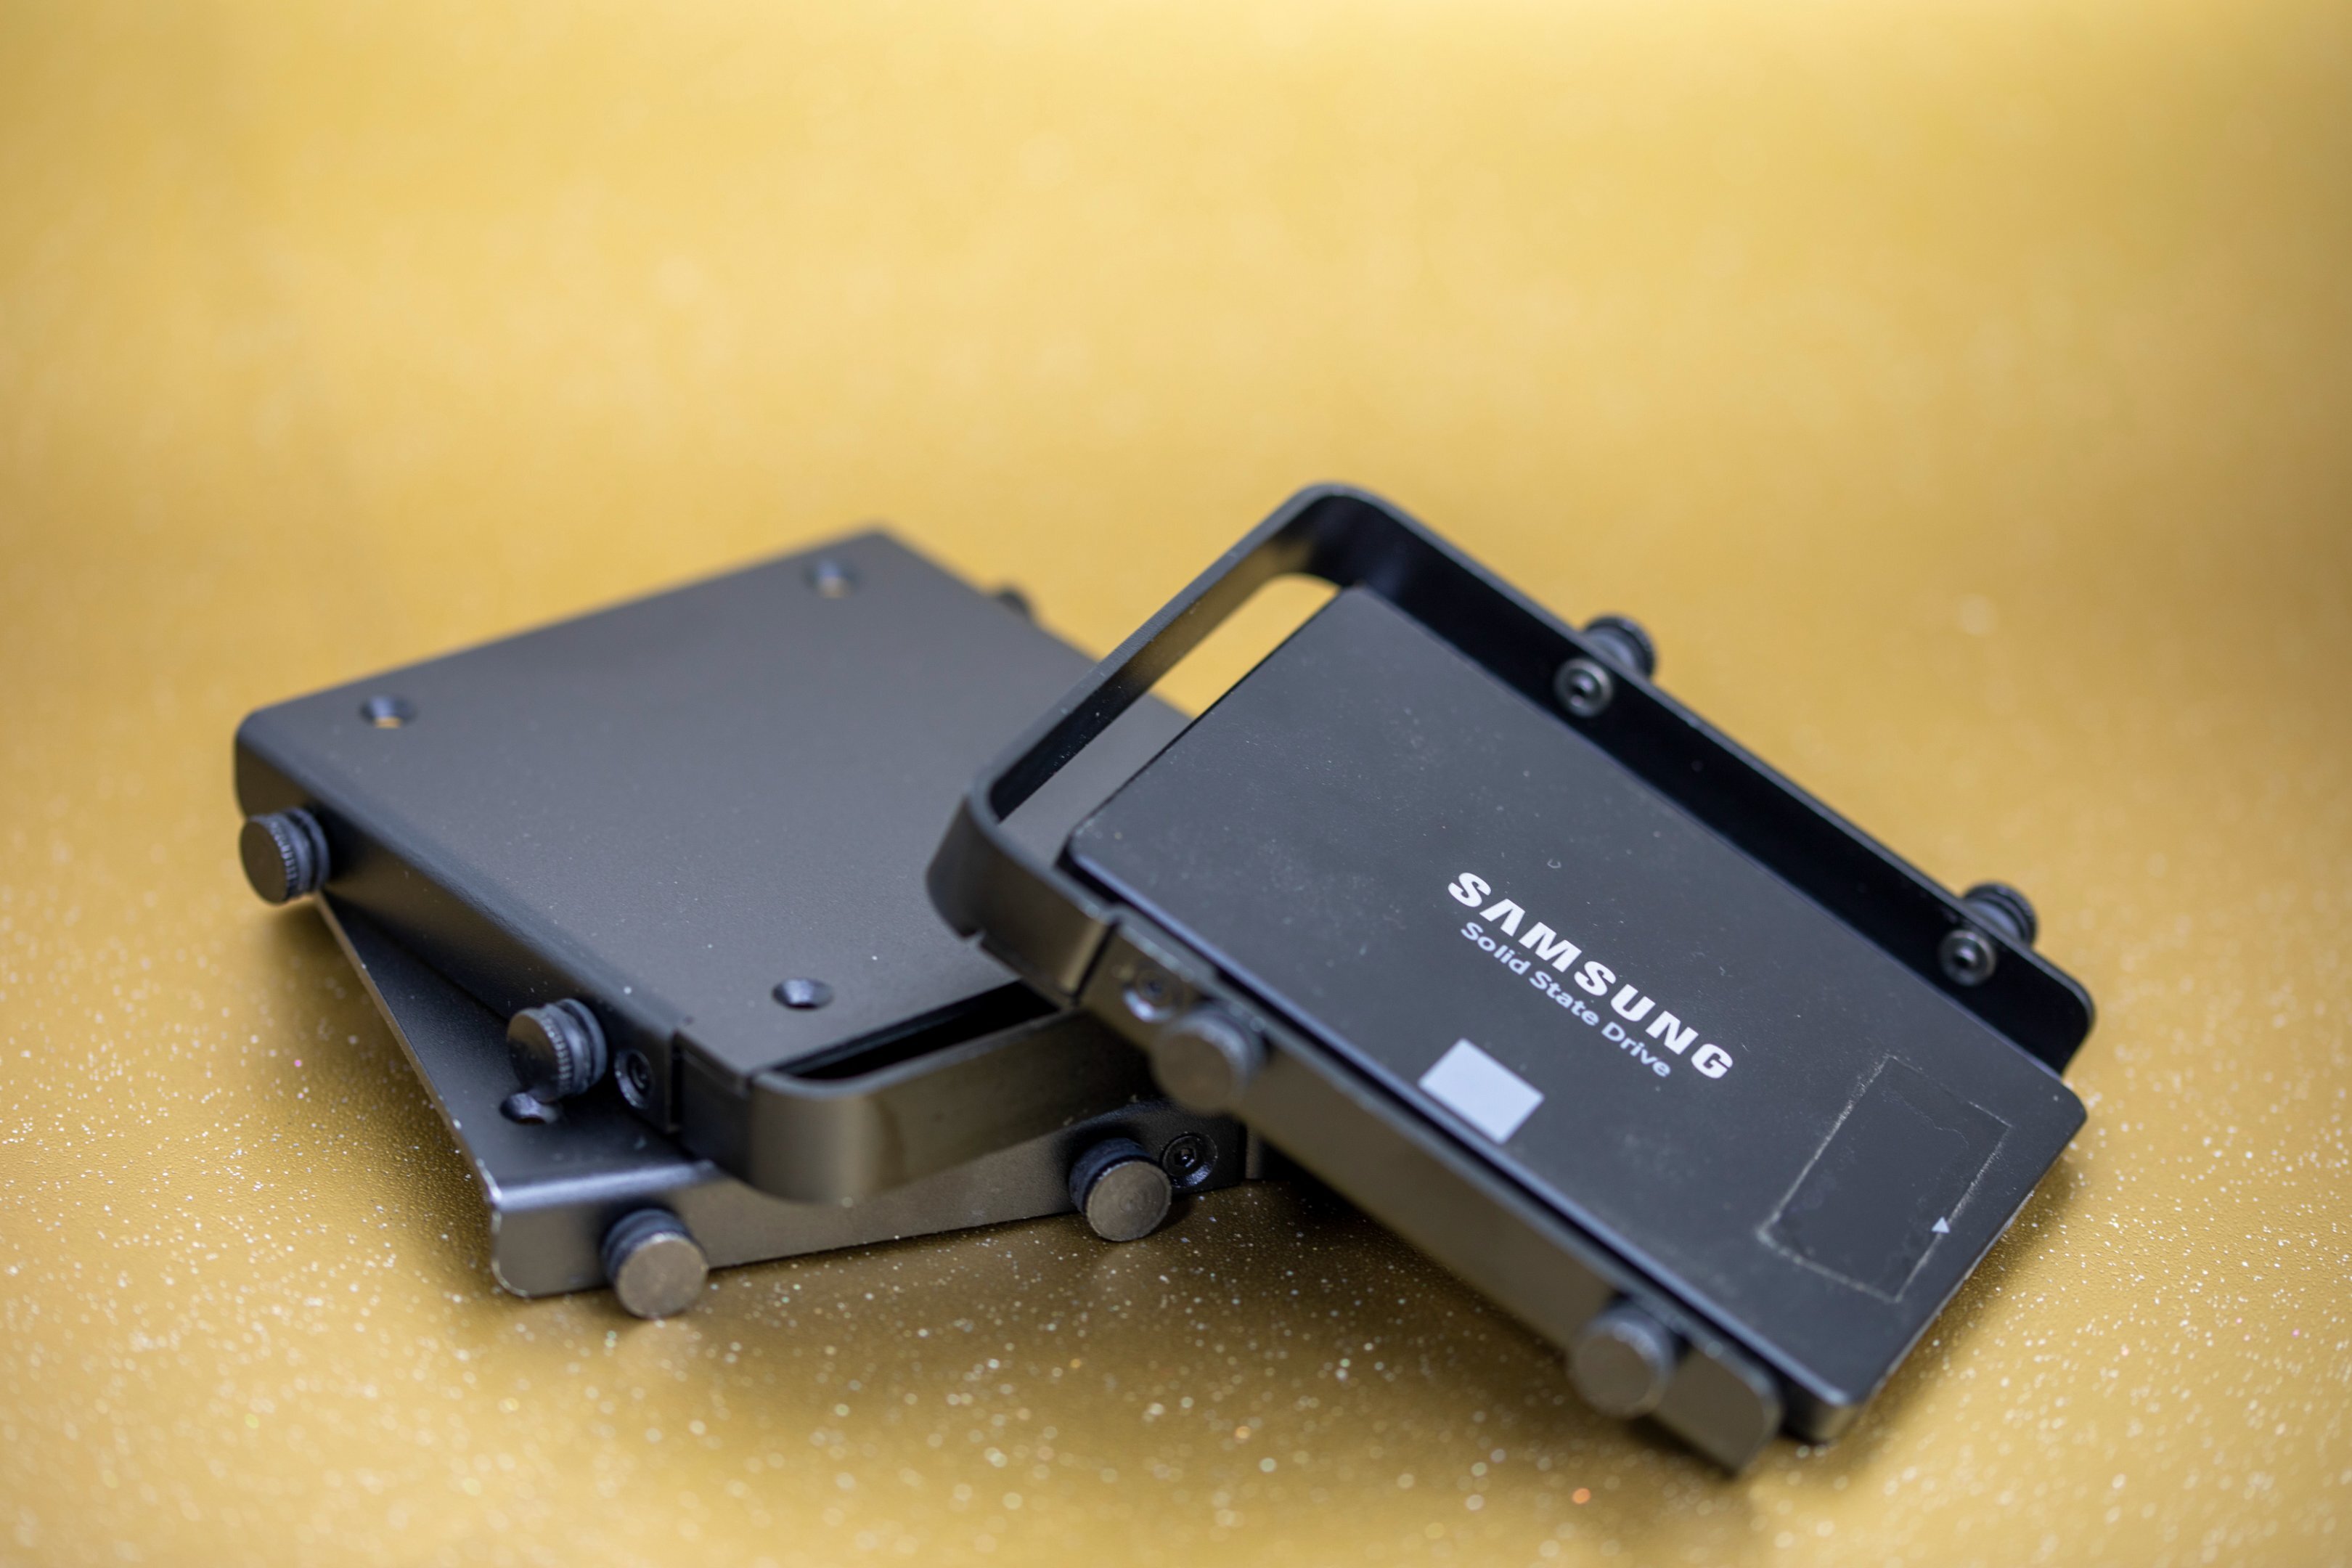
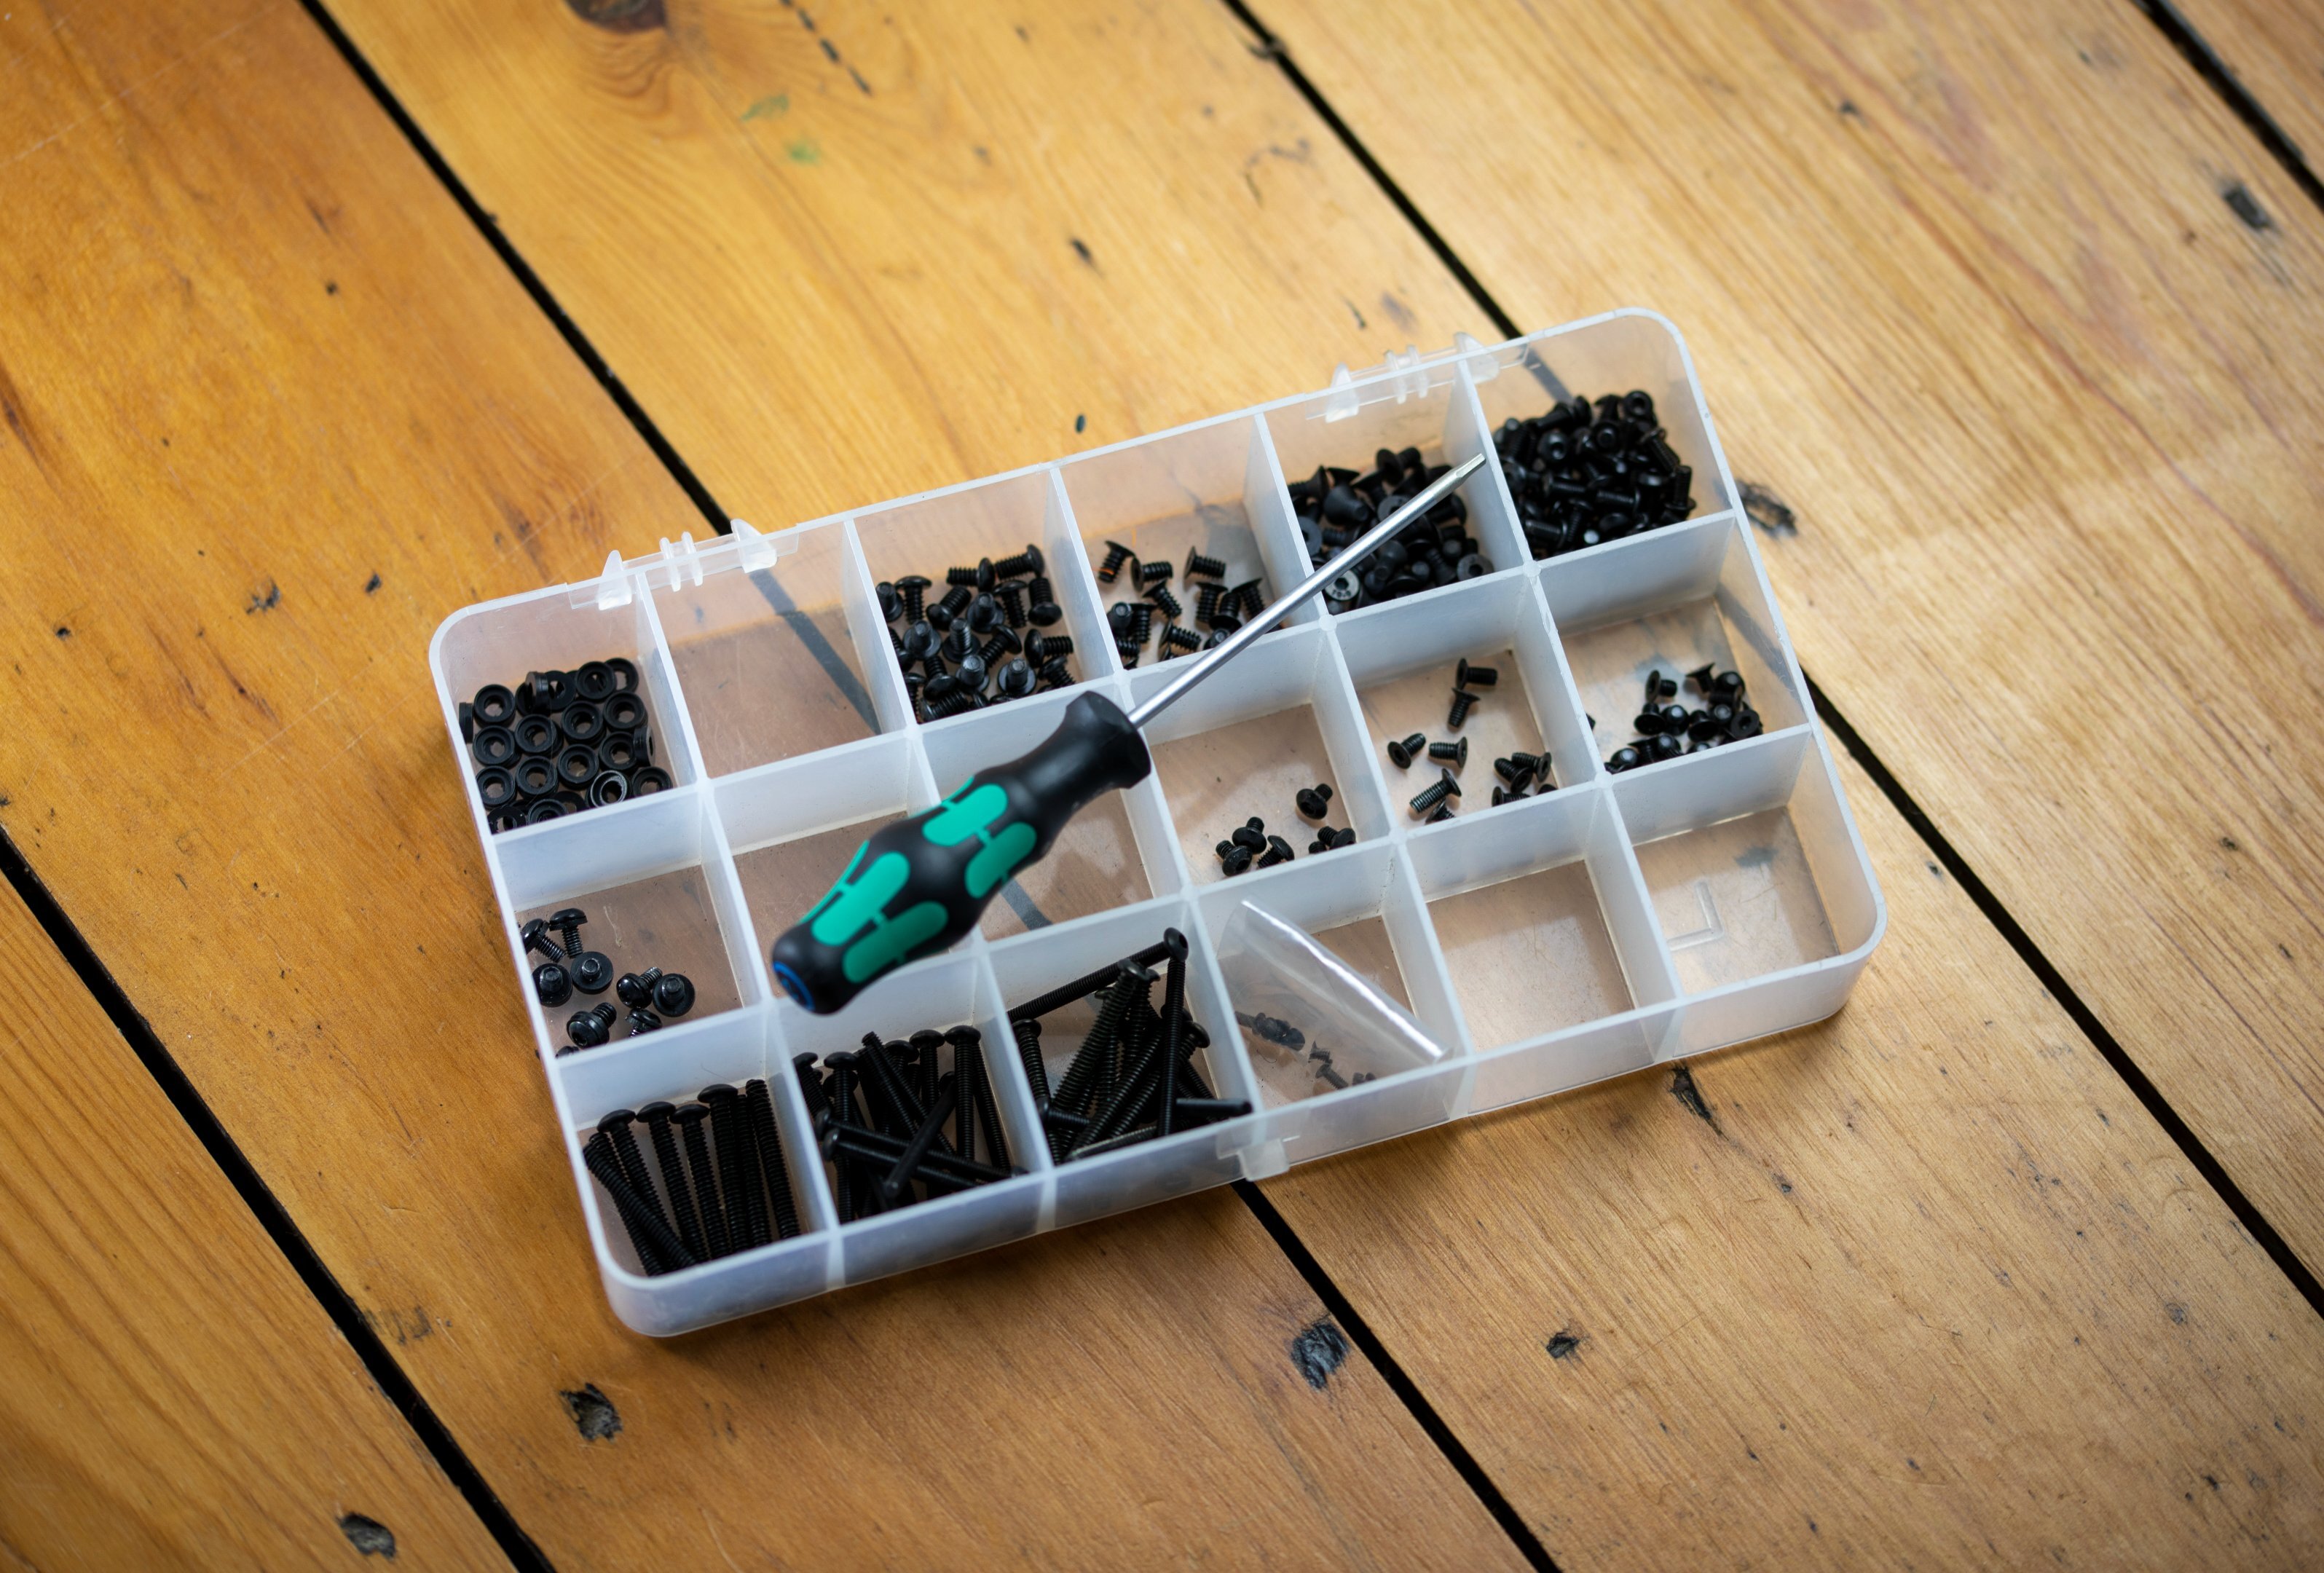
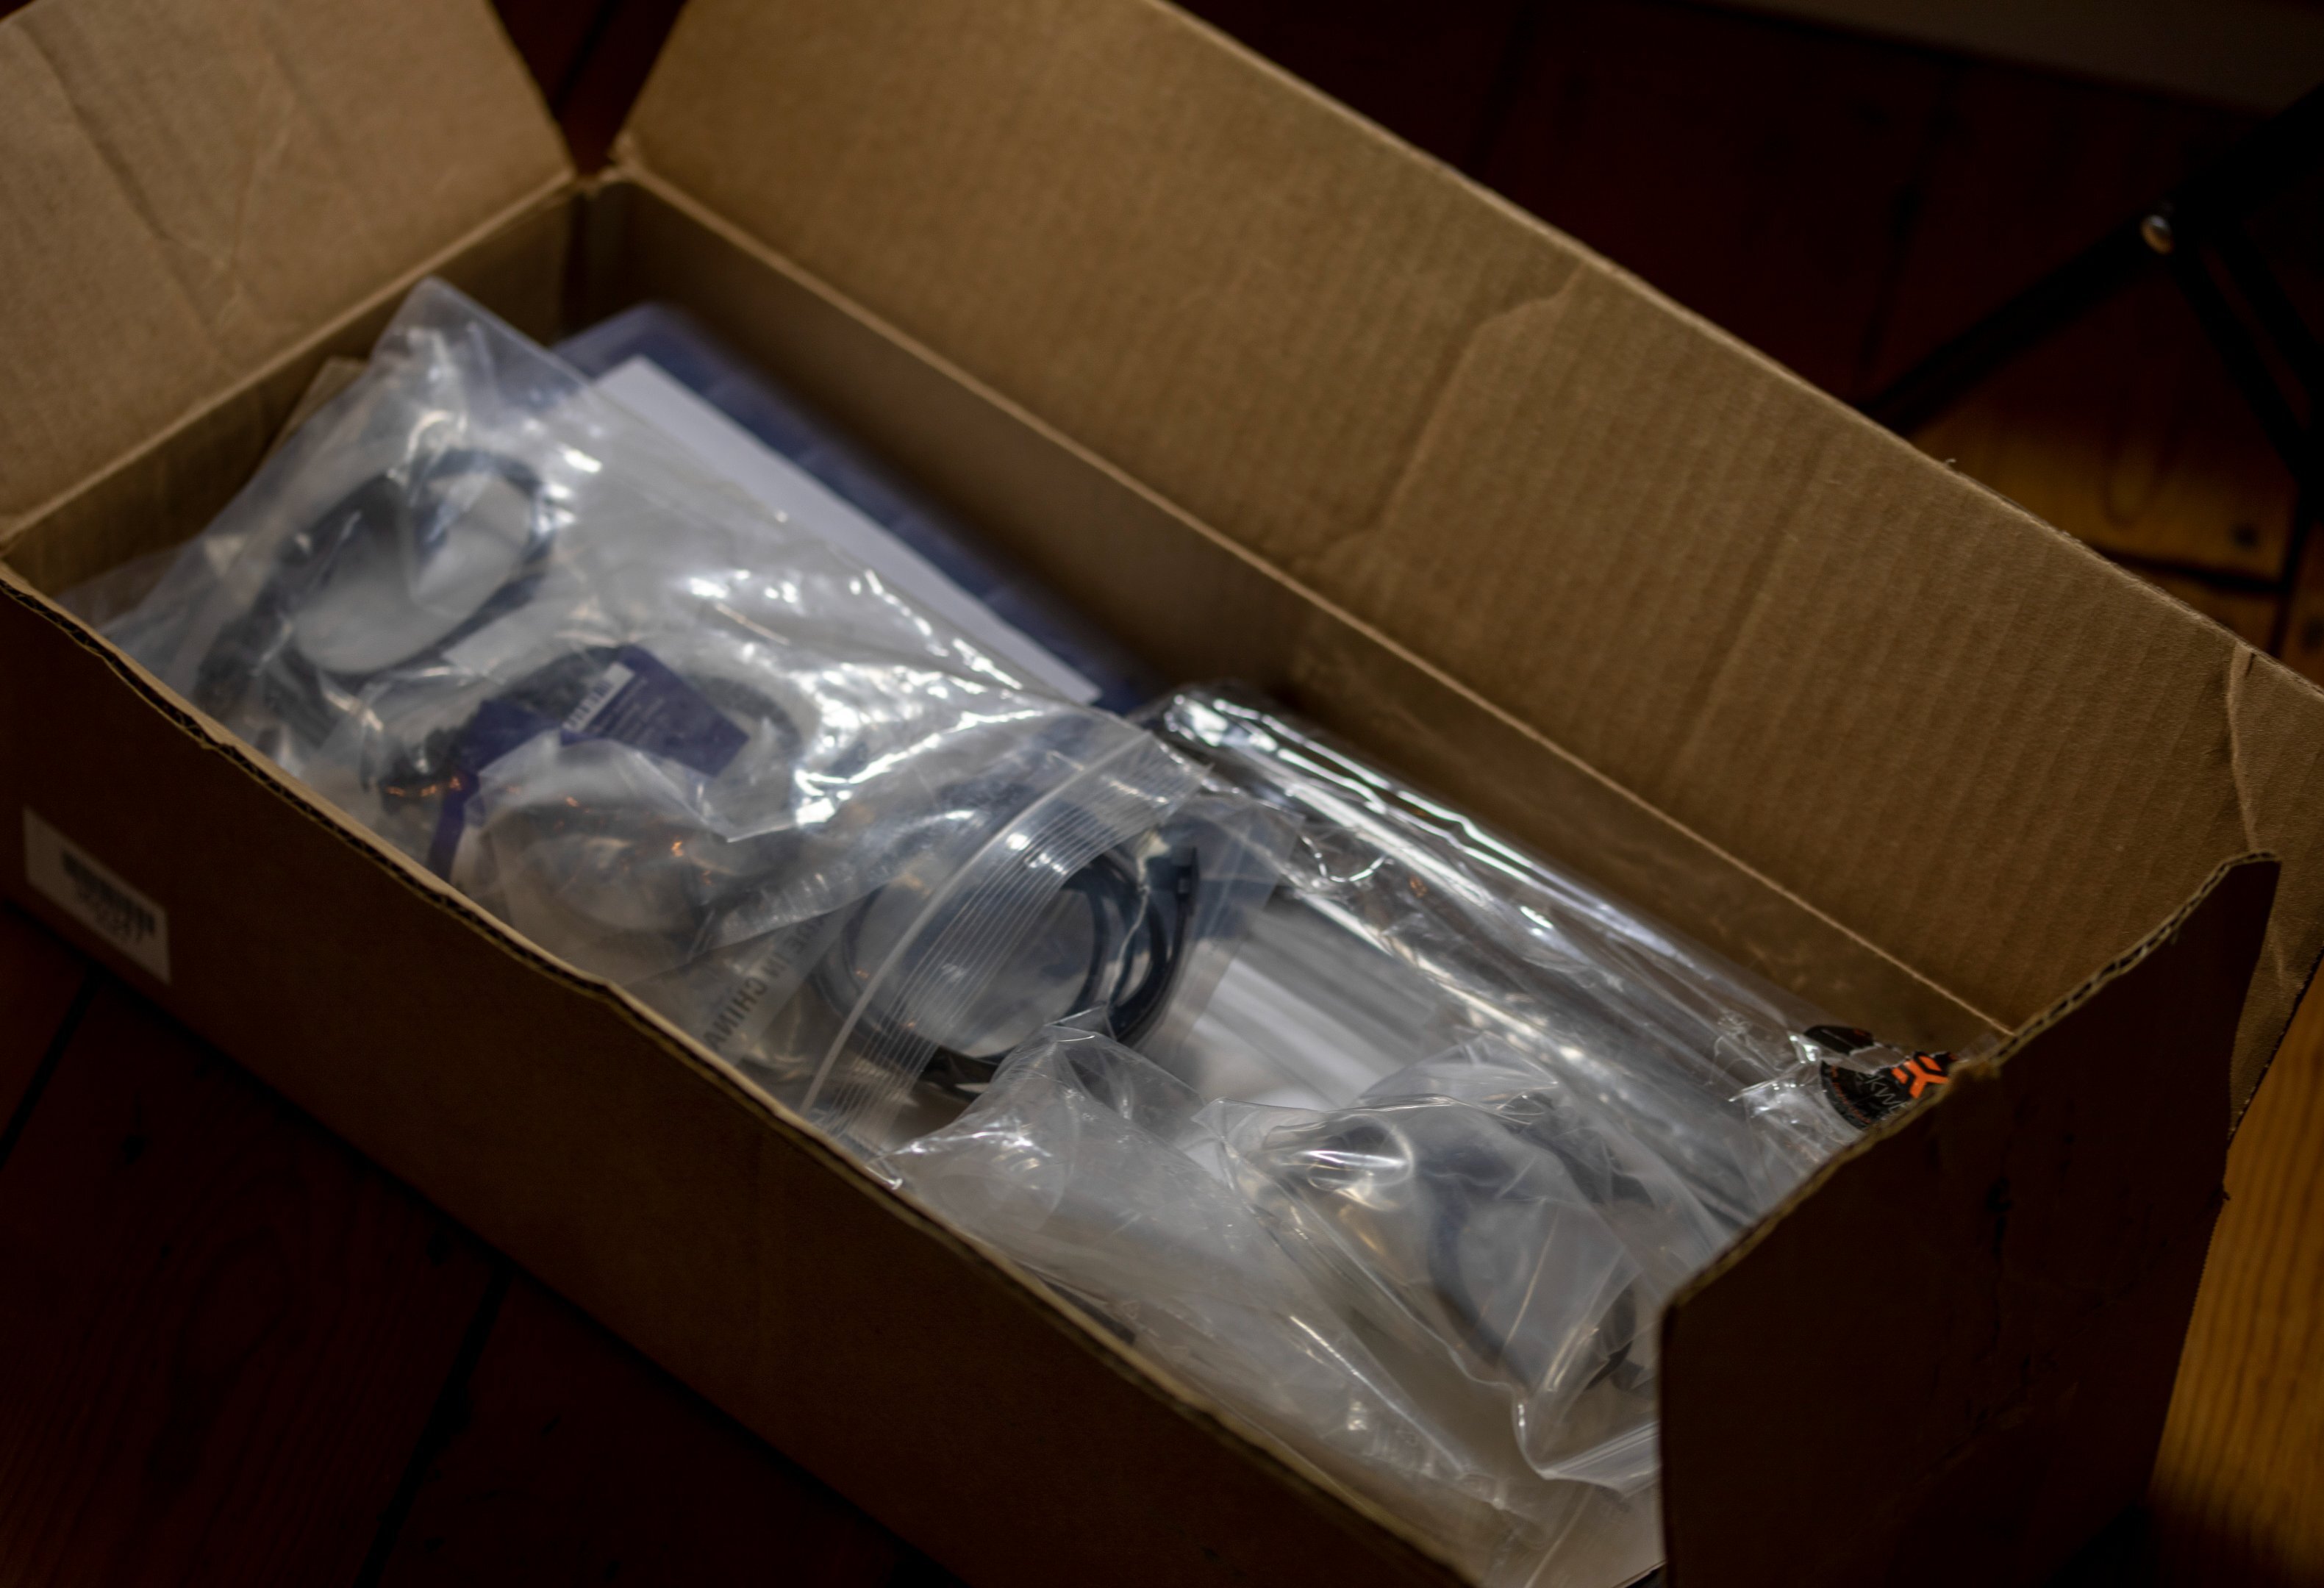
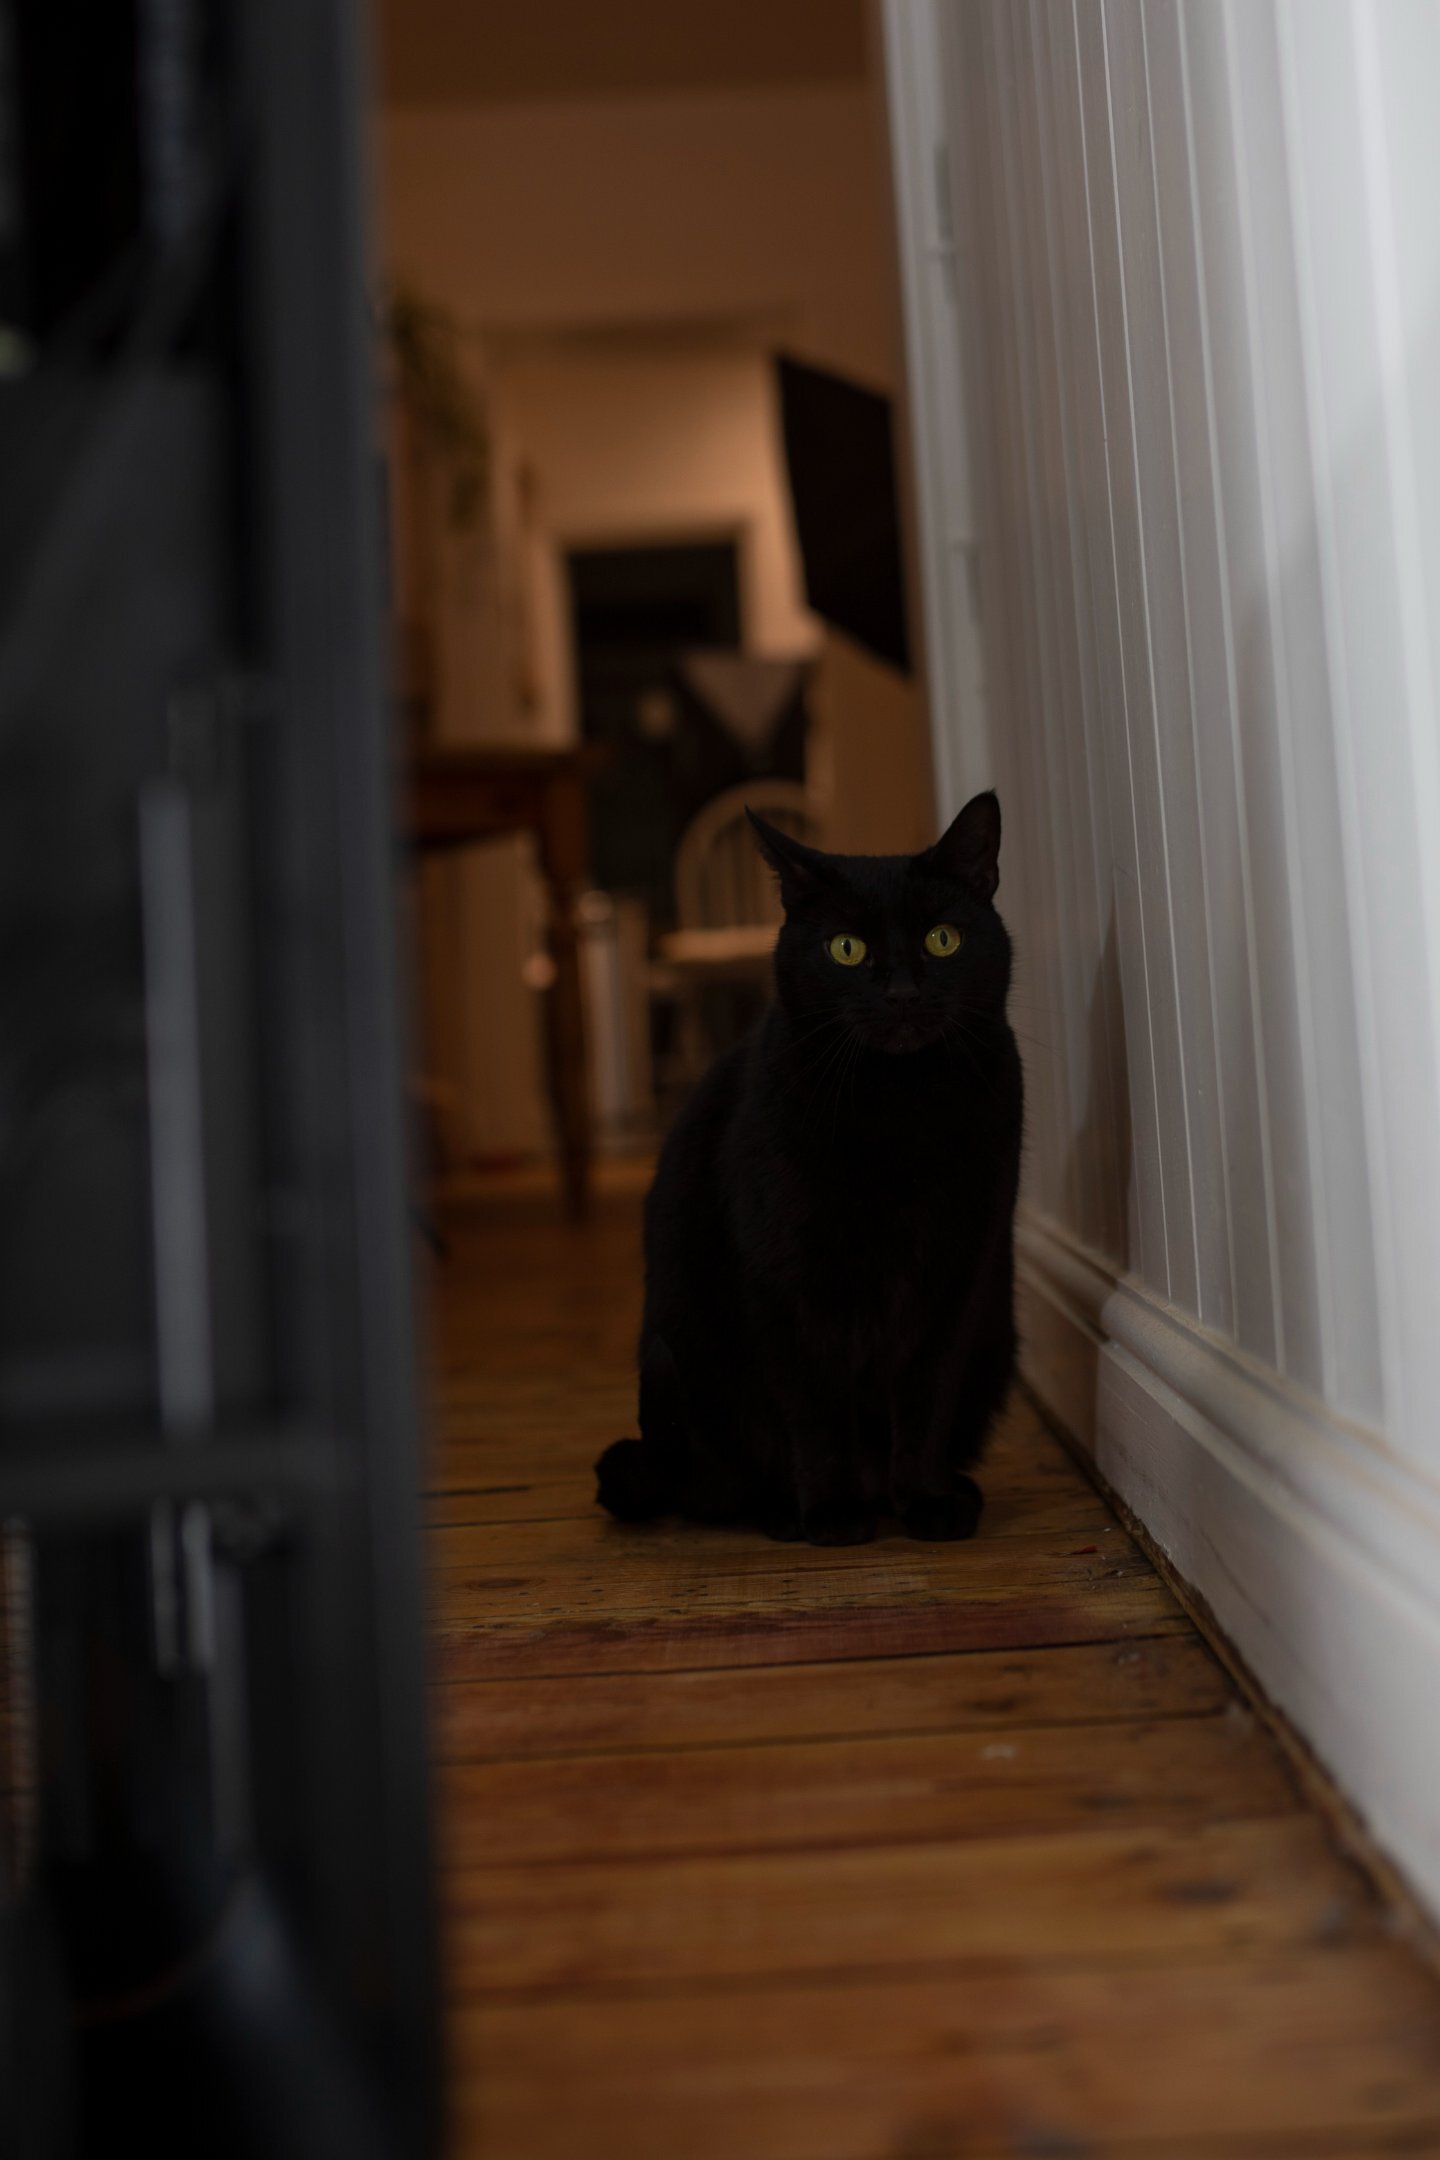
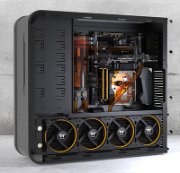
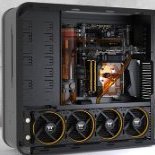
Welp, been a while huh... lets continue like nothing at all has happened to preoccupy the global population for almost two years shall we? So, new exciting updates incoming. Firstly, I got a new toy, which will be replacing the TJ07. But what could possibly replace the Best Case Ever? Tis madness! I hear you shout. Fret not- It's the Best Case Ever v2.0, a TJ07 on steroids and protein powder. Originally totally out of my budget, I found it for a slightly less eye-watering price and I mean, it would be rude not to really. It's an xForma, a completely custom TJ07 from Charles Harwood, the dude who created MDPCx, and Million Dollar PC. He basically took a TJ07 and rebuilt it from the ground up, with almost all of the parts changed in some manner. It's super cool to have a piece of PC-Modding history, especially from the guy who kinda made popular a lot of the things we take for granted these days (sleeving, etc). Hopefully I'll do it some justice! I've been playing with some new camera gear so probably got a bit carried away. I think it looks super-sweet. Here's some bits I think are interesting. The finish is totally sick. Orange LED strip in the front panel. Only 250! Anyone fancy trading me for no.008? Internal storage bays, 3x HDD & 3x SSD. They plug into a custom PCB. All the power for the drives feeds through here. Pepper giving me evils. I think she's jealous. Still got the removable motherboard tray! This thing is like, 14mm thick solid aluminium. It weighs a TON. Even the screws are fancy hex-head. Drive mounts. They're push fit and the drives connect straight to the PCB. Trying to make the photos a bit more interesting too! This one is... gold... Adorable! The case came with so much stuff. Including like, 200 screws, washers and even a tiny screwdriver! Loads more stuff to dig through. Yay content! Obligatory Cat Tax. I've been doing quite a lot of work for the build in the last month or two, so at least there will be a bit more content as I faff around with everything. Updates to follow. Cheers!
-
Hahah fear not, I have a duplicate piece of aluminium and a new set of hole cutting drill bits- version 2 will be much more professional ?
-
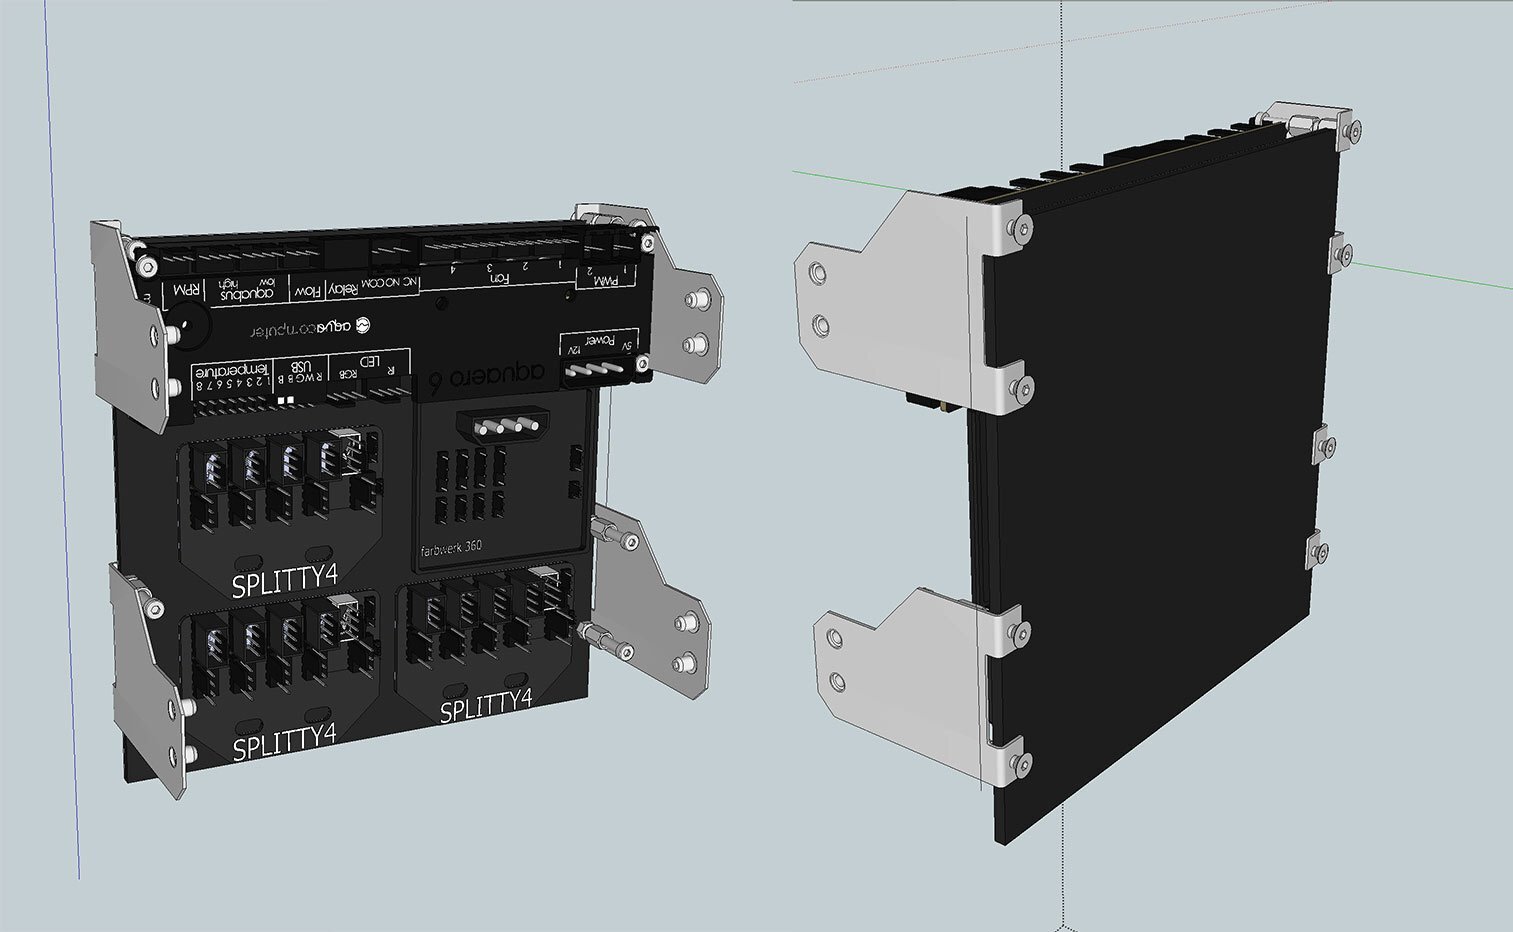
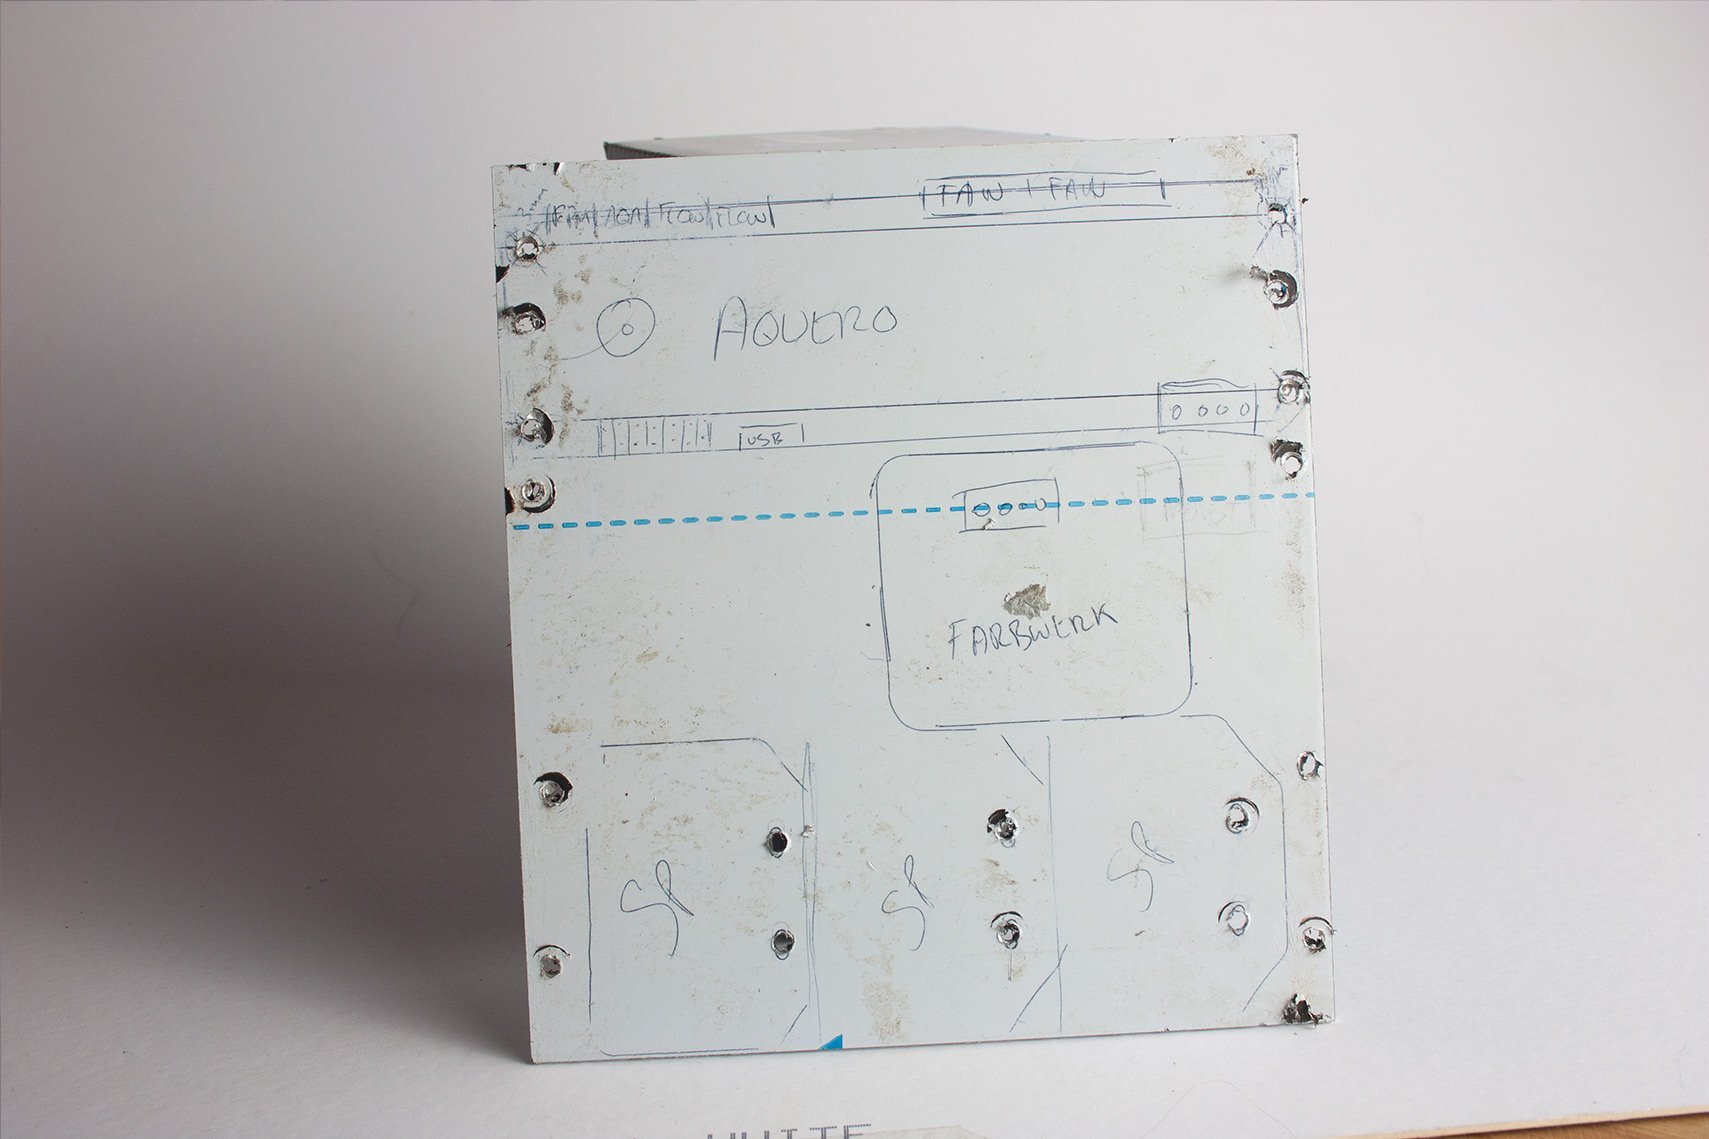
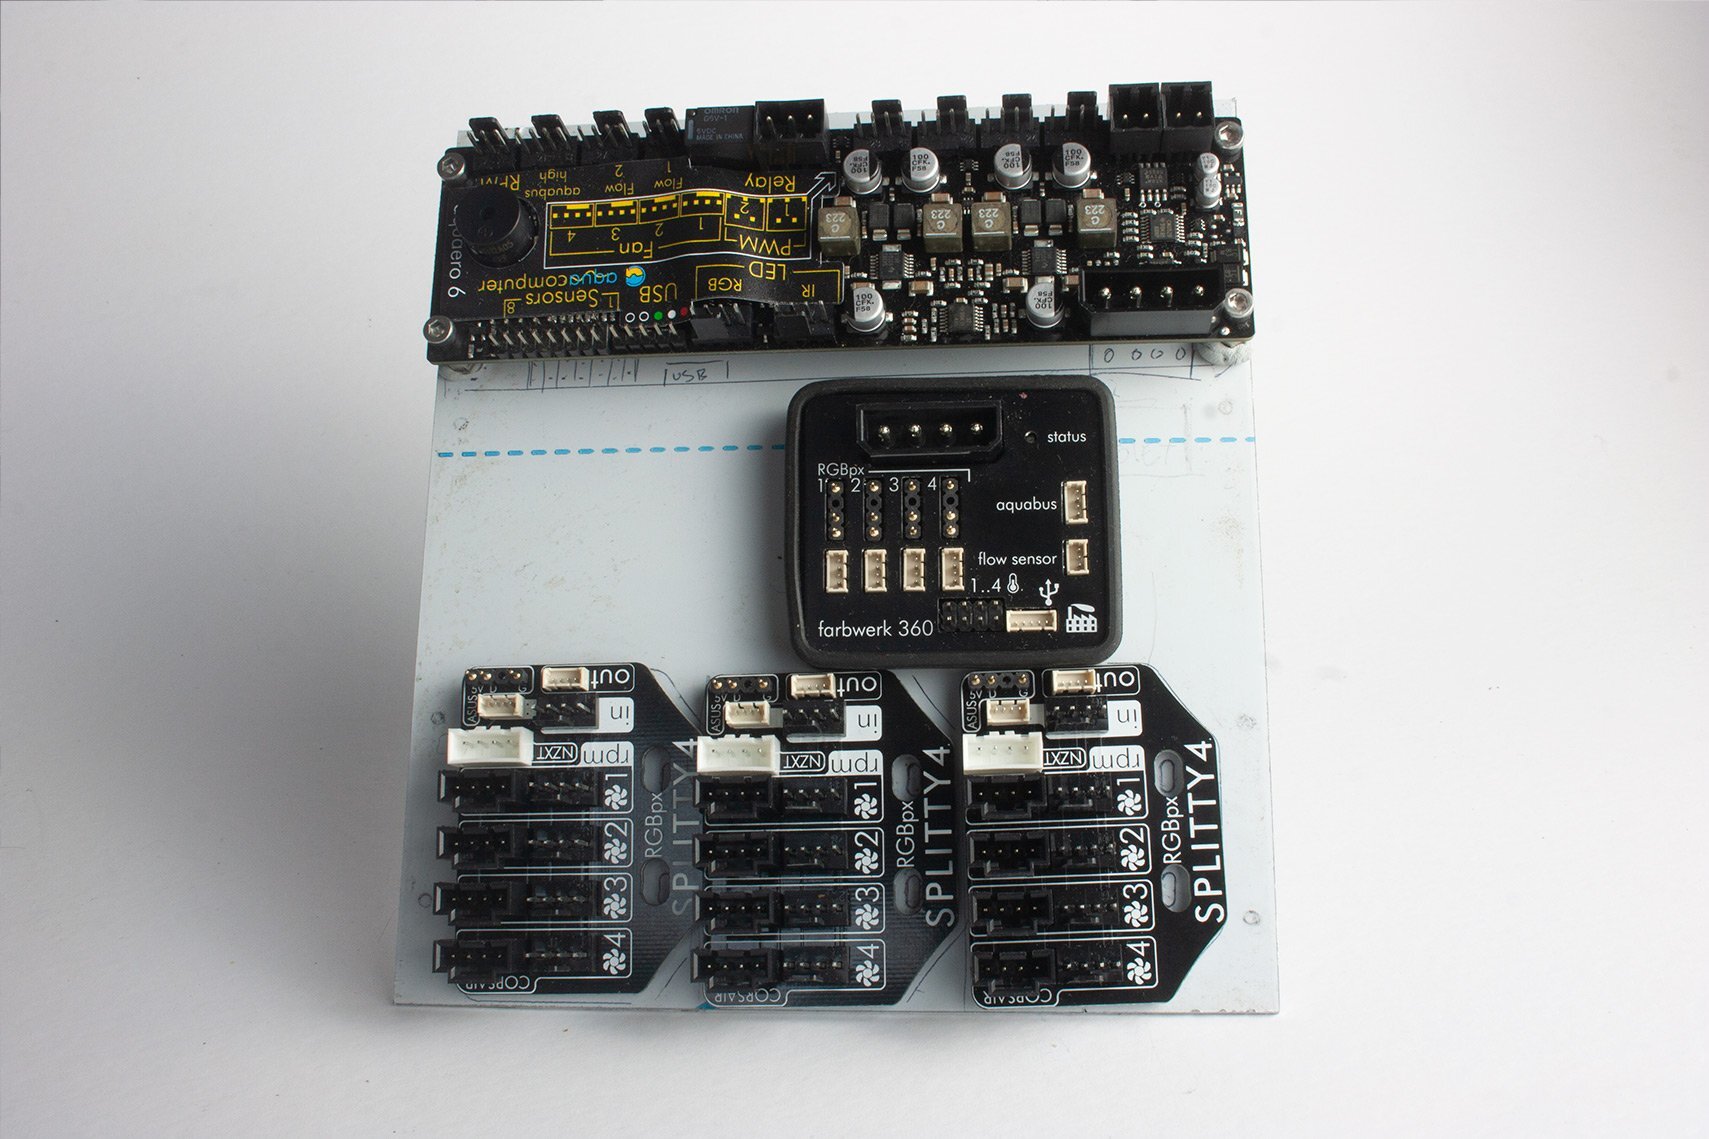
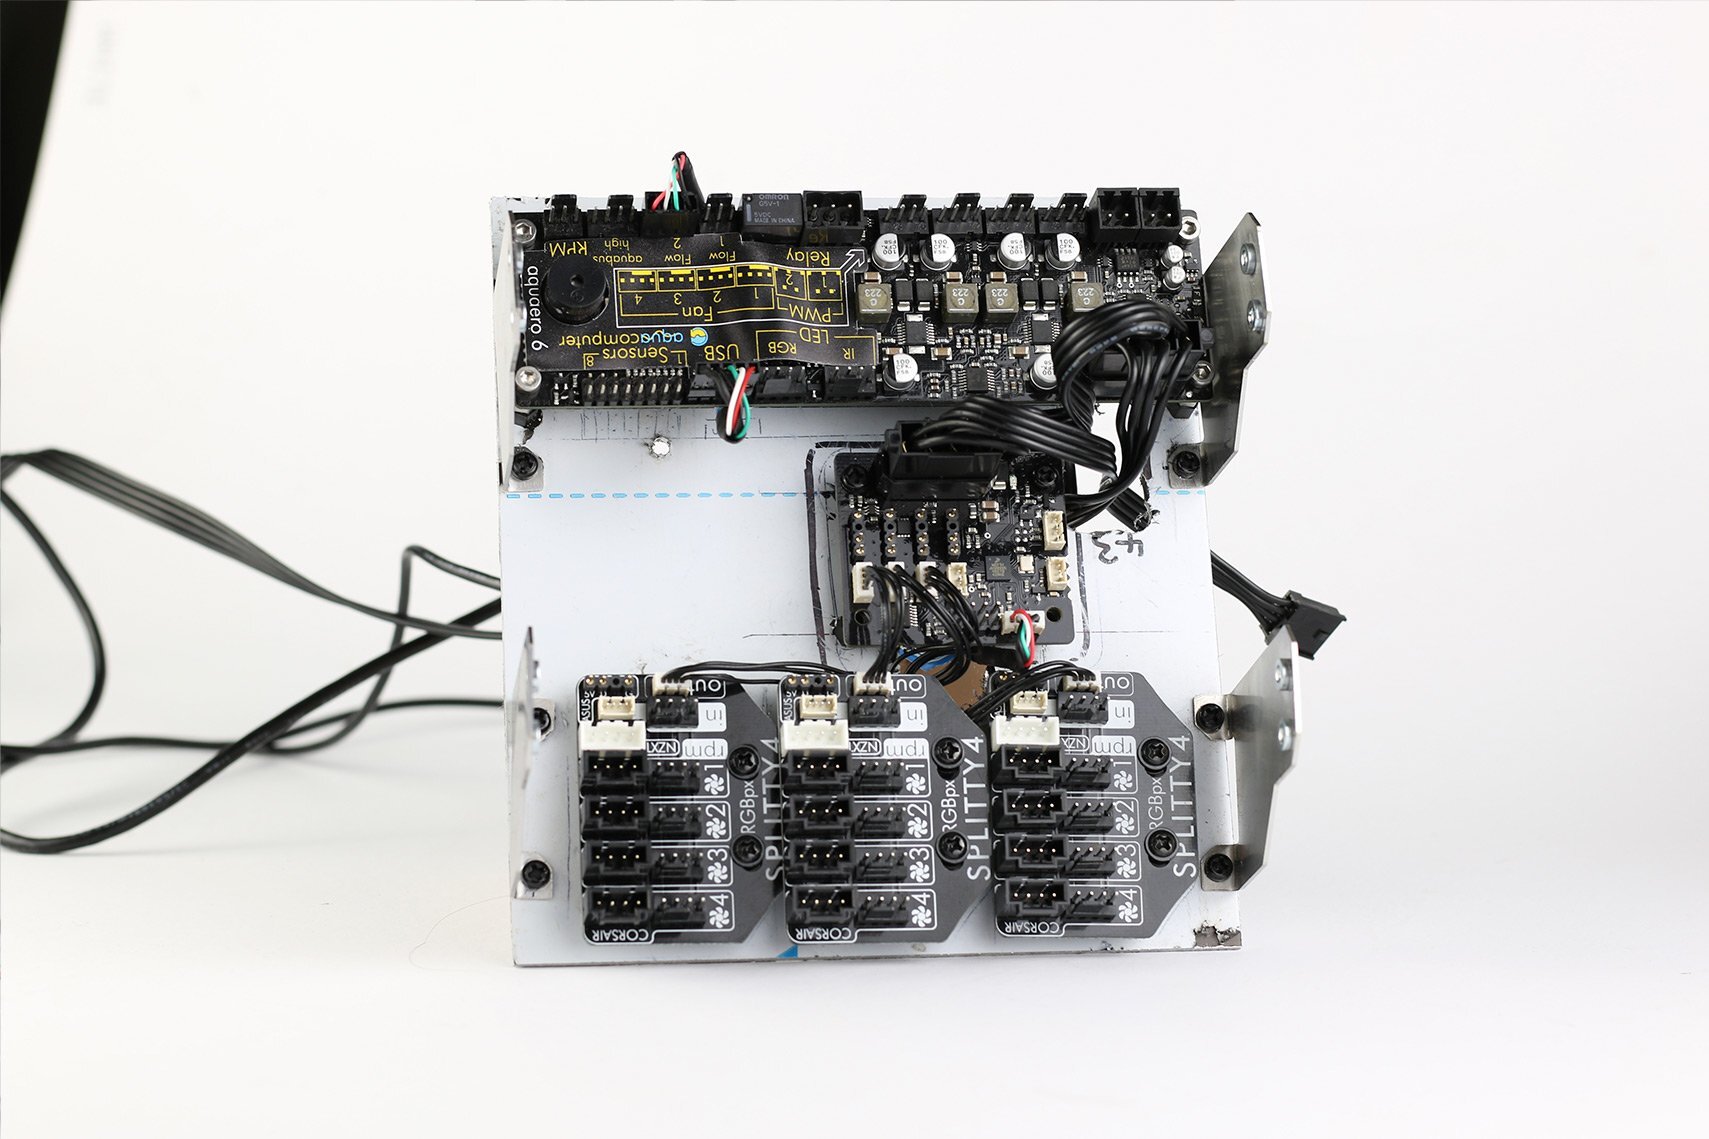
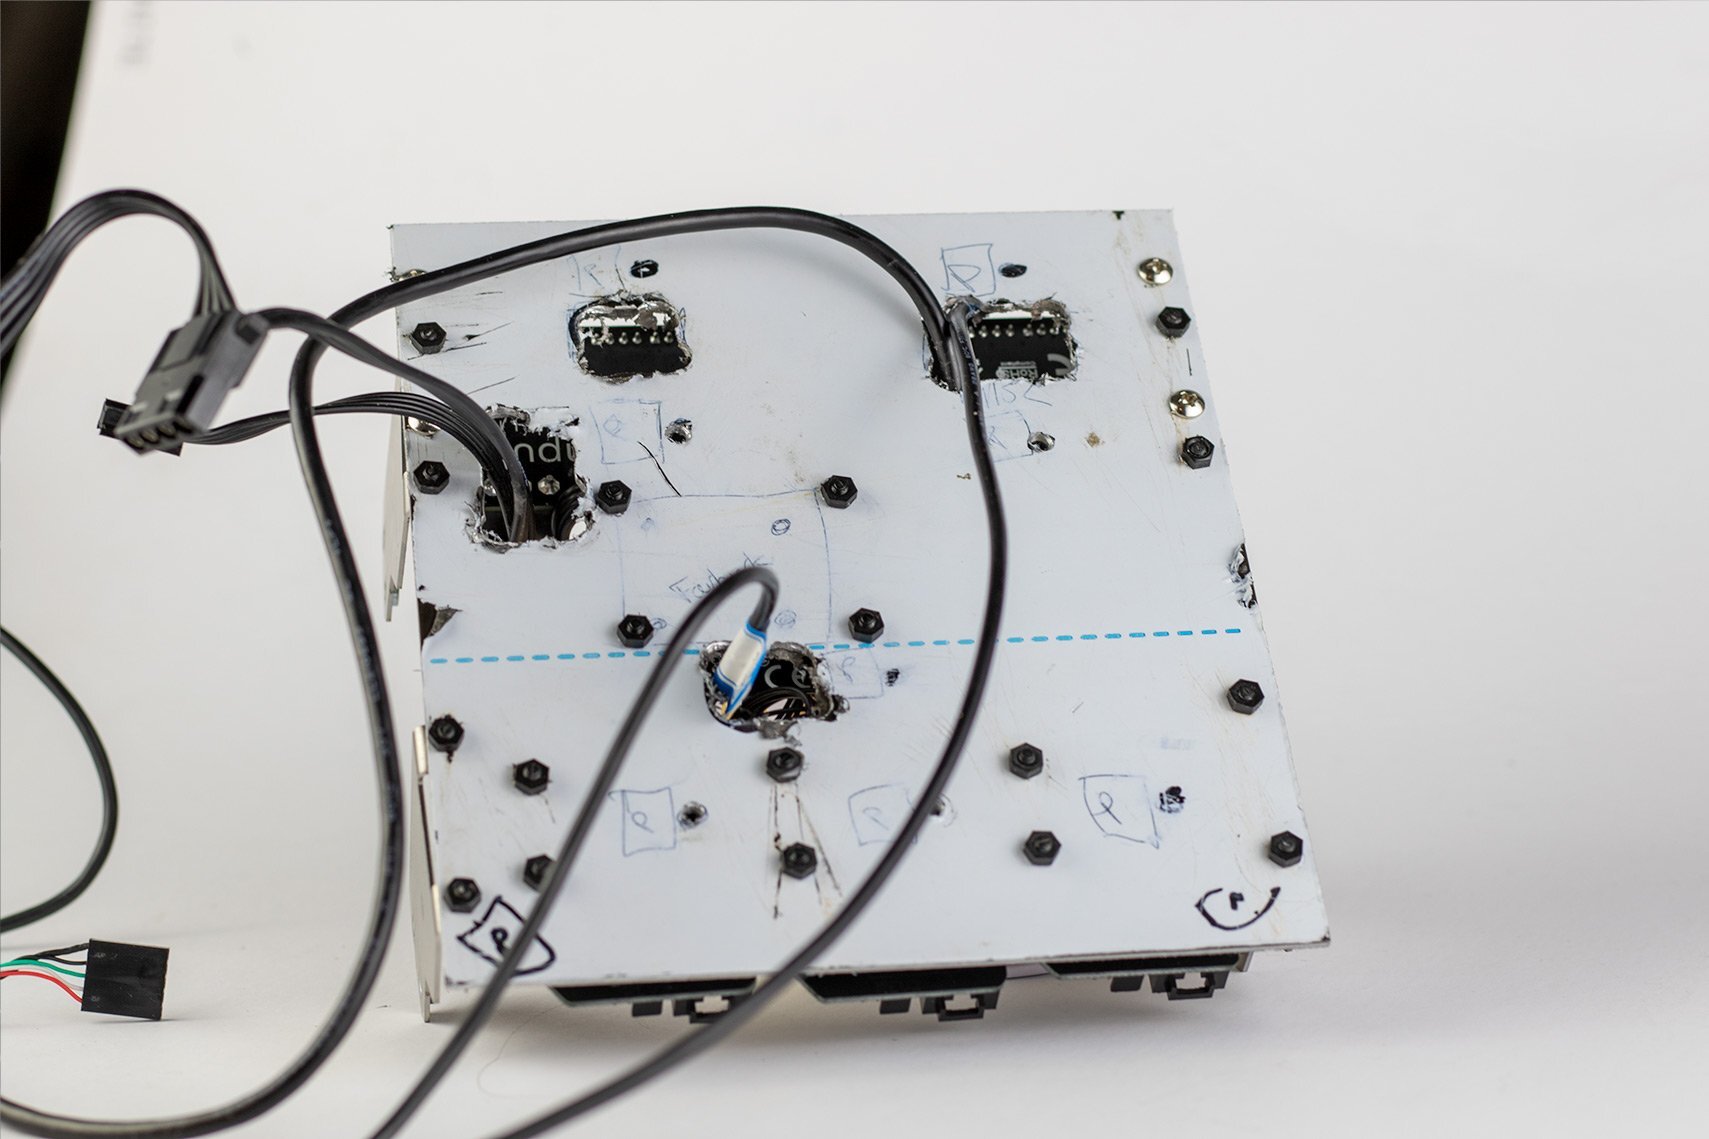
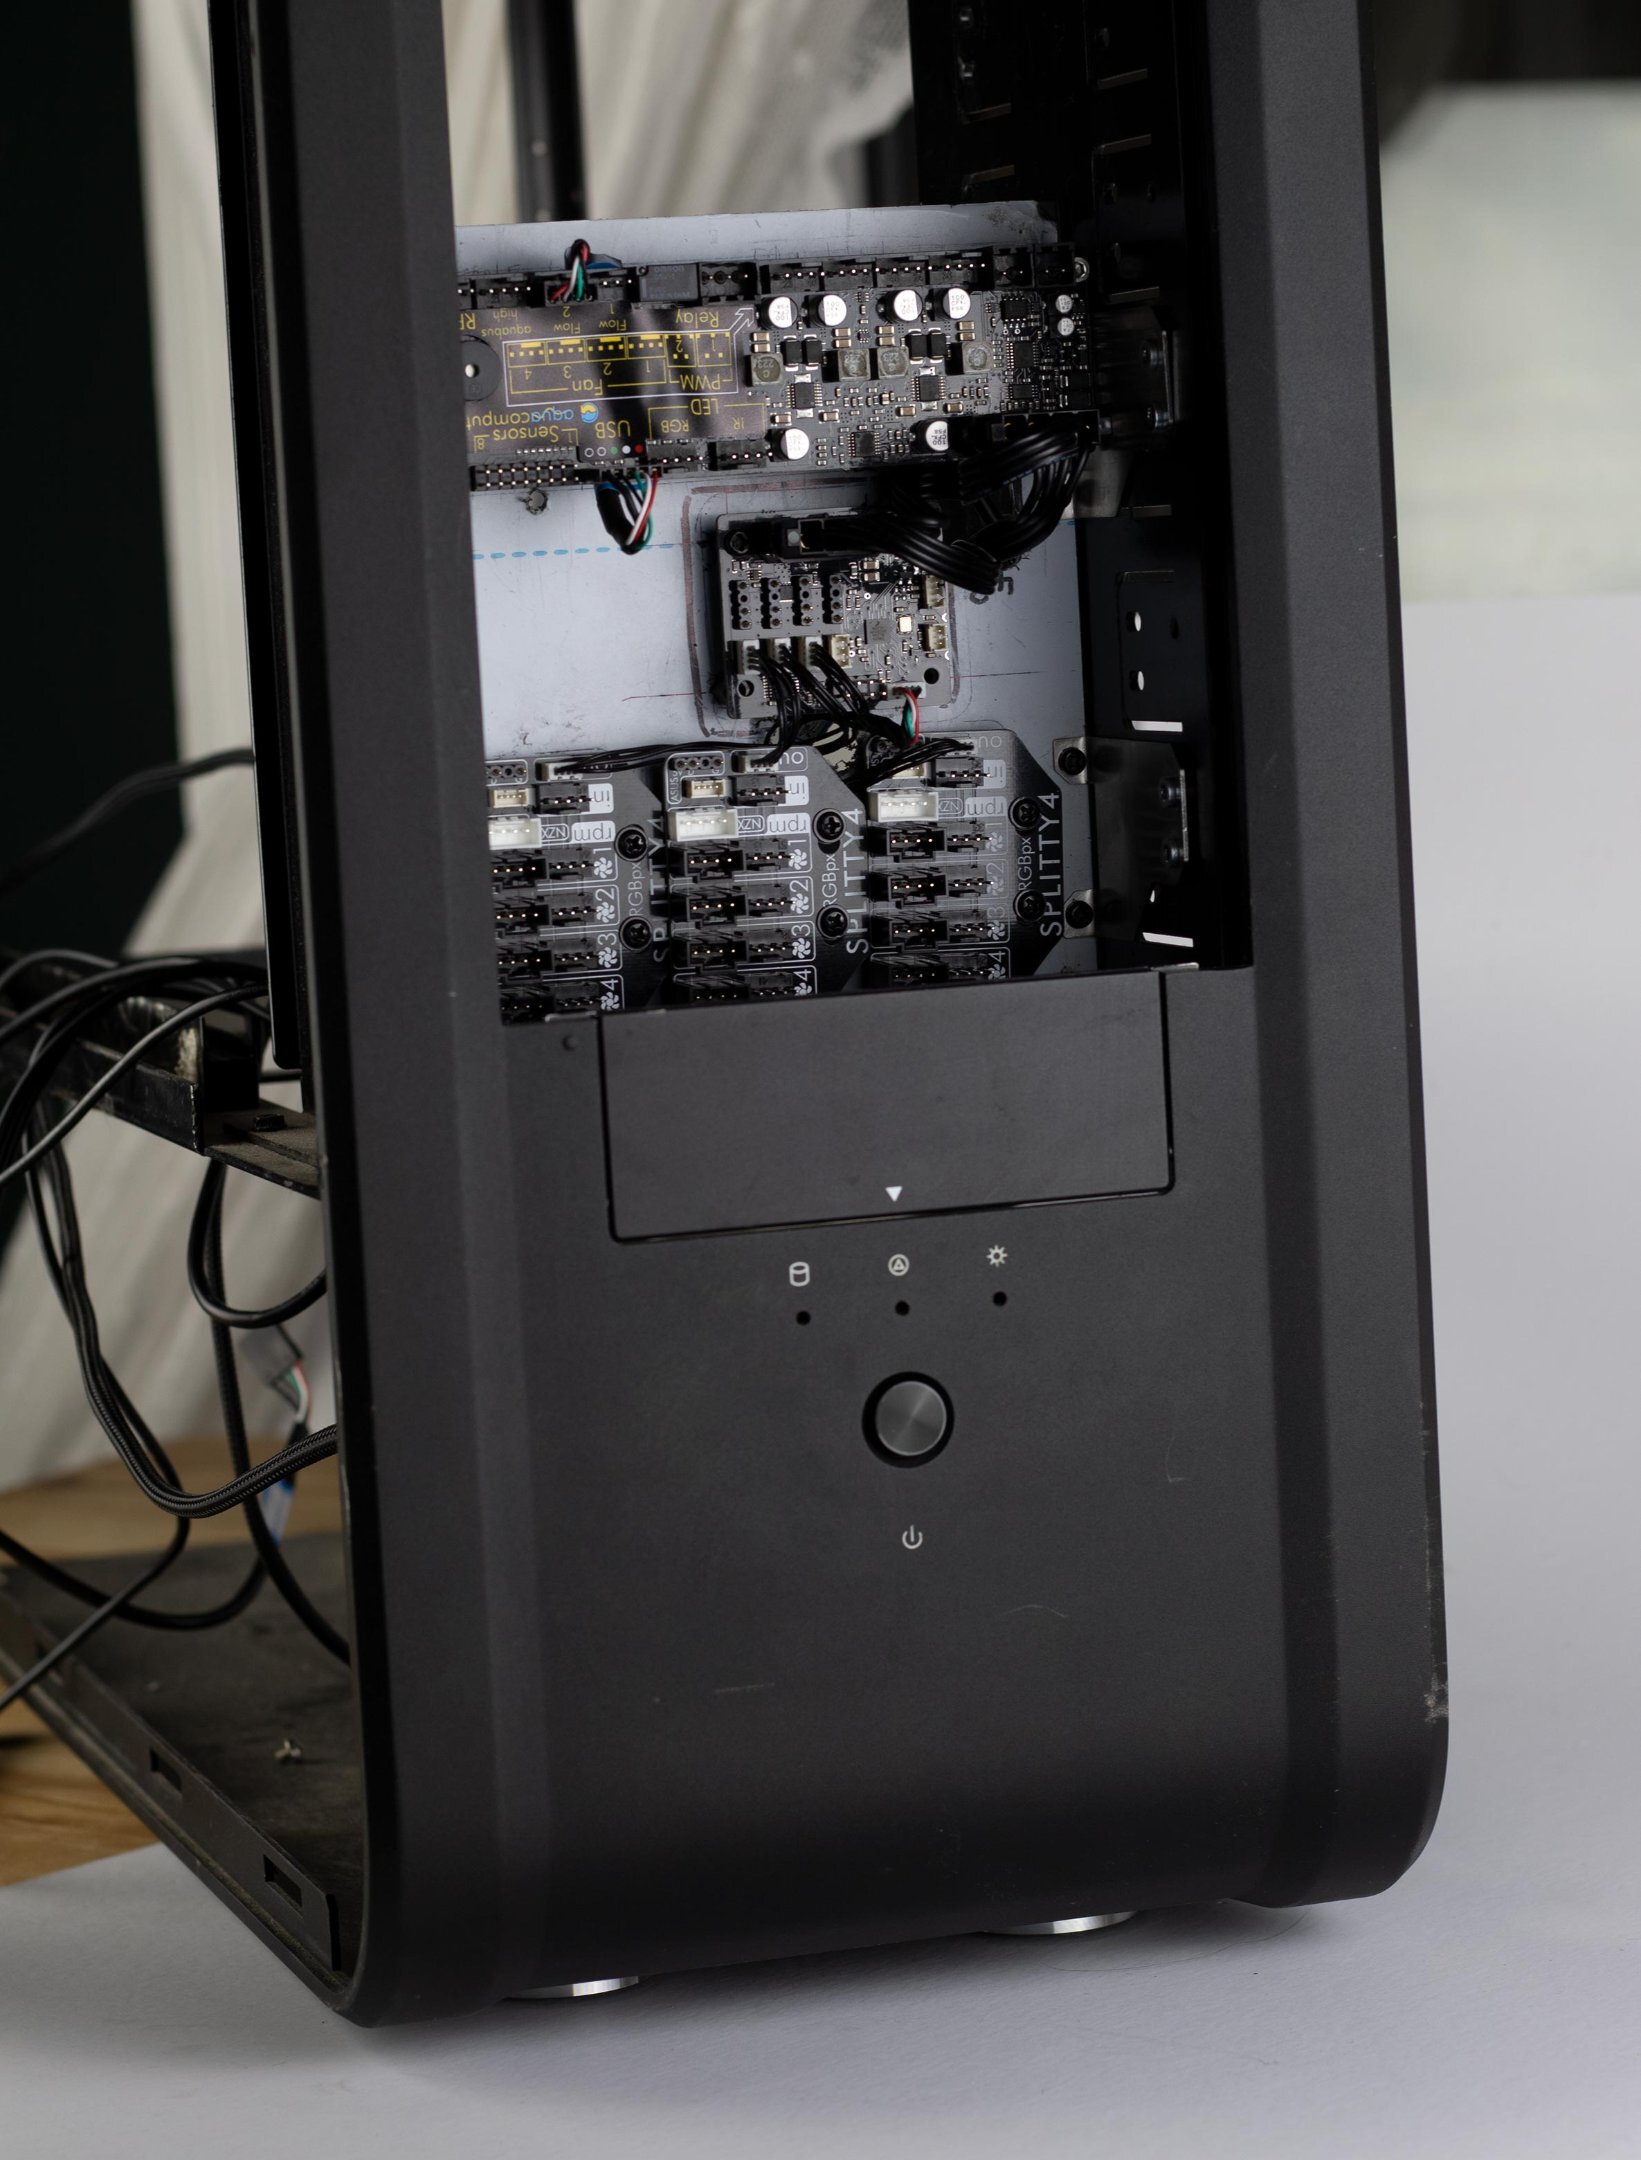
Hi everyone, small update! I've remade the PCB cables by cutting them off completely and soldering new lengths then sleeved the lot as one cable. Lots of extra length on the cables so I can cut them to the right length when I know the measurements. Next up, a quick recap- I'm building a mount for all this Aquacomputer stuff to stop the spaghetti mayhem. This was the design. I've bought a piece of 3mm aluminium cut to fit 5.25" bays, and some of this mounting hardware. Blu-tack'd the bits to the plate and drew some drilling marks. Be warned this is not going to be pretty. (I have a second piece for the final version of this when I know everything I'll need on it). Test fit, looks pretty good. Drilled the holes. Hardware mounted! I've had to find some standoffs and tiny M3 nuts and bolts to be able to mount all this lot. I took a chance on these nylon ones, turns out they're actually amazing quality, would recommend! Had to drill and hacksaw some cable routing holes. I plan to run some P-clips on the back to manage the cables. Luckily the case has some handy routing holes that will make everything easier! Looking pretty good! Much better than the spaghetti madness. Apart from the fans, this is everything I need to have plugged in! I need to make custom length cables for the when I know how long they need to be. That's all for now.... I wanted to be buying the hardware this weekend but we all know it's impossible to get a hold of at the moment, so the waiting continues!
-
Good luck. I can't imagine the stock will be too bad for much longer, by the end of the month things should be more stable!
-
@Bastiaan_NL I found a million different JST plugs but I never saw the SJN variety- which is exactly what it is. I'm going to get you on a tech support retainer =D I've started to cut & solder the cables, so it will all be fine in the end, just a bit more faff. Cheers
-
@Bastiaan_NL No luck with the PCB de-pinning. I can lift the white tab but it refuses to come out I'm not sure what's stopping it but I cant see how its connected to the PCB. Might be soldered onto the pin? Either way I think ill have to either de-solder the connector off the PCB or cut and solder the cables. Bugger! Any suggestions?
-
I can't wait either- I still need to buy the hardware & the watercooling stuff. Trying to be sensible and wait until black friday, see if there's anything good on offer. Still waiting to see what the Heatkiller IV for the 3080 looks like. -And there's no chance of getting a 3080 anytime soon - and I'm waiting for the 6800 benchmarks! All this waiting is killing me hah I've built a couple of PCs in the Silverstone SG05 for people. Love that case. It looks hilariously small next to the TJ07! I had a photo of them somewhere but I can't find it.... Get that server build log going Cheers! I've seen it done on a few TJ07 buildlogs so I had to give it a go. Haven't tried getting the pins out yet, but thanks for the advice, I'll give it a go soon
-
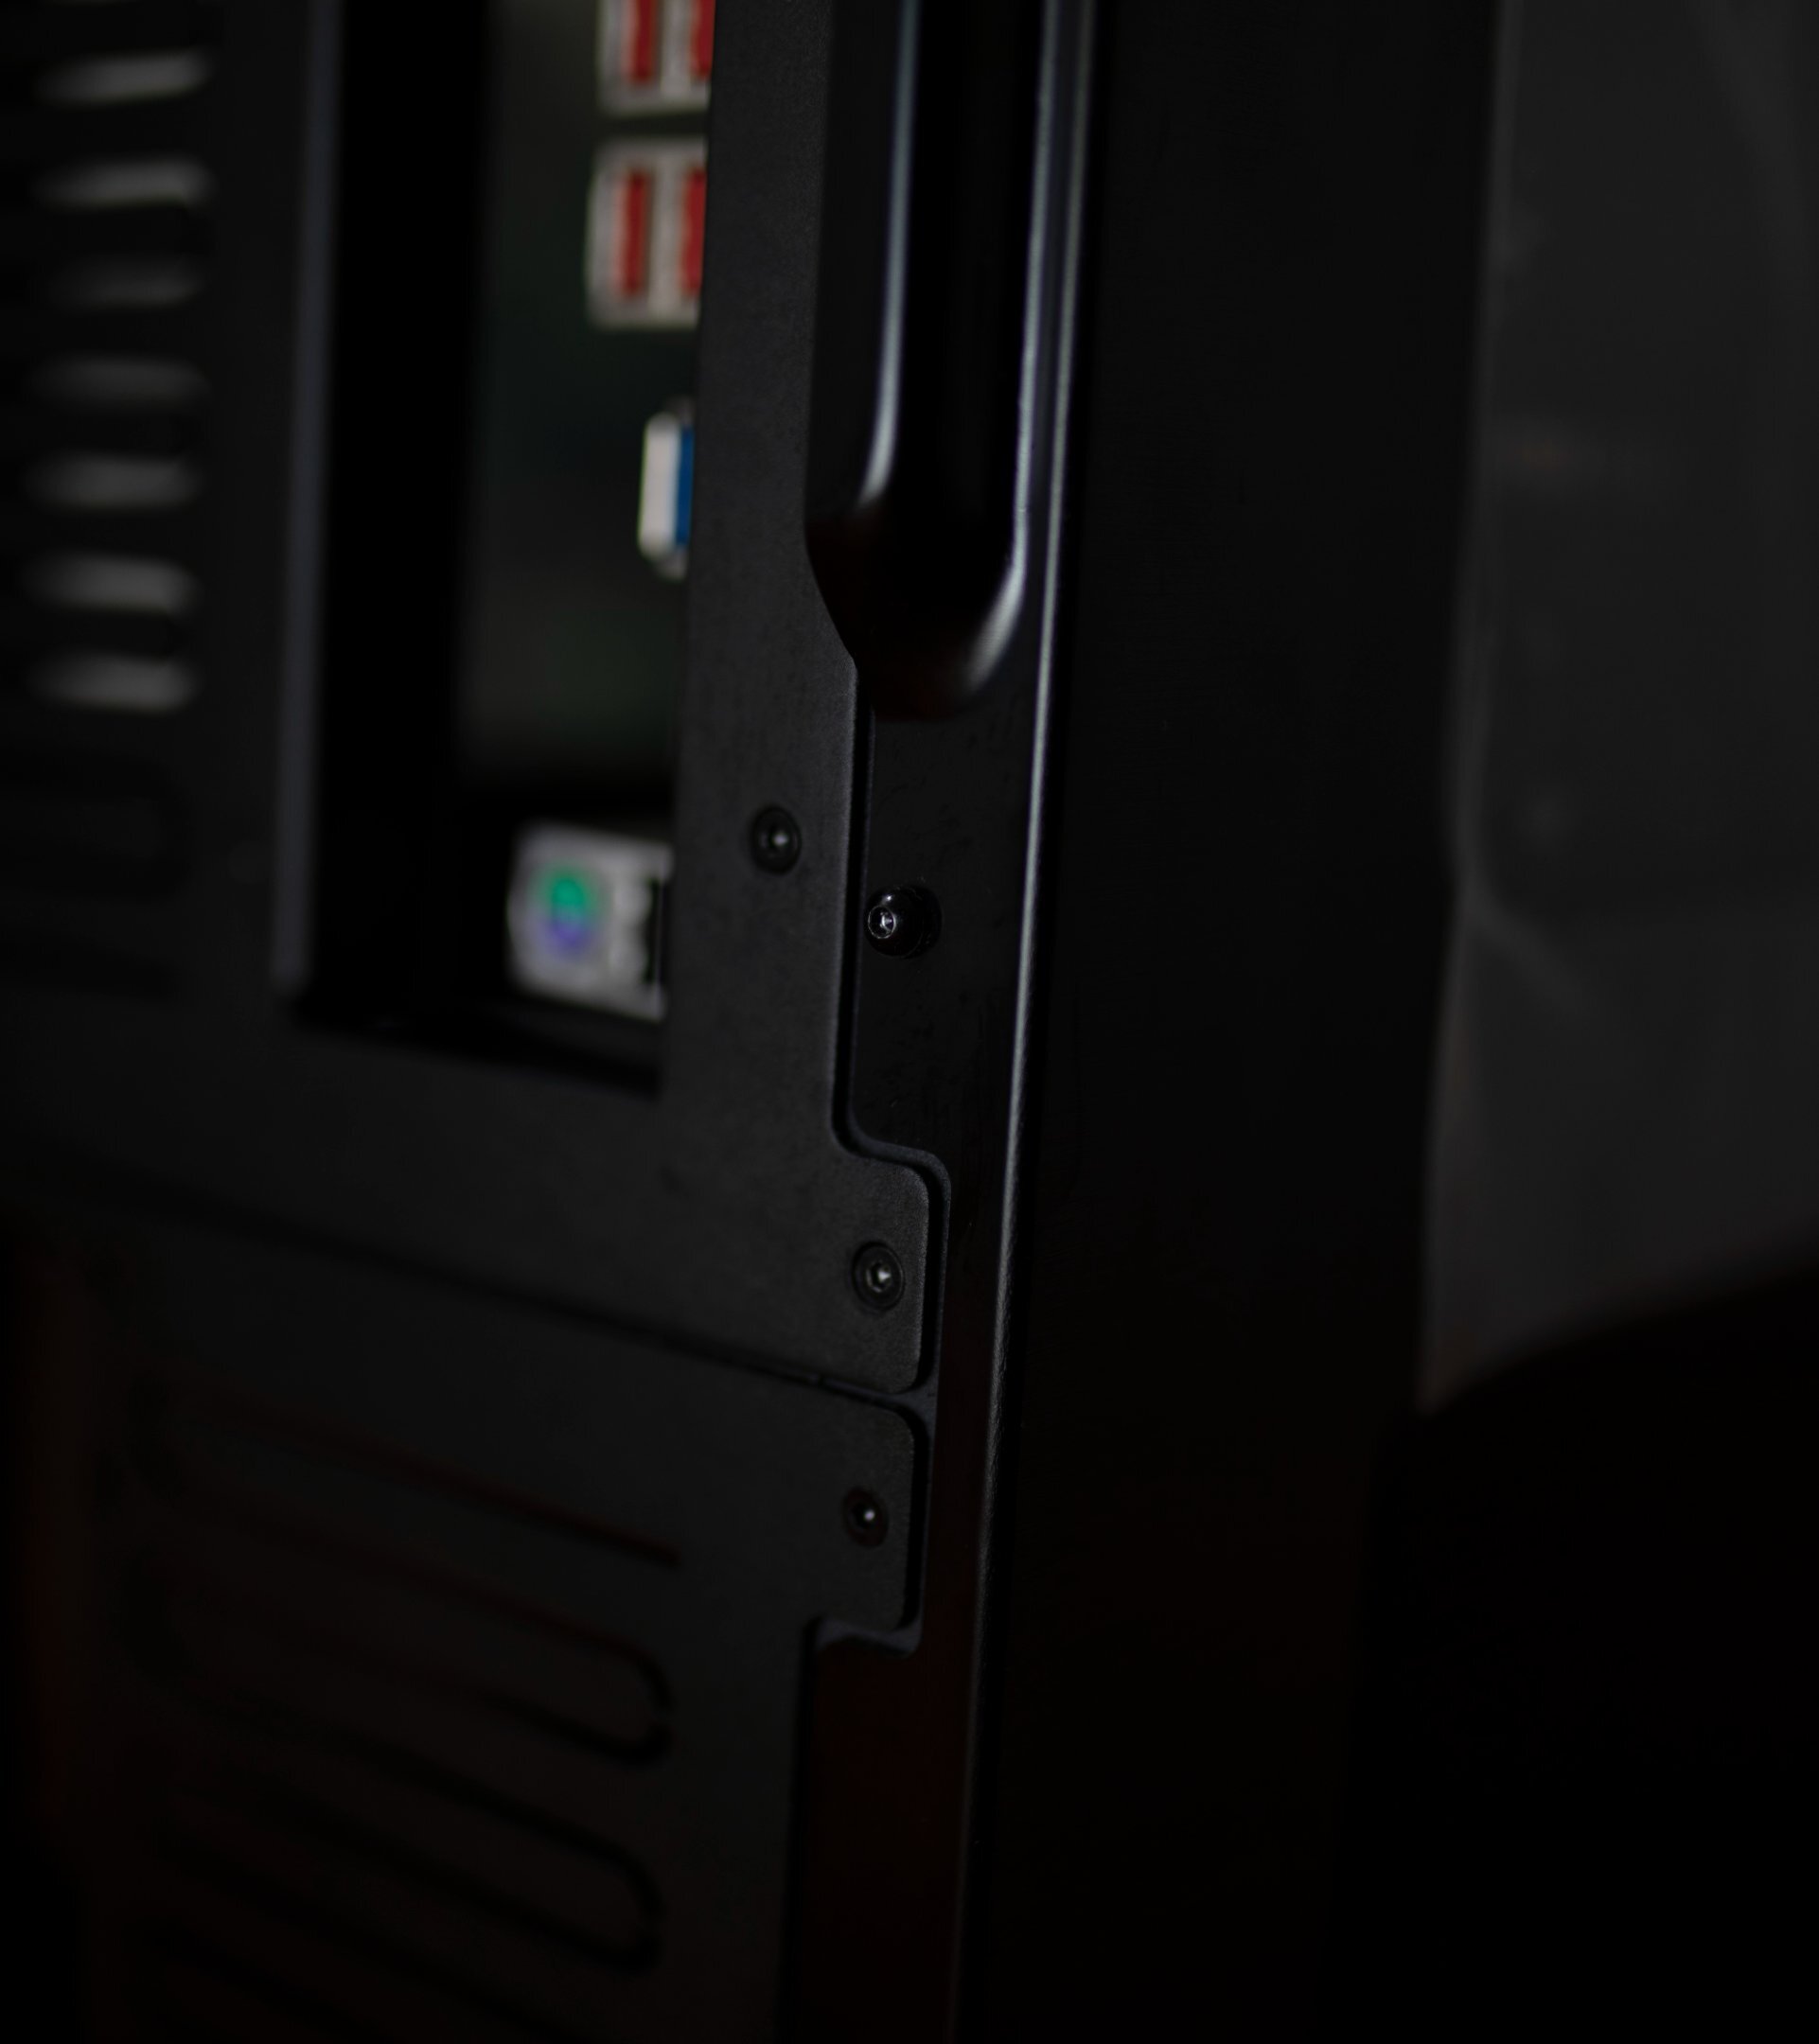
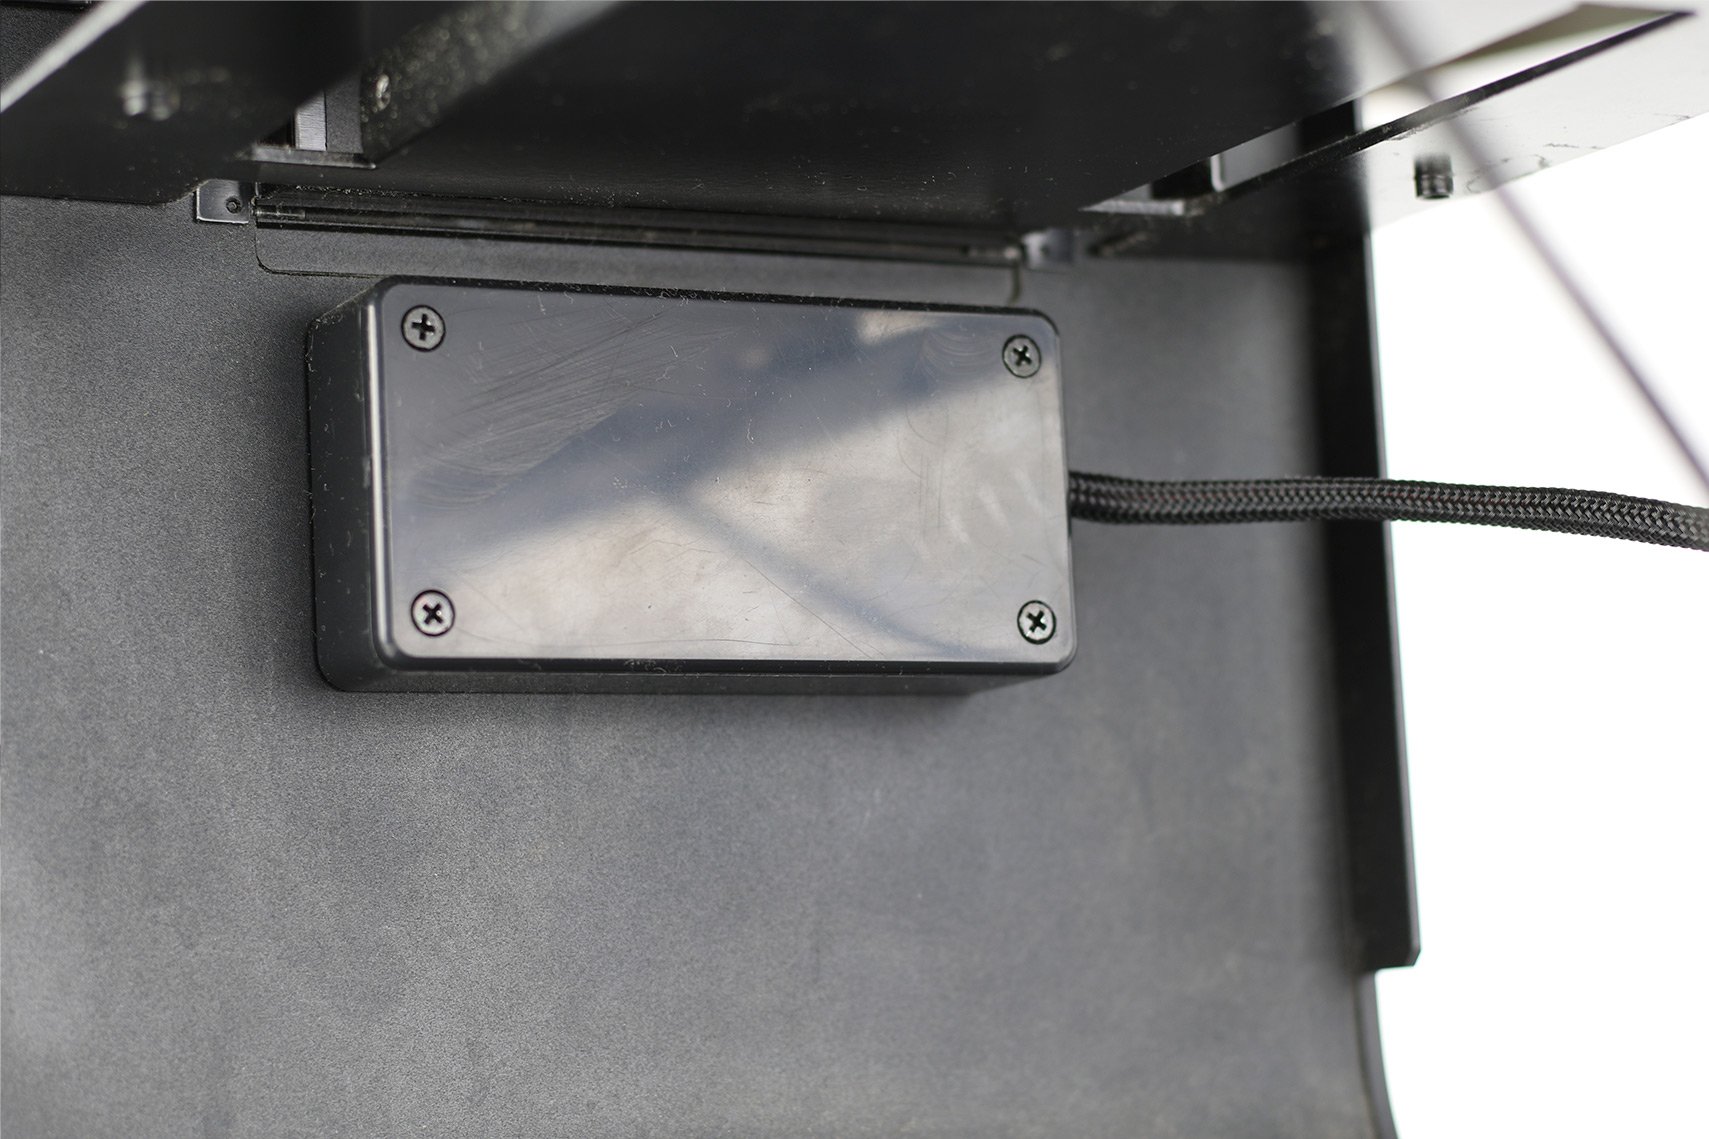
A tiny bit of actual IRL modding today. =D Note: A friend mentioned the pics could be bigger, so I'm upping the resolution. Enjoy! The TJ07 has the power button and status LED's mounted on this little PCB on the front of the case. A popular mod is to encase this in a little box so it looks all neat & tidy, so that's what I'm doing today. Looks like I was lazy and only mounted it with 2 at some point in the past.... Standoffs/Power button hole. The PCB off the case. A lot of people replace the power button with a Anti-Vandal style switch but I think the stock one looks super clean, so I'm leaving it alone. I have a vague memory of there being a reset switch, so something must've happened to it at some point.... I have replaced the blue LED's with orange ones (of course), so no edits needed there. This is the box, it's a Hammond Box. Specifically, a Hammond 1591ABK - 100x50x25mm. I've drilled holes for the PWR, LED & standoffs. The standoffs that come with the case for mounting the PCB are a few millimetres shorter on the threaded screw part compared than a regular motherboard standoff. I'm using the standoffs to hold the Hammond Box in place so swapping them out with regular motherboard ones makes up for the difference in thickness. Lucky because I didn't think about it at all. =D Mounted in the case. Cut a little hole in the side for the cables. How much better is that! The cables will be lengthened & sleeved when I know how long the replacements need to be. If anyone knows how to get cables out of this connector I'd love to hear it. I haven't tried as I don't want to break it. It's soldered to the PCB so I'm being extra cautious! Id like to take them out and replace the wires completely, but otherwise I'm going to have to cut & solder which is more effort.
-
She is a beauty. Thanks! It forced me to go back and look at old designs with fresh eyes which is always a good thing.
-
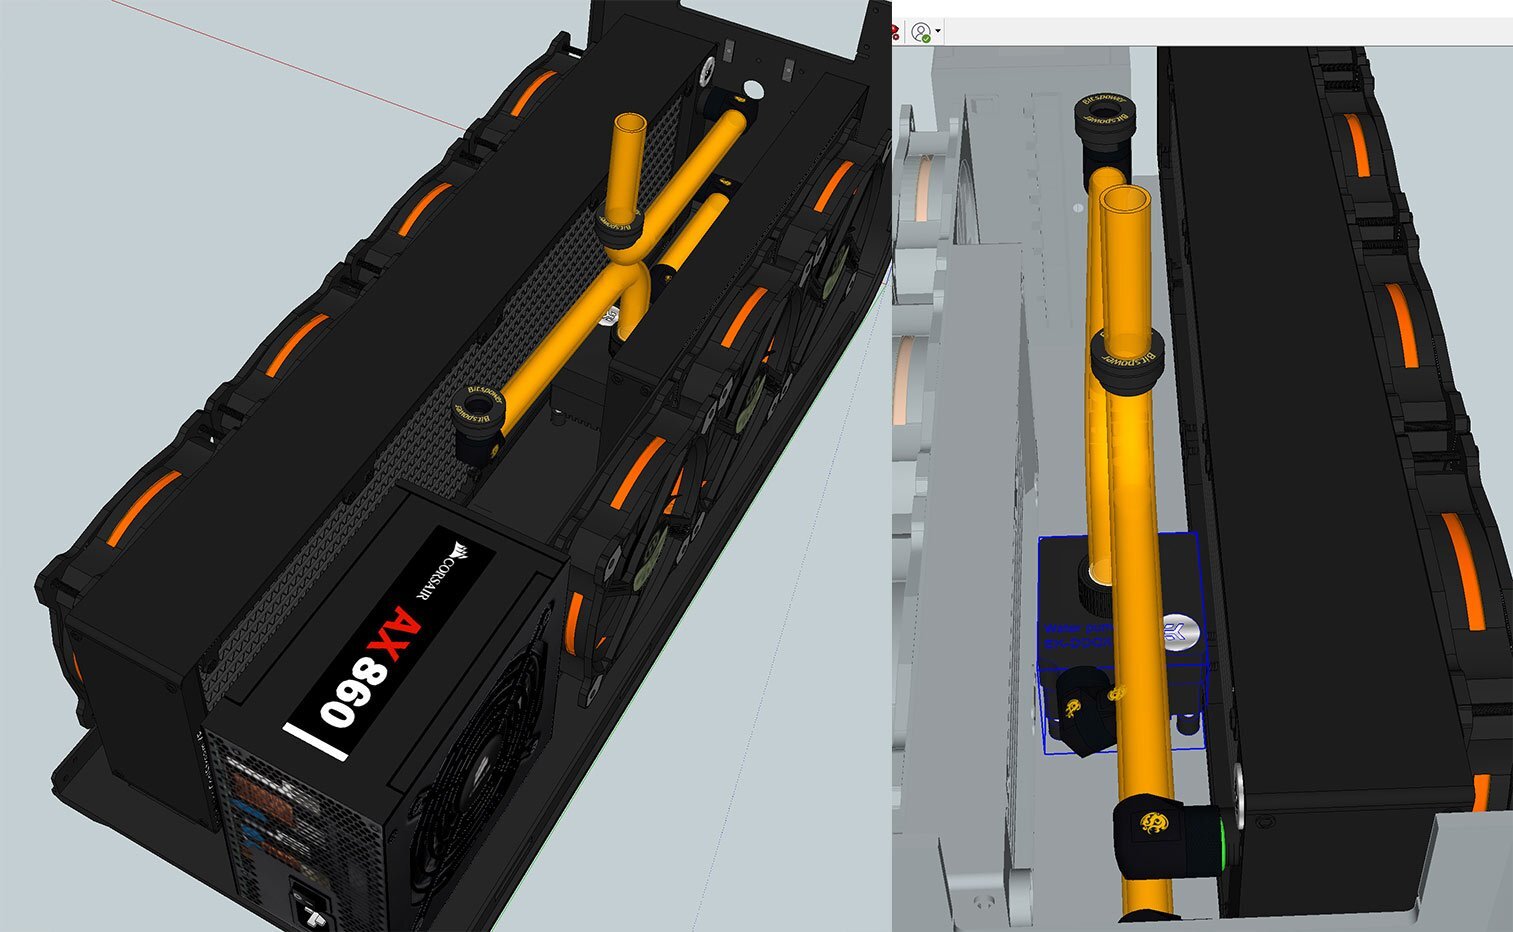
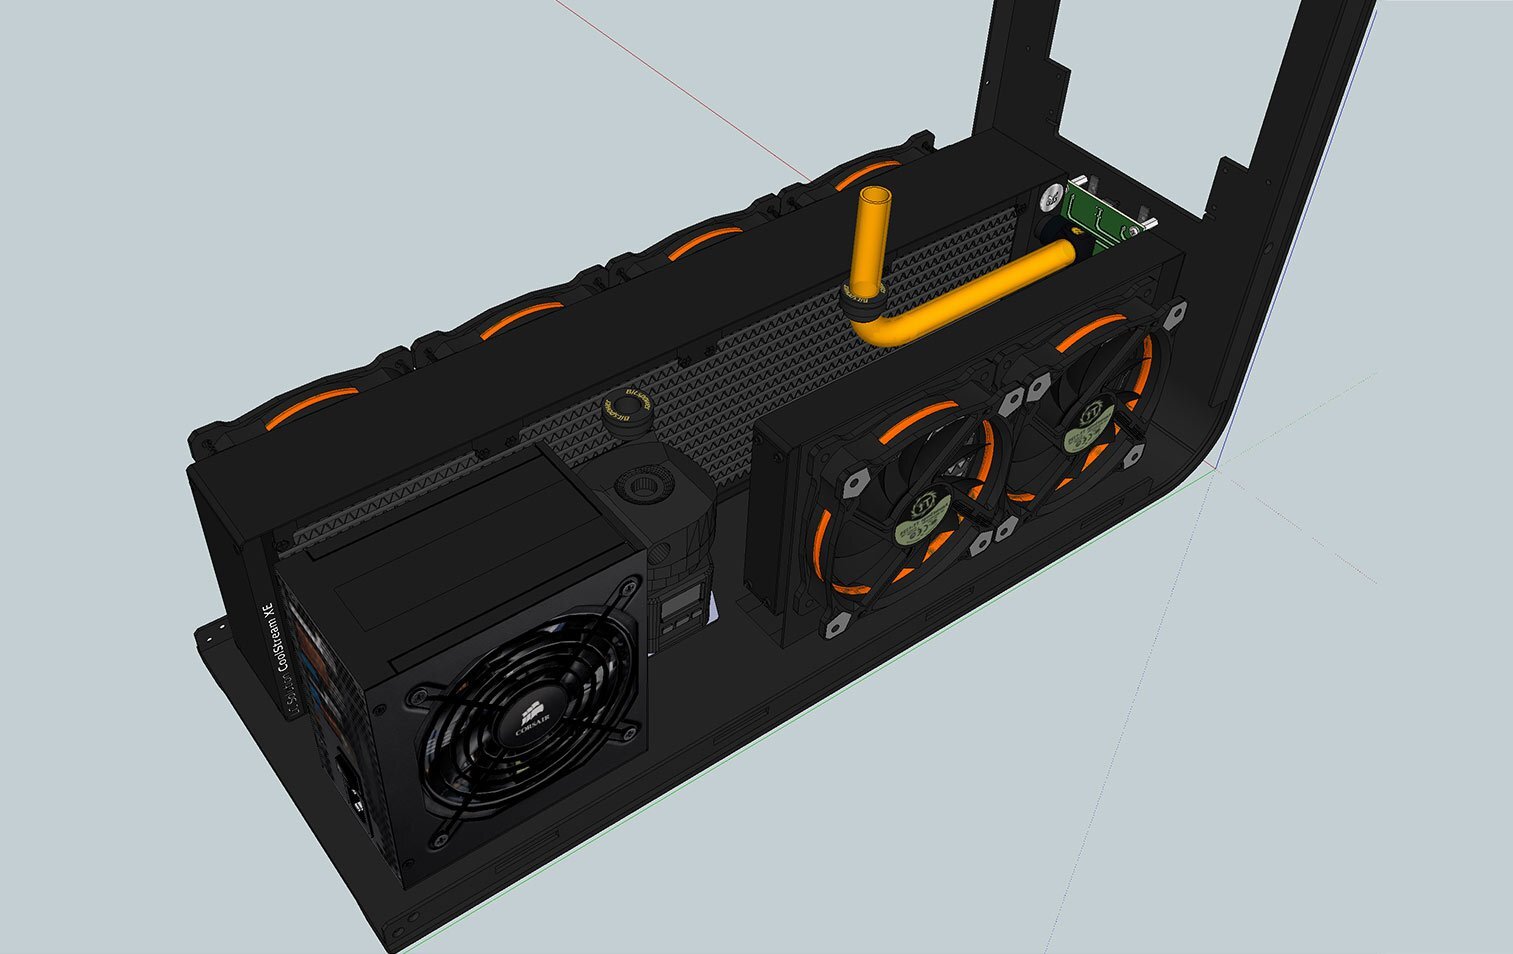
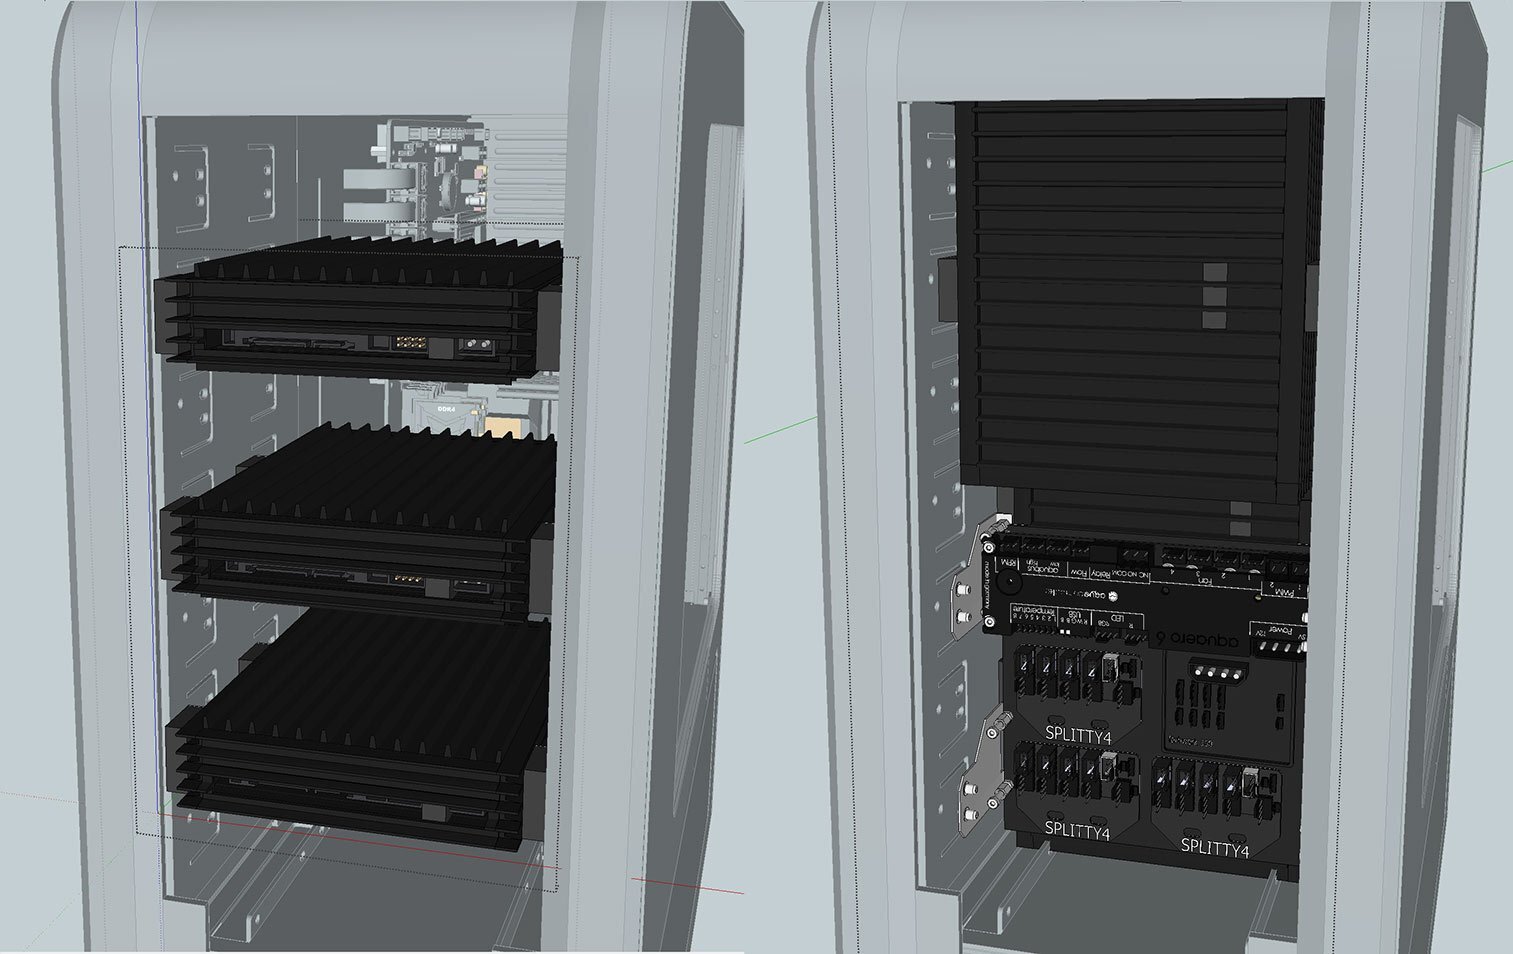
Took the day off today as it was raining- So I've been playing with my layouts for the lower case section =D I didn't take into account all this Aquaero stuff in my original Sketchup file. I've also got a D5 instead of a DDC, so new pump placements required. The DDC is already really squished in there! I spent a while throwing about the Aquacomputer parts in this section but there's no chance they're going to fit. Design MKII- The D5 is too big to fit in-between the rads, and there needs to be space for the cables to run too. This new layout keeps the buttons on the D5 easy to reach and I can get a wider 240mm rad now if I want! This hasnt solved the Aquero stuff needing a home though, sooooo... Before & after ^^ - I've moved the Himuro Drive days to a vertical config. I've and created a little mount for the monitoring stuff which is going to be super simple to knock up! It will be super easy to access through the front panel. Moving the Himuro Drives to a vertical config makes the inside of the case look nicer too! They fill the space almost perfectly, and give me loads more room- the space between the GPU/RES/Himuro has gone from about 5mm to 5cm. Should make life easier all round. As long as all my measurement are correct.... still has to pass the IRL test I've cut a piece of foamboard into a extended-motherboard tray to get measurements for the one I'll get made at ColdZero. I'm at the awkward point now where there's really not much I can do until I order the hardware and the Watercooling stuff though, everything is relying on everything else being present to get precise measurements. Another new decision to make too, 6800xt or 3080? Cheers for reading the latest rambles.
-
*multiple sources* AMD GPU reveal info thread (Updated: review)
Salty_Pepperpot replied to UltraMega's topic in Hardware News
If the review benchmarks are as good as these slides, then FINALLY we have solid competition in the market again, everybody's a winner here. 6900XT is looking like a bargain too (comparatively). -
It is going to be a lot of sleeving …. probably best I don't understand quite what I've gotten myself into yet! Looking forward to using it. And I haven't started sleeving yet... we shall see how far I get before I do what Bastiaan does and shove em under the radiators
-
Sure I'll buy the headset, but where am I going to put the server farm to run it? ?
-
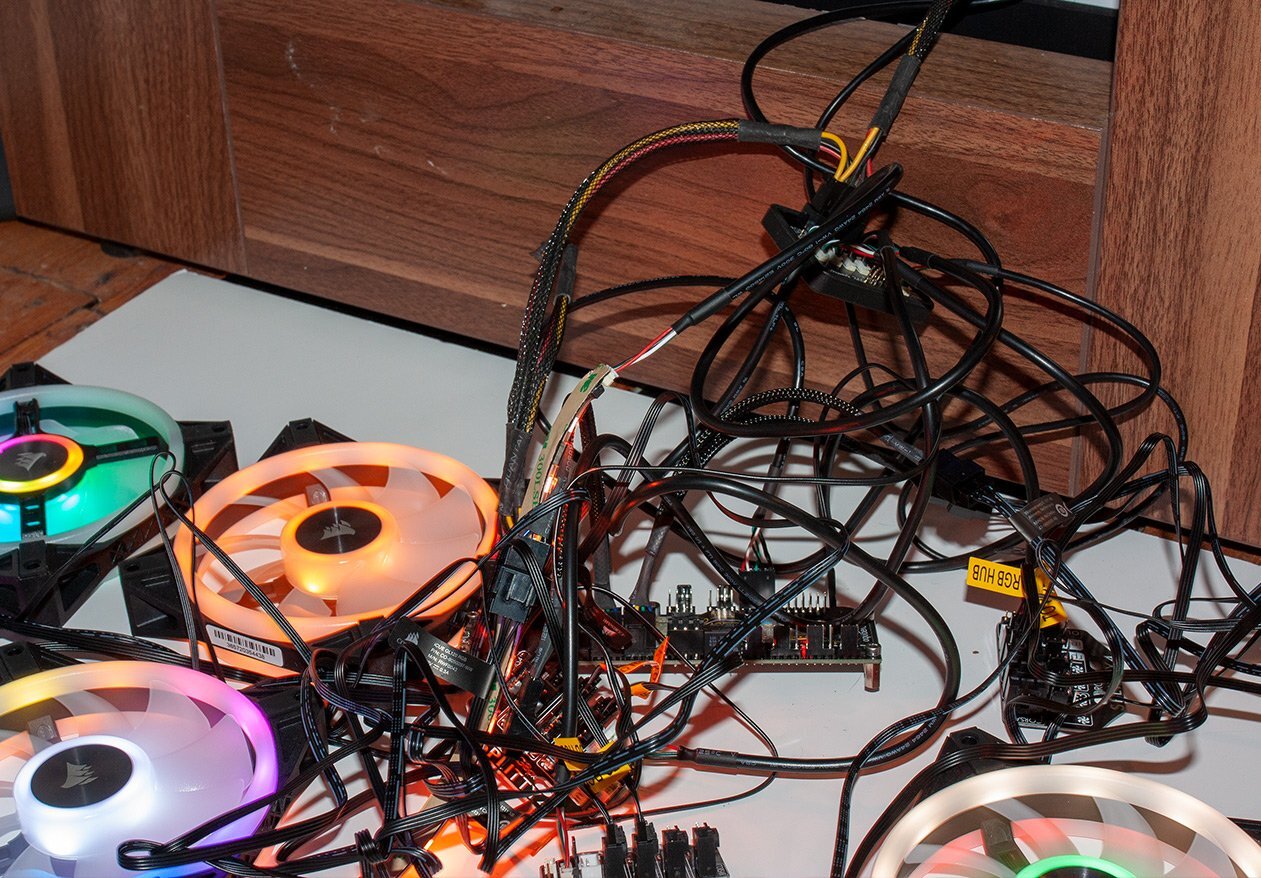
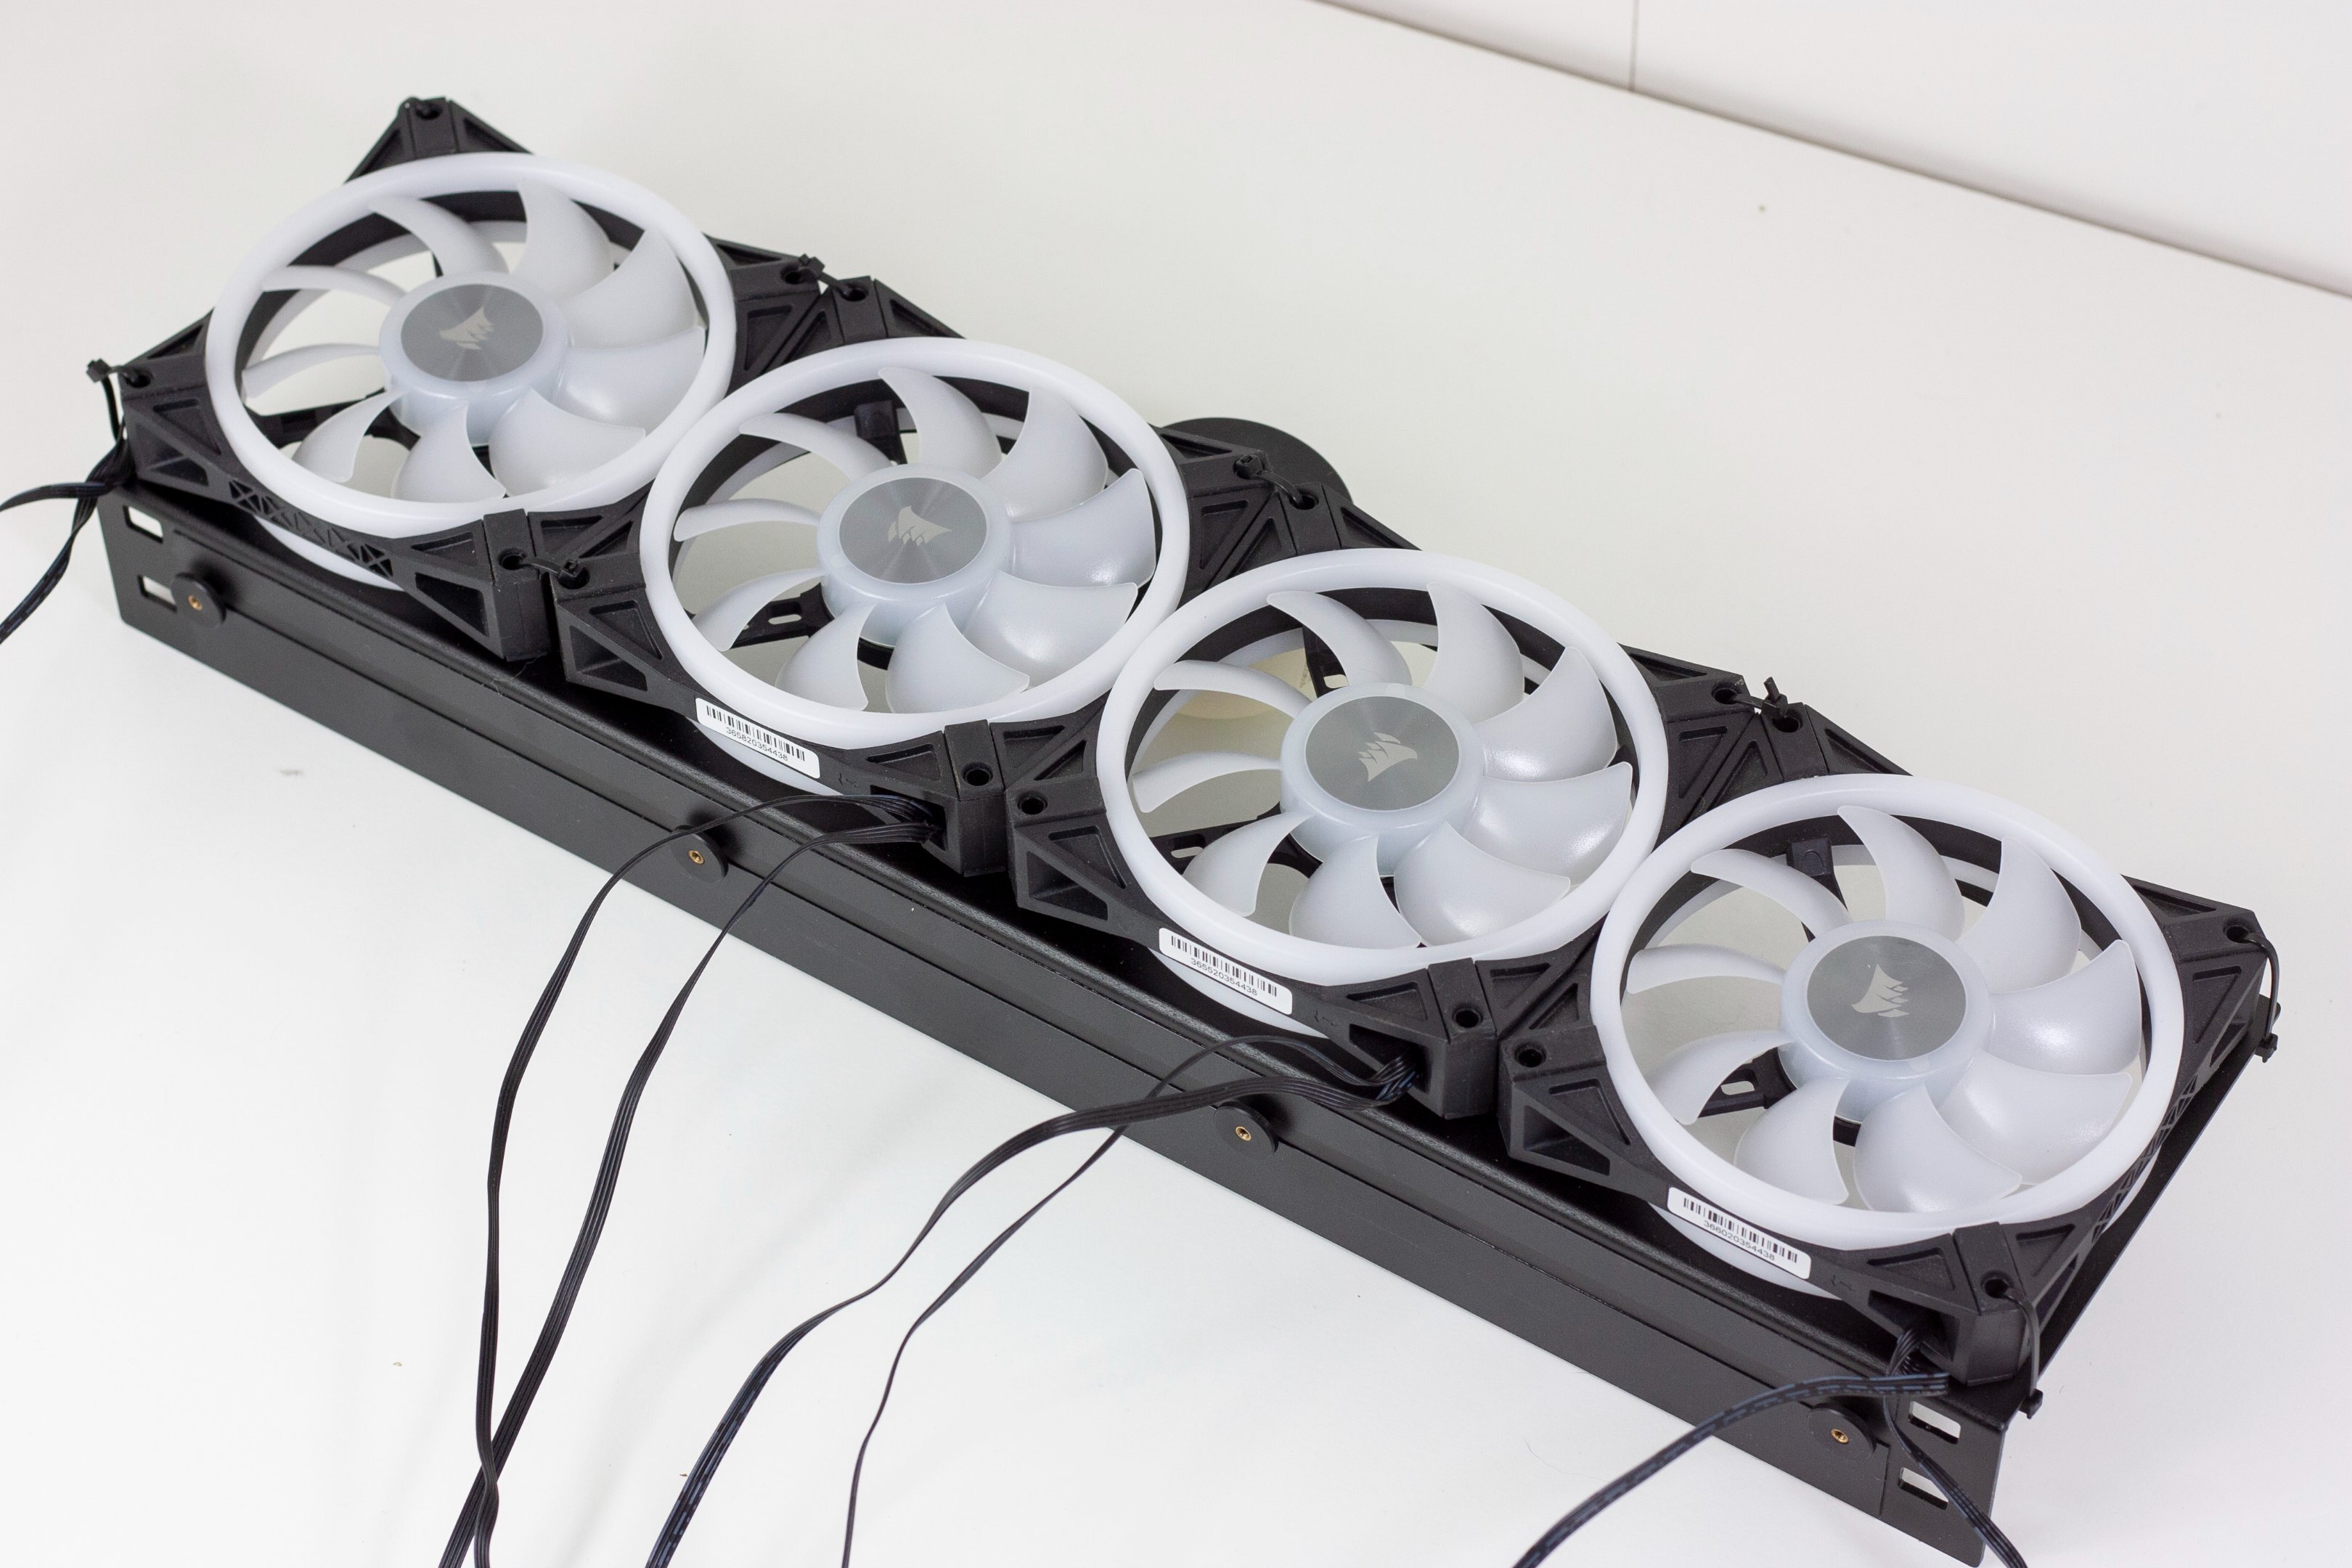
Another package. These arrived much sooner than I expected! This afternoon I've had a play around with all the Aquacomputer stuff. Sweet holy jeebus. What a total cabling nightmare! One Aquero, one Farbwerk, 3 Splitty4's, 6 Corsair QL120's and a whole load of spaghetti. At least I don't have to cook tonight! Unfortunately, the Farbwerk can only support 90 LED's per channel. As the QL-Series fans have 34 LED's each, this means 2 fans max per channel. I'm having to use one Splitty4 per 2 fans, and I've used one Farbwerk channel for LED Strips. Not included in this setup is the three in-line water temp monitors I want to include, the pump, a flow monitor and air temp sensors. I'm definitely going to have to work out how to shorten and sleeve the majority of this stuff. It's all going to have to fit in the bottom of the TJ07... somehow.... I'm going to have to build some kind of mounting setup As for the Aquasuite software, it's exactly what I need. no nonsense, no fancy graphics or bullshit interfaces. My partner bought the ThermalTake Riing AIO. The fans are cool, and look great. The software is complete garbage. It works, (just about) but the way its laid out... its tedious and obfuscated. Nope. Bad. So neat! So tidy! Individually addressable LED's with any effect and copy/pasting. Yes Please. I need to plug everything in. But already I can see this is seriously good. That's all for today! If anyone has suggestions about the spaghetti problem I'd love to hear it. Current plan is to build some kind of mounting system, and start building custom cables. There are a few of these ^^^ connectors though, and I have no idea what to call it, (miniature USB?) or how to take it apart.
-
I like the fact Linus called them out on it. Its a good card for the price too. Can't wait to see the AMD competition now!
-
This is a great idea, cheers! Make it so much simpler.
-
Update time, Package from Germany.... It's Sleeving! So many goodies in here. As I've mentioned above, I've decided to use Small XTC with transparent heatshrink, on 17 AWG black/white wire. This stuff looks amazing! My personal favourite colour- Papaya Orange. This is an absolute beast! Its made my crimping so much easier. Can't recommend it enough. With its baby brother awwww bless. A whole host of connectors, crimps, terminals, p-clips. I've been practicing some crimping and after about 30 wasted ATX pins I think I've worked it out I've started making a shorty cable. The Silverstone pinout is super simple. One split cable and after looking into it, I don't think I even need to include the double one at the back there. How's my Crimping? Apologies this is the best macro shot I can do without a lens. This is through a magnifying glass ahah. Heatshrinkless! It's not difficult at all. (With some practice....) 17AWG on the left, 15AWG on the right. I got another package from Germany too! Pepper approves!


.jpg.fa858337197186f87573a4313a5b752e.jpg)