Jump to content

Welcome to ExtremeHW

Welcome to ExtremeHW, register to take part in our community, don't worry this is a simple FREE process that requires minimal information for you to signup.


Registered users can: 

  • Start new topics and reply to others.
  • Show off your PC using our Rig Creator feature.
  • Subscribe to topics and forums to get updates.
  • Get your own profile page to customize.
  • Send personal messages to other members.
  • Take advantage of site exclusive features.
  • Upgrade to Premium to unlock additional sites features.
IGNORED

Cooling down the AMD Ryzen 5 3550H Mini PC, Thoughts & Advice?


Recommended Posts

I plan on doing some physical mods to my eGlobal mini pc the amd ryzen 5 3550h can use upwards of 84 watts at full tilt & I wanna cool it down so it can take the load.


I plan on adding a copper sheet of these dimensions.


Dimension in Metric 13mm thick by 51mm x 51mm.  It's 1/2 inch thick by 2" wide x 2" long square plate sheet of pure copper.


I'll need to use properly 12-14-16mm long, what M3 pan head philips screws to mount it?  


So I gues something like that would work, huh? 12mm or 14mm or 16mm long M3 screws?  I'm not for certain but I'm pretty sure it uses M3 screws.

I hope this helps out.


What are the dimensions of the core diode silicon itself of the AMD Ryzen 5 3550H chip anyway?


2inchthick2inchx2inchcopperplatesheet.thumb.jpg.d72fac78e3928719a8e76f89736bdcb6.jpg

IMG_20231219_055315-standard-scale-2_00x-1280.thumb.jpg.4999fa7e154b440b18b4fc08f73cb41a.jpgIMG_20240119_190211.thumb.jpg.671e4583a0f8e018bae46c3282d64662.jpgIMG_20240119_191213.thumb.jpg.7641995a515b1a27bc660d6a2064d864.jpgIMG_20240119_191351.thumb.jpg.5404b60567f28d677712993f73f0644e.jpgIMG_20240119_191426.thumb.jpg.6784a89bab8a0309c2d2416f602f2cb7.jpgIMG_20240119_191453.thumb.jpg.126dda85c929eef8940907d2471ecae1.jpgIMG_20240119_191802.thumb.jpg.00dc3c65a10b5bba40c489a41f0e7508.jpgIMG_20240119_191942.thumb.jpg.d135a589ff9c8b001fd7b156f334b4f4.jpgIMG_20240119_191956.thumb.jpg.0f92644ac5e46e05240eb1c676c9fd21.jpgIMG_20240119_192103.thumb.jpg.657963fa4a21f2853e27a0ef90deb331.jpg

Edited by HeyItsChris
  • Thanks 1
Link to comment
Share on other sites

Update 


So after pulling it apart, I kinda flexed the PCB because there is bowing at the PCB behind the core diode because of the 1.5-2mm thick shim I currently have installed.  However after re-doing the thermal paste with Arctic Silver MX-4 the performance went through the roof.  Where before I'd be in throttle-heaven @ 3.7Ghz delimited power & current limits @ 99W 99A 83*C tCtl temperature limit & I'd be down to in the mid to high 1800s multi core CPU-Z bench & about 360 single core, & now it's up to almost 2,250 multi core & almost 410 single core.  It's amazing what a proper mount & paste can do to thermals.  I still want to add the copper plate though & choose 0.5" thick @ 1.5" x 1.5" instead of 2" x 2" because 2" x 2" would not fit.


1.5mm thick copper shim on MX-4 thermal paste.jpg

  • Shocked 1
  • Agreed 1
Link to comment
Share on other sites

Good job with the re-paste. So you have put the copper shim to the underside of the motherboard behind the CPU?

  • Thanks 1

£3000

Owned

 Share

CPU: AMD Ryzen 9 7950X3D
MOTHERBOARD: MSI Meg Ace X670E
RAM: Corsair Dominator Titanium 64GB (6000MT/s)
GPU: EVGA 3090 FTW Ultra Gaming
SSD/NVME: Corsair MP700 Pro Gen 5 2TB
PSU: EVGA Supernova T2 1600Watt
CASE: be quiet Dark Base Pro 900 Rev 2
FANS: Noctua NF-A14 industrialPPC x 6
Full Rig Info

Owned

 Share

CPU: Intel Core i5 8500
RAM: 16GB (2x8GB) Kingston 2666Mhz
SSD/NVME: 256GB Samsung NVMe
NETWORK: HP 561T 10Gbe (Intel X540 T2)
MOTHERBOARD: Proprietry
GPU: Intel UHD Graphics 630
PSU: 90Watt
CASE: HP EliteDesk 800 G4 SFF
Full Rig Info

£3000

Owned

 Share

CPU: 2 x Xeon|E5-2696-V4 (44C/88T)
RAM: 128GB|16 x 8GB - DDR4 2400MHz (2Rx8)
MOTHERBOARD: HP Z840|Intel C612 Chipset
GPU: Nvidia Quadro P2200
HDD: 4x 16TB Toshiba MG08ACA16TE Enterprise
SSD/NVME: Intel 512GB 670p NVMe (Main OS)
SSD/NVME 2: Samsung 1TB 980 NVMe (VM's)
SSD/NVME 3: 2x Seagate FireCuda 1TB SSD's (Apps)
Full Rig Info
Link to comment
Share on other sites

29 minutes ago, ENTERPRISE said:

Good job with the re-paste. So you have put the copper shim to the underside of the motherboard behind the CPU?

Thanks man!  Yeah its sitting on the apu.  I applied paste precisely from edge-to-edge to the apu first then applied paste to the shim on just one side, not both, precisely from edge-to-edge (not a waste of dot/x/pattern a lot of people use who aren't very wise with no experience thermally speaking).  Then precisely aligned the shim on to the apu placing the side of the shim without paste on top of the apu that had paste already applied, then placed the heatsink on top & tightened it down in a X-pattern.  All is well, except for I need the 1/2" thick shim which is 13 times thicker & about 100 times heavier slab of copper to further absorb heat & wick it away from the apu.  I'll be ordering it all soon.


This APU is hungry at full tilt with the CPU @ 3700 Jigga Hertz & the GPU @ 1200 Jigga Hertz with the TDP & TDC limits @ 99 Jigga Watts/Amps & 83*C temp limit on the core diode using RyzenAdj via Task Scheduler.  lol


I've seen more than 85 Jigga Wattz of electricity being sucked down by this chip which is very hot indeed.  So it needs the 13mm thick by 38mm x 38mm copper to work its copper magic on the thermals & hopefully hold true on longer loads.


Edited by HeyItsChris
Link to comment
Share on other sites

Sweet, you will have to let us know your final temps once you have finished the mods so we can see what a difference it makes 🙂

  • Thanks 1

£3000

Owned

 Share

CPU: AMD Ryzen 9 7950X3D
MOTHERBOARD: MSI Meg Ace X670E
RAM: Corsair Dominator Titanium 64GB (6000MT/s)
GPU: EVGA 3090 FTW Ultra Gaming
SSD/NVME: Corsair MP700 Pro Gen 5 2TB
PSU: EVGA Supernova T2 1600Watt
CASE: be quiet Dark Base Pro 900 Rev 2
FANS: Noctua NF-A14 industrialPPC x 6
Full Rig Info

Owned

 Share

CPU: Intel Core i5 8500
RAM: 16GB (2x8GB) Kingston 2666Mhz
SSD/NVME: 256GB Samsung NVMe
NETWORK: HP 561T 10Gbe (Intel X540 T2)
MOTHERBOARD: Proprietry
GPU: Intel UHD Graphics 630
PSU: 90Watt
CASE: HP EliteDesk 800 G4 SFF
Full Rig Info

£3000

Owned

 Share

CPU: 2 x Xeon|E5-2696-V4 (44C/88T)
RAM: 128GB|16 x 8GB - DDR4 2400MHz (2Rx8)
MOTHERBOARD: HP Z840|Intel C612 Chipset
GPU: Nvidia Quadro P2200
HDD: 4x 16TB Toshiba MG08ACA16TE Enterprise
SSD/NVME: Intel 512GB 670p NVMe (Main OS)
SSD/NVME 2: Samsung 1TB 980 NVMe (VM's)
SSD/NVME 3: 2x Seagate FireCuda 1TB SSD's (Apps)
Full Rig Info
Link to comment
Share on other sites

  • 2 weeks later...

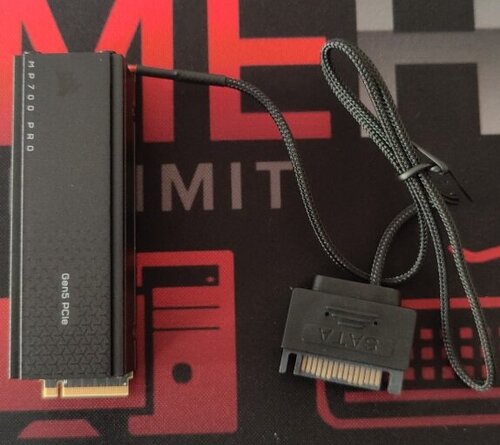
So I ordered the 0.5" thick 2" x 2" copper block plate & m3 x 16mm & 18mm long pan head phillips screws because I couldn't find phillips head wafer head screws in the united states at these lengths with the phillips head.  Do you think the screws head height will interfere with the SODIMM memory module?  It looks like it will be close.  Also I included a pic of my new copper heatsink for my M.2 nvme PCIe ssd installed just for fun.  Also I am showing how I will place the copper block plate on the APU/heatsink.  Your thoughts & Ideas?


m3panphillipsheadscrewsspecifications.thumb.jpg.2e63abb93abac32da042fa01116d4b87.jpgm3x16mmpanphillipsheadscrews1.thumb.jpg.3a465c13664d831301792a307492be2d.jpgm3x18mmpanphillipsheadscrews1.thumb.jpg.ef121435c3dbe4b32be58da9b4acc800.jpgCopperplateplacementonheatsink.thumb.jpg.22254292a651330f123769147f0a8308.jpg0.thumb.jpg.c39d7a3696fb626f35625a72a9ee0c6c.jpg1.thumb.jpg.150dc5326ef0ebf35bb8e0994f42eee9.jpg2.thumb.jpg.451750c40c2b128d7e2cbfff932f02f2.jpg

Link to comment
Share on other sites

Here is some preliminary results, as I received the copper plate & it's gonna be a tight fit for sure.  I took some pics, it's gonna hit some capacitors & what not so I doubled down on some electrical tape in the areas most needed.


I used the Sensodyne to check contact pressure & spread & it's looking good bros.  Cannot wait to get these stupid screws in tomorrow.  M3 x 16mm long & M3 x 18mm long specialty lengths for this project.  I measured the stock screw and it's like 5-7mm long or so, adjust half the length of the width thickness of the copper plate.


IMG_20240202_192420-SharpenAI-focus (2).jpg

IMG_20240202_192432-SharpenAI-focus (2).jpg

IMG_20240202_192445-SharpenAI-focus (2).jpg

IMG_20240202_195157-SharpenAI-focus (2).jpg

IMG_20240202_195235-SharpenAI-focus (2).jpg

IMG_20240202_195249-SharpenAI-focus (2).jpg

IMG_20240202_201919-SharpenAI-focus (2).jpg

IMG_20240202_201923-SharpenAI-focus (2).jpg

IMG_20240202_202749-SharpenAI-focus (2).jpg

IMG_20240202_202755-SharpenAI-focus (2).jpg

IMG_20240202_202802-SharpenAI-focus (2).jpg

8805 - 3550H @ 99W 60A 95C.jpg

9089 - 3550H @ 99W 99A 95C.jpg

Hwinfo thermal results without copper plate with shim - 8805 - 3550H @ 99W 60A 95C.jpg

Hwinfo thermal results without copper plate with shim - 9089 - 3550H @ 99W 99A 95C.jpg

IMG_20240202_195115-SharpenAI-focus (2).jpg

Edited by HeyItsChris
  • Respect 1
Link to comment
Share on other sites

11 hours ago, HeyItsChris said:

Here is some preliminary results, as I received the copper plate & it's gonna be a tight fit for sure.  I took some pics, it's gonna hit some capacitors & what not so I doubled down on some electrical tape in the areas most needed.


I used the Sensodyne to check contact pressure & spread & it's looking good bros.  Cannot wait to get these stupid screws in tomorrow.  M3 x 16mm long & M3 x 18mm long specialty lengths for this project.  I measured the stock screw and it's like 5-7mm long or so, adjust half the length of the width thickness of the copper plate.


IMG_20240202_192420-SharpenAI-focus (2).jpg

IMG_20240202_192432-SharpenAI-focus (2).jpg

IMG_20240202_192445-SharpenAI-focus (2).jpg

IMG_20240202_195157-SharpenAI-focus (2).jpg

IMG_20240202_195235-SharpenAI-focus (2).jpg

IMG_20240202_195249-SharpenAI-focus (2).jpg

IMG_20240202_201919-SharpenAI-focus (2).jpg

IMG_20240202_201923-SharpenAI-focus (2).jpg

IMG_20240202_202749-SharpenAI-focus (2).jpg

IMG_20240202_202755-SharpenAI-focus (2).jpg

IMG_20240202_202802-SharpenAI-focus (2).jpg

8805 - 3550H @ 99W 60A 95C.jpg

9089 - 3550H @ 99W 99A 95C.jpg

Hwinfo thermal results without copper plate with shim - 8805 - 3550H @ 99W 60A 95C.jpg

Hwinfo thermal results without copper plate with shim - 9089 - 3550H @ 99W 99A 95C.jpg

IMG_20240202_195115-SharpenAI-focus (2).jpg

Are you going to flatten off the existing copper coldplate on your fab cooler assembly so the new shim has full contact ?

  • Great Idea 1

£3000

Owned

 Share

CPU: AMD Ryzen 9 7950X3D
MOTHERBOARD: MSI Meg Ace X670E
RAM: Corsair Dominator Titanium 64GB (6000MT/s)
GPU: EVGA 3090 FTW Ultra Gaming
SSD/NVME: Corsair MP700 Pro Gen 5 2TB
PSU: EVGA Supernova T2 1600Watt
CASE: be quiet Dark Base Pro 900 Rev 2
FANS: Noctua NF-A14 industrialPPC x 6
Full Rig Info

Owned

 Share

CPU: Intel Core i5 8500
RAM: 16GB (2x8GB) Kingston 2666Mhz
SSD/NVME: 256GB Samsung NVMe
NETWORK: HP 561T 10Gbe (Intel X540 T2)
MOTHERBOARD: Proprietry
GPU: Intel UHD Graphics 630
PSU: 90Watt
CASE: HP EliteDesk 800 G4 SFF
Full Rig Info

£3000

Owned

 Share

CPU: 2 x Xeon|E5-2696-V4 (44C/88T)
RAM: 128GB|16 x 8GB - DDR4 2400MHz (2Rx8)
MOTHERBOARD: HP Z840|Intel C612 Chipset
GPU: Nvidia Quadro P2200
HDD: 4x 16TB Toshiba MG08ACA16TE Enterprise
SSD/NVME: Intel 512GB 670p NVMe (Main OS)
SSD/NVME 2: Samsung 1TB 980 NVMe (VM's)
SSD/NVME 3: 2x Seagate FireCuda 1TB SSD's (Apps)
Full Rig Info
Link to comment
Share on other sites

3 minutes ago, HeyItsChris said:

I wish I could, but gonna have to make due with what I have to work with, with minimal tools & minimal items.  Will let you know what happens, Monday night when I receive the screws.  It's taking a long time to get from Florida to Missouri.

 It is not a huge issue, you might just have to use more thermal contact material. You could use thermal paste for the core and thermal pads for the surrounding area. Or just use more than usual thermal paste for covering the entire area of the new shim.

  • Thanks 1

£3000

Owned

 Share

CPU: AMD Ryzen 9 7950X3D
MOTHERBOARD: MSI Meg Ace X670E
RAM: Corsair Dominator Titanium 64GB (6000MT/s)
GPU: EVGA 3090 FTW Ultra Gaming
SSD/NVME: Corsair MP700 Pro Gen 5 2TB
PSU: EVGA Supernova T2 1600Watt
CASE: be quiet Dark Base Pro 900 Rev 2
FANS: Noctua NF-A14 industrialPPC x 6
Full Rig Info

Owned

 Share

CPU: Intel Core i5 8500
RAM: 16GB (2x8GB) Kingston 2666Mhz
SSD/NVME: 256GB Samsung NVMe
NETWORK: HP 561T 10Gbe (Intel X540 T2)
MOTHERBOARD: Proprietry
GPU: Intel UHD Graphics 630
PSU: 90Watt
CASE: HP EliteDesk 800 G4 SFF
Full Rig Info

£3000

Owned

 Share

CPU: 2 x Xeon|E5-2696-V4 (44C/88T)
RAM: 128GB|16 x 8GB - DDR4 2400MHz (2Rx8)
MOTHERBOARD: HP Z840|Intel C612 Chipset
GPU: Nvidia Quadro P2200
HDD: 4x 16TB Toshiba MG08ACA16TE Enterprise
SSD/NVME: Intel 512GB 670p NVMe (Main OS)
SSD/NVME 2: Samsung 1TB 980 NVMe (VM's)
SSD/NVME 3: 2x Seagate FireCuda 1TB SSD's (Apps)
Full Rig Info
Link to comment
Share on other sites

8 minutes ago, ENTERPRISE said:

 It is not a huge issue, you might just have to use more thermal contact material. You could use thermal paste for the core and thermal pads for the surrounding area. Or just use more than usual thermal paste for covering the entire area of the new shim.

Thanks.  What do think of cutting out a hole in a piece of paper or cardboard & laying it down over the Ryzen APU as to further prevent metal to metal contact just in case?

Link to comment
Share on other sites

3 minutes ago, HeyItsChris said:

Thanks.  What do think of cutting out a hole in a piece of paper or cardboard & laying it down over the Ryzen APU as to further prevent metal to metal contact just in case?

Paper while unlikely to burn, is more prone to it. You are much better off getting liquid insulating tape. You essentially paint it on the parts of the motherboard you wish to protect LN2 overclockers use it all the time to protect against condensation damage.  


https://www.googleadservices.com/pagead/aclk?sa=L&ai=DChcSEwjo07GQ5I-EAxULmlAGHbxKANIYABALGgJkZw&ase=2&gclid=Cj0KCQiA5fetBhC9ARIsAP1UMgH0KHD7bNlXmXuTFoi3klPOHwdB3fqmcptPnlSnTthauvNO1U09ac0aAjMAEALw_wcB&sph=&ohost=www.google.com&cid=CAESVeD2WJUQ7FyUpyn5s7CF4dLdnYIWdoQDbsDLmwS68iLWITVZ41r05eSl3JZZuZ5N8R7AeLww20ZGFic1Jah0MZvXNqZAOO3521Hjn0F0tUAXwu-tqGQ&sig=AOD64_2l-vFz8-8tsEsRWjFQyfNk0ntpWQ&ctype=5&q=&nis=6&ved=2ahUKEwi1zqqQ5I-EAxUya0EAHVo_DeEQwg8oAHoECAUQEw&adurl=

  • Great Idea 1

£3000

Owned

 Share

CPU: AMD Ryzen 9 7950X3D
MOTHERBOARD: MSI Meg Ace X670E
RAM: Corsair Dominator Titanium 64GB (6000MT/s)
GPU: EVGA 3090 FTW Ultra Gaming
SSD/NVME: Corsair MP700 Pro Gen 5 2TB
PSU: EVGA Supernova T2 1600Watt
CASE: be quiet Dark Base Pro 900 Rev 2
FANS: Noctua NF-A14 industrialPPC x 6
Full Rig Info

Owned

 Share

CPU: Intel Core i5 8500
RAM: 16GB (2x8GB) Kingston 2666Mhz
SSD/NVME: 256GB Samsung NVMe
NETWORK: HP 561T 10Gbe (Intel X540 T2)
MOTHERBOARD: Proprietry
GPU: Intel UHD Graphics 630
PSU: 90Watt
CASE: HP EliteDesk 800 G4 SFF
Full Rig Info

£3000

Owned

 Share

CPU: 2 x Xeon|E5-2696-V4 (44C/88T)
RAM: 128GB|16 x 8GB - DDR4 2400MHz (2Rx8)
MOTHERBOARD: HP Z840|Intel C612 Chipset
GPU: Nvidia Quadro P2200
HDD: 4x 16TB Toshiba MG08ACA16TE Enterprise
SSD/NVME: Intel 512GB 670p NVMe (Main OS)
SSD/NVME 2: Samsung 1TB 980 NVMe (VM's)
SSD/NVME 3: 2x Seagate FireCuda 1TB SSD's (Apps)
Full Rig Info
Link to comment
Share on other sites

  • 3 weeks later...

Does anyone know what the total package dimensions are of the AMD Ryzen 5 3550H?  Not just the silicon, as it's 35mm x 25mm according to wikichip.  I think they are measuring the silicon only, not the whole package...


I could be wrong because Anandtech states this : AMD Picasso @ 19.21mm x 10.92mm for the silicon.  Is it possible the entire pacakage is 35mm x 25mm?  I guess so.  Sorry for posting if I answered my own question.  As I ordered a different copper sheet with dimensions 1/2" thick x 1" x 1" which is 12.7mm x 25.4mm x 25.4mm.


Ryzen 5 3550H - AMD - WikiChip

AMDRyzen53550HPackageDimensions.thumb.jpg.e2842005e64ada1e073c55020b798649.jpg

Edited by HeyItsChris
Link to comment
Share on other sites

  • 2 weeks later...

Here's the thermal results from the 1/2 inch thick x 1 inch x 1 inch copper block as it fit better.  It wasn't easy installing and the screws at M2 x 20mm are a little too long so they jet into the fan and cause it to stop so I have to loosen fan screws and let it hover over the screws protruding through.


hwinfo and cpuz score.png

Link to comment
Share on other sites

Create an account or sign in to comment

You need to be a member in order to leave a comment

Create an account

Sign up for a new account in our community. It's easy!

Register a new account

Sign in

Already have an account? Sign in here.

Sign In Now
×
×
  • Create New...

Important Information

This Website may place and access certain Cookies on your computer. ExtremeHW uses Cookies to improve your experience of using the Website and to improve our range of products and services. ExtremeHW has carefully chosen these Cookies and has taken steps to ensure that your privacy is protected and respected at all times. All Cookies used by this Website are used in accordance with current UK and EU Cookie Law. For more information please see our Privacy Policy